close

grace

HealthLifeStyle

Keto Diet Food Chart with Calories

the keto diet food charts

The ketogenic diet, commonly known as the keto diet, has skyrocketed in popularity over the past few years. It’s a low-carb, high-fat eating plan that promises impressive benefits like weight loss, better blood sugar control, and overall improved health.

Whether you’re just starting out or looking to fine-tune your approach, knowing which foods to include and understanding their caloric content is crucial.

We’ll dive into a detailed food chart and calorie information to help you navigate the keto diet with ease, ensuring you can plan your meals effectively and stay on track with your health goals. Let’s get started and make keto simple and enjoyable!

What is the Keto Diet?

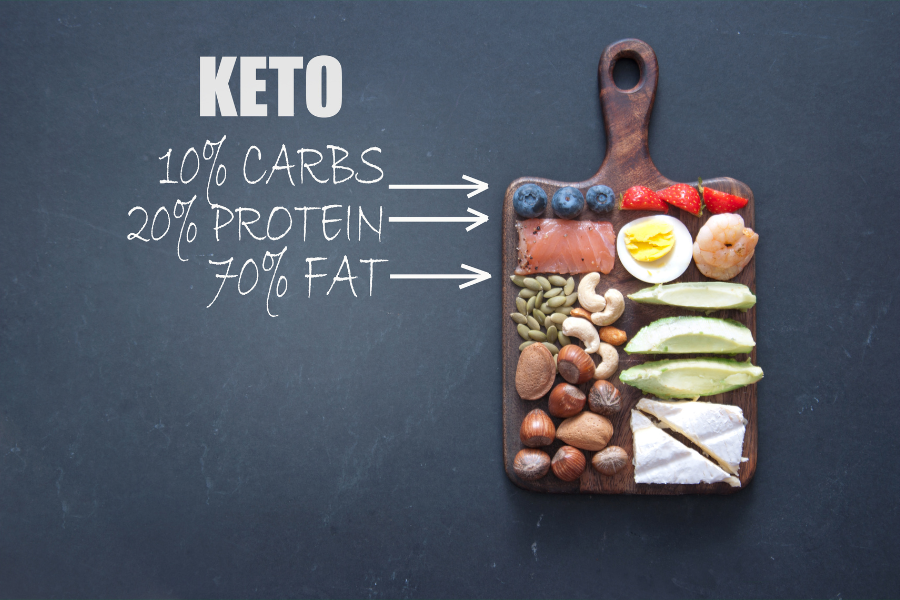
The keto diet focuses on reducing carbohydrate intake and increasing fat consumption to put your body into a metabolic state called ketosis. In ketosis, your body burns fat for fuel instead of carbohydrates. The typical macronutrient breakdown for a keto diet is:

  • 70-75% of calories from fat
  • 20-25% of calories from protein
  • 5-10% of calories from carbohydrates

Benefits of the Keto Diet

The keto diet offers several potential benefits, including:

  • Weight Loss: By reducing carb intake and relying on fats for energy, many people experience significant weight loss.
  • Improved Blood Sugar Control: The diet can help manage and stabilize blood sugar levels, which is beneficial for individuals with type 2 diabetes.
  • Enhanced Mental Clarity and Focus: Many people report improved cognitive function and mental clarity when in ketosis.
  • Increased Energy Levels: Once your body adapts to burning fat for fuel, you may experience more consistent energy levels throughout the day.

Keto Diet Food Chart with Calories
High-Fat Foods

Avocado

  • Calories: 234 per medium avocado
  • Benefits: Rich in healthy fats, fiber, and various vitamins and minerals, avocados are an excellent addition to a keto diet.

Olive Oil

  • Calories: 119 per tablespoon
  • Benefits: A staple in the Mediterranean diet, olive oil is packed with monounsaturated fats and antioxidants.

Cheese

  • Calories: 113 per ounce (cheddar)
  • Benefits: Cheese is high in fat and protein, making it a delicious and satisfying keto-friendly food.

Protein Sources

Eggs

  • Calories: 72 per large egg
  • Benefits: Eggs are a versatile and nutrient-dense protein source that is also rich in healthy fats.

Chicken Thighs

  • Calories: 209 per 3.5 ounces (cooked, with skin)
  • Benefits: Higher in fat than chicken breast, thighs are flavorful and fit well into a keto diet.

Salmon

  • Calories: 206 per 3.5 ounces (cooked)
  • Benefits: Salmon is rich in omega-3 fatty acids, which have numerous health benefits.

Low-Carb Vegetables

Spinach

  • Calories: 7 per cup (raw)
  • Benefits: Spinach is low in carbs and calories but high in vitamins and minerals.

Broccoli

  • Calories: 55 per cup (cooked)
  • Benefits: Broccoli is a nutrient powerhouse, offering fiber, vitamins, and minerals with very few carbs.

Cauliflower

  • Calories: 25 per cup (raw)
  • Benefits: Cauliflower is a versatile low-carb vegetable that can be used as a substitute for grains and legumes.

Nuts and Seeds

Almonds

  • Calories: 164 per ounce
  • Benefits: Almonds are high in healthy fats, protein, and fiber, making them an excellent keto snack.

Chia Seeds

  • Calories: 58 per tablespoon
  • Benefits: Chia seeds are packed with fiber, omega-3 fatty acids, and various nutrients.

Walnuts

  • Calories: 185 per ounce
  • Benefits: Walnuts are rich in healthy fats, including omega-3 fatty acids, and provide a good amount of protein.

Dairy Products

Greek Yogurt (Full Fat)

  • Calories: 190 per cup
  • Benefits: Full-fat Greek yogurt is higher in protein and fat, making it suitable for a keto diet.

Heavy Cream

  • Calories: 51 per tablespoon
  • Benefits: Heavy cream is rich in fat and can be used to add creaminess to various keto recipes.

Berries

Raspberries

  • Calories: 64 per cup
  • Benefits: Raspberries are low in carbs and high in fiber, making them one of the best fruits for a keto diet.

Blackberries

  • Calories: 62 per cup
  • Benefits: Like raspberries, blackberries are low in carbs and high in fiber.

Sample Keto Meal Plan

Breakfast

Scrambled Eggs with Avocado

  • Calories: 300
  • Ingredients: 2 eggs, 1/2 avocado, 1 tablespoon olive oil
  • Benefits: High in healthy fats and protein, this breakfast keeps you full and energized.

Lunch

Grilled Chicken Salad

  • Calories: 400
  • Ingredients: 4 ounces chicken thigh, 2 cups spinach, 1/4 cup sliced almonds, 2 tablespoons olive oil
  • Benefits: Packed with protein and healthy fats, this salad is both satisfying and nutritious.

Dinner

Salmon with Broccoli

  • Calories: 500
  • Ingredients: 6 ounces salmon, 1 cup broccoli, 1 tablespoon butter
  • Benefits: A well-balanced meal rich in omega-3 fatty acids, protein, and fiber.

Snack

Greek Yogurt with Berries

  • Calories: 150
  • Ingredients: 1/2 cup Greek yogurt, 1/4 cup raspberries
  • Benefits: This snack is low in carbs and high in protein and antioxidants.

Tips for Following a Keto Diet

  1. Plan Your Meals: Planning your meals ahead of time ensures you have keto-friendly options available and helps you avoid impulsive, non-keto choices.
  2. Stay Hydrated: Drinking plenty of water is essential on a keto diet, as it helps with digestion and can prevent the “keto flu.”
  3. Monitor Your Macros: Use a food tracking app to keep an eye on your macronutrient intake and ensure you stay within your desired range.
  4. Listen to Your Body: Pay attention to how your body responds to different foods and adjust your diet as needed to feel your best.
  5. Incorporate Variety: To prevent boredom and ensure you get a range of nutrients, include a variety of foods in your keto meal plan.

Common Mistakes to Avoid

  1. Not Eating Enough Fat: A keto diet requires a high intake of fats to keep you in ketosis. Skimping on fats can lead to hunger and reduced energy levels.
  2. Eating Too Many Carbs: Hidden carbs can sneak into your diet through processed foods and condiments. Always read labels carefully.
  3. Neglecting Vegetables: Some people avoid vegetables due to their carb content, but non-starchy vegetables are an important part of a balanced keto diet.
  4. Ignoring Electrolytes: The keto diet can lead to an initial loss of water and electrolytes. Make sure to consume enough sodium, potassium, and magnesium.

Who Should Follow the Keto Diet?

The keto diet can be beneficial for various individuals, but it’s not suitable for everyone. Here’s a look at who might benefit:

Beneficial For:

  1. Individuals Seeking Weight Loss: The keto diet can help reduce body fat and promote weight loss.
  2. People with Type 2 Diabetes: By stabilizing blood sugar levels, the keto diet can help manage type 2 diabetes.
  3. Those with Epilepsy: Originally developed to treat epilepsy, the keto diet can reduce the frequency of seizures in some individuals.
  4. Individuals with PCOS: The keto diet may help manage symptoms of polycystic ovary syndrome (PCOS).

Not Suitable For:

  1. People with Liver Disease: The high-fat content of the keto diet can put extra strain on the liver.
  2. Individuals with Pancreatic Disease: A high-fat diet may not be advisable for those with pancreatic issues.
  3. Pregnant or Breastfeeding Women: Nutritional needs are different during pregnancy and breastfeeding, and a restrictive diet like keto may not provide all necessary nutrients.

Final Thoughts

The keto diet can be a really effective tool for weight loss and overall health improvement when you stick to it properly. By understanding which foods to include and paying attention to their caloric content, you can make smart choices that help you stay on track with your keto journey.

Don’t forget to plan your meals, keep yourself hydrated, and keep an eye on your macronutrient intake to make sure you’re getting the right balance. While the keto diet has a lot of potential benefits, it’s crucial to figure out if it’s the right fit for your specific needs and health goals.

Always check in with a healthcare professional before making any major changes to your diet. With the right approach and a bit of planning, the keto diet can be a game-changer for your health and wellness journey.

read more
LifeStyle

How to Track Your Sleep & Improve Your Health

Sleep is super important for staying healthy and feeling good every day. When you get quality sleep, you wake up refreshed and ready to take on the day. Plus, good sleep is key for both your physical health and mental well-being.

Tracking your sleep can give you some great insights into how well you’re sleeping and where you might need to make some changes. In this article, we’ll dive into why sleep is so important, how you can track your sleep easily, and share some practical tips to help you get the best sleep possible.

Let’s get started on the journey to better sleep and better health!

The Importance of Sleep

Why Sleep Matters

Sleep is essential for various bodily functions, including:

  • Physical Health: Sleep helps repair and rejuvenate the body, supports growth and development, and boosts the immune system.
  • Mental Health: Adequate sleep is vital for cognitive functions such as memory, problem-solving, and concentration. It also plays a role in emotional regulation and mental resilience.
  • Performance and Productivity: Quality sleep improves focus, decision-making, and productivity. It also reduces the risk of accidents and errors.

Consequences of Poor Sleep

Lack of sleep or poor sleep quality can lead to several health issues, including:

  • Chronic Conditions: Poor sleep is linked to conditions like obesity, diabetes, cardiovascular disease, and hypertension.
  • Mental Health Disorders: Insufficient sleep can contribute to anxiety, depression, and mood disorders.
  • Impaired Cognitive Function: Sleep deprivation affects memory, attention, and learning abilities.

How to Track Your Sleep

how to track sleep

Using Wearable Devices

Wearable devices like smartwatches and fitness trackers are popular tools for monitoring sleep. These devices use sensors to detect movement, heart rate, and sometimes even blood oxygen levels to provide detailed sleep analysis.

  • Examples: Fitbit, Apple Watch, Garmin, and Samsung Galaxy Watch.
  • Features: Sleep duration, sleep stages (light, deep, REM), heart rate variability, and sleep quality scores.

Sleep Tracking Apps

Several apps can turn your smartphone into a sleep tracker. These apps typically use the phone’s accelerometer and microphone to monitor sleep patterns.

  • Examples: Sleep Cycle, Pillow, Sleep Score, and Calm.
  • Features: Sleep analysis, wake-up alarms, sleep sounds, and personalized tips.

Smart Mattresses and Sleep Accessories

Innovative sleep accessories like smart mattresses, pillows, and sleep monitors offer advanced sleep tracking capabilities.

  • Examples: Eight Sleep Pod, Sleep Number 360, and Withings Sleep Analyzer.
  • Features: Sleep tracking, temperature regulation, snore detection, and personalized sleep insights.

Manual Sleep Tracking

If you prefer a more traditional approach, you can manually track your sleep using a sleep diary. Record the following details each morning:

  • Bedtime and Wake-Up Time: Note the time you go to bed and the time you wake up.
  • Sleep Duration: Calculate the total hours of sleep.
  • Sleep Quality: Rate your sleep quality on a scale (e.g., 1-10).
  • Sleep Interruptions: Note any awakenings during the night and their duration.
  • Lifestyle Factors: Record factors that may influence sleep, such as caffeine intake, exercise, and stress levels.

Analyzing Sleep Data

Understanding Sleep Stages

Sleep is divided into several stages, each playing a unique role in overall health:

  • NREM (Non-Rapid Eye Movement) Sleep: Includes three stages (N1, N2, and N3). N3, also known as deep sleep, is crucial for physical restoration and growth.
  • REM (Rapid Eye Movement) Sleep: This stage is associated with dreaming and cognitive functions like memory consolidation and emotional processing.

Interpreting Sleep Metrics

Key metrics to monitor in your sleep data include:

  • Sleep Duration: The total amount of sleep you get each night. Adults typically need 7-9 hours.
  • Sleep Efficiency: The percentage of time spent asleep while in bed. A sleep efficiency of 85% or higher is considered good.
  • Sleep Latency: The time it takes to fall asleep. Ideally, this should be less than 20 minutes.
  • Sleep Stages: The proportion of time spent in each sleep stage. Healthy sleep includes adequate deep sleep and REM sleep.

Identifying Patterns and Trends

Regularly review your sleep data to identify patterns and trends. Look for:

  • Consistency: Aim for a consistent sleep schedule, going to bed and waking up at the same time each day.
  • Sleep Disruptions: Identify factors that may be causing interruptions, such as stress, noise, or light.
  • Lifestyle Correlations: Notice how lifestyle factors like diet, exercise, and screen time affect your sleep quality.

Tips to Improve Your Sleep Health

Establish a Bedtime Routine

Creating a calming bedtime routine can signal your body that it’s time to wind down and prepare for sleep.

  • Relaxing Activities: Engage in relaxing activities like reading, meditating, or taking a warm bath.
  • Limit Screen Time: Avoid screens (phones, tablets, TVs) at least an hour before bed as the blue light can interfere with melatonin production.

Optimize Your Sleep Environment

Your sleep environment plays a crucial role in sleep quality.

  • Comfortable Bed: Invest in a comfortable mattress and pillows that support your sleeping position.
  • Room Temperature: Keep your bedroom cool, ideally between 60-67°F (15-19°C).
  • Noise and Light: Use earplugs or white noise machines to block out noise and blackout curtains to keep the room dark.

Maintain a Consistent Sleep Schedule

Going to bed and waking up at the same time every day helps regulate your body’s internal clock.

  • Weekends: Try to maintain your sleep schedule even on weekends to avoid disrupting your routine.
  • Avoid Napping: Limit naps to 20-30 minutes and avoid napping late in the day.

Watch Your Diet

What you eat and drink can affect your sleep.

  • Avoid Heavy Meals: Refrain from eating large meals close to bedtime as they can cause discomfort.
  • Limit Caffeine and Alcohol: Both can interfere with sleep. Try to avoid caffeine in the afternoon and evening and limit alcohol consumption.

Exercise Regularly

Regular physical activity can improve sleep quality, but timing is essential.

  • Morning or Afternoon: Exercise earlier in the day is more beneficial. Vigorous exercise close to bedtime can be stimulating and make it harder to fall asleep.
  • Relaxing Exercises: Consider relaxing exercises like yoga or stretching in the evening.

Manage Stress and Anxiety

Stress and anxiety can significantly impact sleep quality.

  • Relaxation Techniques: Practice relaxation techniques such as deep breathing, progressive muscle relaxation, or meditation.
  • Journaling: Write down your thoughts and worries before bed to clear your mind.

Seek Professional Help if Needed

If you continue to experience sleep problems despite making these changes, consider seeking help from a healthcare professional.

  • Sleep Disorders: Conditions like sleep apnea, insomnia, and restless legs syndrome may require medical intervention.
  • Therapy: Cognitive-behavioral therapy for insomnia (CBT-I) can be effective in treating chronic sleep issues.

Final Thoughts

Tracking your sleep and making informed changes can significantly improve your sleep quality and overall health. By using modern technology like wearable devices, sleep tracking apps, and smart sleep accessories, you can gain valuable insights into your sleep patterns.

Combining these tools with practical tips like establishing a bedtime routine, optimizing your sleep environment, and managing stress can help you achieve better sleep and enhance your well-being.

Remember, quality sleep is not a luxury—it’s a necessity for a healthy and productive life. So, start tracking your sleep today and take the first step towards a healthier, more rested you.

read more
Social

How to Make Your X (Twitter) Account Attractive: A Complete Guide

With over 330 million active users, X (formerly known as Twitter) remains a powerful platform for personal branding, networking, and growing your business. However, the challenge lies in standing out in a sea of tweets. Whether you’re an influencer, entrepreneur, or brand, creating an attractive and engaging X account is essential.

In this guide, we’ll break down key strategies to transform your X account into a visually appealing, engaging, and impactful space.

Why Does an Attractive X Account Matter?

In just a few seconds, people decide whether to follow you or not. A well-organized and visually cohesive account:

  • Builds credibility and trust.
  • Increases follower engagement and interaction.
  • Enhances your brand visibility and identity.

Now, let’s explore the steps to creating a striking X account!

Step 1: Choose a Professional Profile Picture and Header Image

Your profile picture and header image are the first things people notice. These visuals are crucial for creating a strong first impression.

Profile Picture

Your profile picture should be clear and recognizable. If you’re a brand, use your logo. If you’re an individual, choose a high-quality headshot. Ensure the picture is consistent across all your social media profiles to create a cohesive online presence.

Header Image

The header image is a larger space where you can get more creative. Use this space to showcase your brand, highlight a project, or promote an upcoming event.

Header Image Ideas:

  • Show off your latest product or service.
  • Display an inspirational message or tagline.
  • Promote an event or campaign.
Tip: Keep your header visually aligned with your profile picture to ensure your page looks cohesive and professional.

Step 2: Write a Catchy and Informative Bio

Your bio is a short, 160-character description that tells people who you are and what your account is about. Make it concise but impactful.

What to Include in Your Bio:

  • Who you are or what you do.
  • What value you bring to your audience.
  • Relevant keywords for your industry or niche.
  • A call to action (CTA) like a link to your website or a project.

Example:

“Digital marketer sharing tips on social media growth & SEO. Helping brands shine online. 💡 Follow for daily insights! 🌐 www.mysite.com

Step 3: Pin an Important Tweet

One of the easiest ways to make your X account more attractive is by pinning a tweet. A pinned tweet stays at the top of your feed, so visitors will see it first.

What to Pin:

  • Your most engaging or popular tweet.
  • An announcement about a new product, service, or blog post.
  • A tweet that showcases your best work or content.
Tip: Change your pinned tweet periodically to keep your profile fresh and relevant.

Step 4: Post High-Quality Content Regularly

Consistency is key to keeping your followers engaged. But it’s not just about how often you tweet—it’s about the quality of the content you share.

What Qualifies as High-Quality Content?

High-quality content is relevant, engaging, and valuable to your audience. Focus on sharing content that aligns with your brand and resonates with your followers.

Ideas for Content:

  • Industry insights: Share trends, news, or valuable information in your niche.
  • Interactive content: Polls, questions, and threads that encourage discussion.
  • Visuals: Incorporate images, GIFs, or videos to make your tweets more engaging.
  • User-generated content: Share and retweet content from your followers or customers that relates to your brand.
Tip: Use a mix of text, visuals, and interactive content to keep your feed dynamic.

Step 5: Use Hashtags and Mentions Effectively

Hashtags and mentions can increase the visibility of your tweets. However, it’s important to use them strategically.

How to Use Hashtags:

  • Relevant hashtags: Use industry-specific or trending hashtags to reach a wider audience.
  • Limit your hashtags: Don’t go overboard—one to three hashtags per tweet is usually enough.

How to Use Mentions:

  • Engage with influencers or brands: Mention relevant accounts in your tweets to encourage interaction.
  • Thank your followers: Acknowledge those who engage with your content by mentioning them in replies or tweets.
Tip: Join trending conversations by using hashtags strategically, but make sure they align with your content.

Step 6: Engage with Your Audience

X is a fast-moving platform, so real-time engagement is crucial. Interacting with your followers not only boosts engagement but also builds relationships and trust.

Ways to Engage:

  • Reply to comments and questions: Show your followers that you value their input.
  • Retweet or like relevant tweets** from your followers or industry experts.
  • Participate in conversations: Jump into trending topics or discussions in your niche.
Tip: The more you engage, the more your followers will see you as approachable and responsive.

Step 7: Create Twitter Threads for In-Depth Content

If you want to share a lot of information, but don’t want to overwhelm your followers with long tweets, use Twitter threads. Threads allow you to connect multiple tweets and provide more detailed insights on a topic.

Why Use Threads?

  • They increase engagement by encouraging users to keep reading.
  • They’re great for sharing tutorials, guides, or step-by-step processes.
  • Threads often get more likes and retweets compared to single tweets.
Tip: Start with a strong opening tweet to hook your audience and encourage them to read the entire thread.

Step 8: Analyze and Optimize Your Performance

Lastly, use Twitter Analytics to track how well your tweets are performing. This will help you understand what content resonates with your audience and where you can improve.

Key Metrics to Monitor:

  • Engagement rate: The number of likes, retweets, and replies your tweets receive.
  • Impressions: How many people see your tweets.
  • Follower growth: Track how quickly your account is growing.
Tip: Adjust your content strategy based on which types of tweets are performing the best.

Final Thoughts

Making your X account attractive requires a combination of high-quality visuals, engaging content, and consistent interaction with your audience. By optimizing your bio, posting regularly, and using X’s features effectively, you can create a profile that not only looks great but also helps you build a loyal following. You can also check our topic on- How to Create an Ad on X (formerly Twitter): A Step-by-Step Guide

So, what are you waiting for? Start transforming your X account today and watch your followers grow!

read more
Social

Top 10 Platforms to Design Logos & Cover Photos

Platforms to Design a Logos

Creating professional logos and cover photos is essential for building a strong brand identity. Luckily, there are numerous design platforms that make this process easy, even for non-designers. Whether you need advanced design tools or simple, user-friendly platforms, these platforms can help you bring your vision to life.

Here are the top 10 platforms for designing logos and cover photos:

1. Canva

Canva is one of the most popular and user-friendly design platforms, ideal for both beginners and professionals. It offers thousands of customizable logo and cover photo templates for various industries. You can drag and drop elements, change fonts, colors, and shapes to create your design.

Key Features:

  • Ready-to-use templates for logos and cover photos
  • Easy-to-use drag-and-drop interface
  • Free and premium versions
  • Access to millions of stock photos, icons, and illustrations
Best For: Beginners and small business owners.

2. Adobe Illustrator

Adobe Illustrator is the gold standard in vector graphic design, widely used by professionals to create logos and cover photos. It offers advanced tools for creating scalable designs that look crisp on any platform.

Key Features:

  • Advanced vector editing tools
  • Perfect for creating highly customized, professional designs
  • Scalable designs without losing quality
  • Access to Adobe Fonts, colors, and design assets
Best For: Professional designers and advanced users.

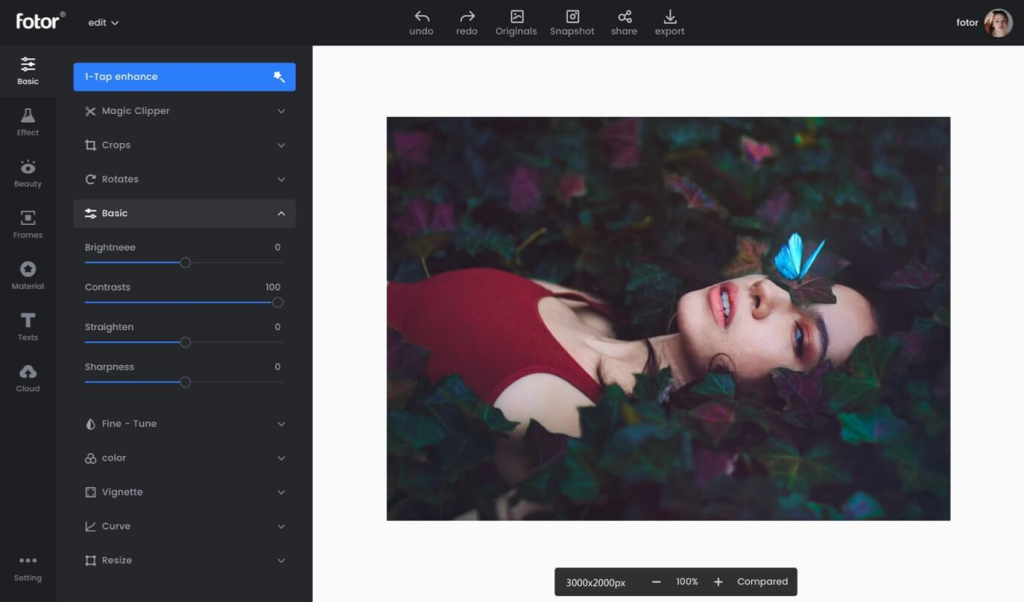
3. Fotor

Fotor is an online design platform known for its photo editing capabilities, but it also has a wide range of templates for logos and cover photos. With a simple interface, Fotor allows users to design beautiful logos and cover images without technical expertise.

Key Features:

  • Free templates for logos and cover photos
  • Easy-to-use editing tools for adding text, icons, and colors
  • Access to basic photo editing tools
  • Free and paid versions
Best For: Users looking for simple, quick designs.

4. Hatchful by Shopify

Hatchful is a free logo design tool offered by Shopify that caters to small businesses and entrepreneurs. It allows you to choose from a variety of logo templates and customize them based on your preferences.

Key Features:

  • Free to use with no prior design skills needed
  • Focused on creating logos for small businesses and startups
  • Customizable templates for various industries
  • High-quality download options
Best For: Small business owners and entrepreneurs.

5. Looka

Looka combines artificial intelligence and customization options to help users create professional logos. It’s easy to use, and the AI feature suggests logo designs based on your business name and industry. Once the logo is generated, you can tweak it according to your preferences.

Key Features:

  • AI-powered logo generator
  • Offers branding kits that include logos, social media assets, and website designs
  • High-quality downloads for web and print
  • Option to purchase various file formats, including vector
Best For: Entrepreneurs and small businesses needing fast logo design solutions.

6. Placeit

Placeit is a web-based design platform that offers a wide range of templates for logos and cover photos. What sets it apart is its mockup generator, which allows you to see your logo on various products, such as T-shirts, business cards, or social media profiles.

Key Features:

  • Thousands of logo and cover photo templates
  • Instant mockup generator for branding assets
  • Easy drag-and-drop functionality
  • Integration with various social media platforms
Best For: Entrepreneurs, marketers, and small businesses.

7. DesignEvo

DesignEvo is a dedicated logo design platform with over 10,000 customizable templates. It offers a vast library of icons, shapes, and fonts to help you create a professional logo without needing advanced design skills.

Key Features:

  • Over 10,000 logo templates to choose from
  • Easy customization options for fonts, icons, and colors
  • Free to use with affordable premium downloads
  • High-resolution logo downloads
Best For: Beginners who need a simple and fast logo solution.

8. Gravit Designer

Gravit Designer is a vector-based design tool similar to Adobe Illustrator but more user-friendly and web-based. It allows users to create logos and cover photos from scratch or using templates. It’s available as a free tool with paid options for more advanced features.

Key Features:

  • Powerful vector editing tools
  • Easy-to-use interface for both beginners and professionals
  • Free version with essential features
  • Export designs in various formats, including SVG, PDF, and PNG
Best For: Designers looking for a free alternative to Adobe Illustrator.

9. VistaCreate (Formerly Crello)

VistaCreate is a design platform that offers a wide variety of templates for logos, cover photos, social media posts, and more. It’s similar to Canva in its drag-and-drop functionality but with a different selection of templates and assets.

Key Features:

  • Thousands of design templates for logos, cover photos, and more
  • Animated design options for social media
  • Free and paid versions available
  • Easy to use with a wide range of customization options
Best For: Entrepreneurs and social media marketers.

10. LogoMakr

LogoMakr is a simple and fast tool for designing logos online. It allows you to search for icons, customize them with text, and download your design. It’s a no-frills platform that’s perfect for those who need a quick and basic logo.

Key Features:

  • Free to use with a simple interface
  • Access to thousands of icons
  • Easy-to-use editor for quick logo creation
  • High-resolution downloads available for a fee
Best For: Users looking for a quick and basic logo solution.

Final Thoughts

Whether you’re looking to create a simple logo or a professional cover photo, there’s a design platform to suit your needs. Platforms like Canva and Fotor are perfect for beginners and quick designs, while tools like Adobe Illustrator and Gravit Designer are ideal for professional-level creations. Explore these platforms, and choose the one that best aligns with your skill level, needs, and budget to start designing logos and cover photos that truly reflect your brand’s identity.

read more
Social

How to Make Landing Pages to Run Ads: A Complete Guide

Make Landing Pages to Run Ads: A Complete Guide

Creating a highly effective landing page is essential to running successful ads. A landing page is where users land after clicking on an ad, and it serves as the bridge between your ad and your conversion goal (sales, sign-ups, etc.). A well-designed landing page can significantly boost your conversion rates and help you get the most out of your ad campaigns.

In this guide, we’ll cover everything you need to know about making an effective landing page to run ads on platforms like Facebook, Google, Instagram, and others.

What Is a Landing Page?

A landing page is a standalone web page designed to capture leads or drive sales through a focused call-to-action (CTA). Unlike a regular webpage, it’s created with a specific goal in mind — such as collecting emails, encouraging purchases, or registering users for an event — and is often tied directly to an ad campaign.

Why Are Landing Pages Important for Ads?

Landing pages are crucial because they:

  • Drive Conversions: A well-optimized landing page can increase the likelihood that visitors will complete the desired action.
  • Provide a Seamless Experience: Landing pages offer a focused message that aligns with the ad, making the transition smoother for visitors.
  • Improve Ad Quality Scores: Especially on platforms like Google Ads, landing pages are factored into your Quality Score, which can reduce costs and improve your ad’s placement.
  • Trackable Metrics: You can track how visitors interact with your landing page to improve future campaigns and refine your ads.

Step-by-Step: How to Create a Landing Page to Run Ads

1. Define the Goal of Your Landing Page

The first step in creating a landing page is to define your primary objective. Ask yourself, What action do I want visitors to take?

Some common goals for landing pages include:

  • Collecting Email Addresses: For newsletter sign-ups or lead generation.
  • Driving Sales: Encouraging visitors to purchase a product or service.
  • Offering a Free Resource: Such as an ebook, webinar, or free trial, in exchange for contact details.
  • Event Registration: Getting visitors to sign up for a webinar, event, or seminar.

By having a clear goal, you’ll be able to craft your landing page around this objective, ensuring that every element of the page works toward achieving it.

2. Create a Simple, Clean Layout

Simplicity is key to an effective landing page. You don’t want to overwhelm visitors with too much information, as it can distract from the main goal.

Best Practices for Landing Page Layout:

  • Minimal Distractions: Remove unnecessary navigation menus, links, or content that could take users away from the page.
  • Above-the-Fold CTA: Place the most important content (headline, CTA) above the fold so that visitors don’t have to scroll to see it.
  • Whitespace: Use whitespace to make the page look clean and guide the user’s attention to key elements like the CTA.
  • Mobile-Responsive Design: Ensure your landing page works smoothly on both desktop and mobile devices.

3. Craft a Compelling Headline

Your headline is the first thing visitors will see, and it needs to grab their attention immediately. It should communicate the value of your offer in a concise and compelling way.

Tips for Writing Effective Headlines:

  • Be Clear and Specific: Avoid being vague. Let users know exactly what they’ll get.
  • Highlight a Benefit: Focus on what the user gains by completing the action (e.g., “Boost Your Sales with Our Free Guide”).
  • Use Action Words: Encourage action with strong verbs like “Get,” “Discover,” “Start,” or “Claim.”

4. Write Engaging Copy

Once the headline has caught your visitors’ attention, the rest of your page’s copy should persuade them to take the desired action. Every word on your landing page should support the goal.

Tips for Writing Landing Page Copy:

  • Keep it Short and Focused: Avoid long paragraphs. Break up your copy into short, digestible sections.
  • Highlight Benefits Over Features: Focus on how your product or service will solve the user’s problem or improve their life.
  • Use Bullet Points: Bullet points make it easy to highlight key features and benefits at a glance.
  • Social Proof: Include testimonials, reviews, or case studies to build credibility and trust.
  • Clear Call-to-Action: Your CTA should stand out and clearly communicate what action users should take next.

5. Design an Irresistible Call-to-Action (CTA)

The CTA is the most critical element on your landing page. It should stand out and motivate users to take the desired action, such as “Buy Now,” “Get Started,” or “Sign Up.”

Tips for Creating a Strong CTA:

  • Be Direct: Use clear and action-oriented language. Avoid vague phrases like “Submit.”
  • Make it Visually Stand Out: Use a contrasting button color that draws attention.
  • Create a Sense of Urgency: Phrases like “Limited Time Offer” or “Only 5 Spots Left” encourage users to act quickly.
  • Positioning: Place your CTA in multiple locations on the page — at least one above the fold and another at the bottom.

6. Use High-Quality Visuals

The right visuals can make your landing page more engaging and appealing. Avoid stock images that feel generic, and opt for visuals that complement your message.

Visual Elements to Consider:

  • Hero Image or Video: A high-quality image or video at the top of the page can visually communicate the benefits of your product or service.
  • Infographics: If you’re explaining a process or complex idea, an infographic can simplify the information.
  • Product Images: If you’re selling a product, showcase it with clear, professional photos.
  • Trust Badges and Logos: Add logos of recognized brands or security badges to build trust with your audience.

7. Include Social Proof

Adding social proof — like testimonials, customer reviews, or user-generated content — is an excellent way to build credibility and trust. It shows potential customers that others have benefited from your offer.

Examples of Social Proof:

  • Customer Testimonials: Use real quotes from satisfied customers, ideally with names and photos for authenticity.
  • Case Studies: Share success stories that highlight measurable results.
  • User Reviews: Include user ratings, especially if you’re selling products.

8. Optimize for SEO and Speed

While most landing pages are promoted via ads, it’s still important to consider SEO and page load speed. Faster-loading pages improve user experience and prevent visitors from bouncing.

SEO Best Practices:

  • Relevant Keywords: Use keywords that relate to your product or offer in the headline, copy, and meta descriptions.
  • Title Tag and Meta Description: Write a compelling title and meta description to encourage clicks from search engines (if you’re targeting organic traffic).
  • Alt Text: Add alt text to images to make them more accessible and SEO-friendly.

Speed Optimization Tips:

  • Compress Images: Use image compression tools to reduce file sizes without losing quality.
  • Minimize Plugins: If using WordPress or other platforms, keep plugins to a minimum to ensure fast load times.
  • Use a Reliable Hosting Provider: Ensure your hosting provider delivers fast server response times, especially if you expect heavy traffic from ads.

9. Set Up Tracking and Analytics

Once your landing page is live, it’s crucial to track its performance. Setting up tracking ensures that you know which ads are driving the most conversions and what needs to be optimized.

Tools to Use:

  • Google Analytics: Set up goals to track conversions, bounce rates, and user behavior.
  • Facebook Pixel: For Facebook ads, install the Facebook Pixel on your landing page to track ad performance and optimize your campaigns.
  • Heatmaps: Tools like Hotjar or Crazy Egg allow you to see how users are interacting with your page.

10. A/B Test and Optimize

No landing page is perfect right out of the gate. A/B testing (or split testing) allows you to compare two versions of a landing page to see which one performs better.

Elements to A/B Test:

  • Headline: Try testing different headlines to see which one resonates most with visitors.
  • CTA: Test different CTA button text or colors.
  • Form Length: If your goal is lead generation, try different form lengths to see if shorter or longer forms convert better.
  • Visuals: Experiment with different images or videos to see which engages visitors more.

Final Thoughts

Creating a successful landing page for running ads requires thoughtful planning, design, and optimization. By focusing on a clear goal, writing persuasive copy, and incorporating strong visuals and social proof, you can create a landing page that not only complements your ads but also drives conversions. Don’t forget to continuously track, A/B test, and refine your page for the best results. You can also check our topic on – How To Create a Facebook Ad Account & Run Ads: Step-by-Step Guide

By following these steps, you’ll be well on your way to building landing pages that not only look great but also help you achieve your advertising goals.

read more
Social

How To Create a Facebook Ad Account & Run Ads: Step-by-Step Guide

Create Facebook Ad Account

Running Facebook ads is one of the most effective ways to reach your target audience, grow your business, and increase brand awareness. With over 2.9 billion users, Facebook Ads provides businesses and individuals with powerful targeting tools to create highly engaging campaigns.

In this guide, we will walk you through the process of creating a Facebook Ad Account and launching successful ad campaigns.

1. Why Use Facebook Ads?

Before diving into the setup, let’s talk about why Facebook Ads are so valuable:

  • Massive Reach: Facebook has billions of active users, making it a prime platform to reach diverse audiences.
  • Advanced Targeting: Facebook Ads lets you target users based on demographics, interests, behavior, and more.
  • Cost-Effective: You can set flexible budgets, from small daily spending to larger investments.
  • Measurable Results: Facebook’s analytics give detailed insights into ad performance, helping you optimize for better results.

2. Setting Up Your Facebook Business Manager

Before you can start running ads, you’ll need to create a Facebook Business Manager account. This tool helps manage your pages, ad accounts, and marketing efforts.

How to Create a Facebook Business Manager Account:

  1. Visit Business Manager: Go to business.facebook.com.
  2. Click ‘Create Account’: Enter your business name, your name, and the business email address you want to use.
  3. Enter Details: Complete your profile with your business information, such as your address, phone number, and website.

Once the Business Manager is set up, you’ll have access to tools to create and manage ads, pages, and people working on your account.

3. Setting Up Your Facebook Ad Account

To run ads, you’ll need a dedicated ad account. This is where you’ll manage your ad campaigns, billing, and reports.

How to Create a Facebook Ad Account:

  1. In Business Manager, go to “Business Settings.”
  2. Click on ‘Ad Accounts’: Under the “Accounts” section on the left side.
  3. Add Ad Account: Choose “Create a New Ad Account.”
  4. Enter Account Details: Select the account name, time zone, and currency. Be mindful of selecting the correct time zone and currency, as this affects your billing and reporting.
  5. Add People: Assign roles to team members or yourself, giving access to manage campaigns.

Now that your ad account is created, you’re ready to run ads!

4. Setting Up Payment Information

Before you can publish ads, you need to set up your payment method for billing.

To Add Payment Details:

  1. Go to Payment Settings in Business Manager.
  2. Click ‘Add Payment Method’: You can choose between credit/debit card, PayPal, or direct debit options.
  3. Confirm Payment Details: Make sure all the information is accurate.

Facebook will charge you based on your ad delivery and spending.

5. Creating Your First Campaign

Now it’s time to start running ads! Facebook Ads Manager is the tool where you’ll create and manage your campaigns.

Campaign Structure

Before diving in, understand the Facebook Ad campaign structure:

  • Campaign: The top level, where you choose your advertising objective (e.g., traffic, engagement, conversions).
  • Ad Set: The middle level, where you define your audience, budget, schedule, and placement.
  • Ad: The bottom level, where you create the actual ad with images, videos, and text.

Step-by-Step: Creating Your Campaign

1. Go to Ads Manager

  • In Business Manager, go to Ads Manager by clicking on “Create” to start a new campaign.

2. Choose Your Objective

Facebook Ads has different campaign objectives depending on what you want to achieve. Here are some common objectives:

  • Awareness: To increase brand visibility.
  • Traffic: To drive users to your website or app.
  • Engagement: To get more likes, shares, or comments.
  • Conversions: To drive purchases or actions on your site.

3. Name Your Campaign

Give your campaign a name that makes it easy to identify, especially if you plan to run multiple campaigns.

6. Setting Up Your Ad Set

In the Ad Set level, you’ll define important settings like audience targeting, budget, and placement.

Audience Targeting

Facebook’s detailed targeting lets you zero in on your ideal customer based on:

  • Location: Target specific countries, states, cities, or even postal codes.
  • Age & Gender: Choose the age range and gender of your ideal audience.
  • Interests: Target users who are interested in specific topics relevant to your business.
  • Behavior: Target based on user behavior, like purchase history or device usage.

You can also use Custom Audiences to target people who have already interacted with your business (e.g., your website visitors or email list) or create Lookalike Audiences to find new users similar to your existing customers.

Budget and Schedule

You can set either a Daily Budget or a Lifetime Budget.

  • Daily Budget: The maximum amount you’re willing to spend per day.
  • Lifetime Budget: The total amount to spend throughout your campaign.

For scheduling, you can:

  • Run Continuously: Let the ad run until you manually stop it.
  • Set Start and End Dates: If you want to run ads for a limited period (e.g., for a sale or event), specify the start and end dates.

Ad Placement

Facebook offers two types of ad placements:

  • Automatic Placements: Facebook will choose where your ad performs best across its network (Facebook, Instagram, Audience Network, Messenger).
  • Manual Placements: You can specify where your ad will appear, such as in the Facebook News Feed, Instagram Feed, Stories, or Messenger.

7. Designing Your Ad

Now, let’s focus on the actual ad creation. Facebook Ads supports multiple formats depending on the campaign objective:

  • Single Image: A single, compelling image.
  • Video Ad: Use videos to engage users or showcase your product.
  • Carousel Ad: Show multiple images or videos in one ad.
  • Slideshow: A looping series of images.
  • Collection Ads: For e-commerce, it’s great to display a variety of products.

Best Practices for Designing Ads:

  • High-Quality Visuals: Whether it’s an image or video, ensure it’s high-resolution and eye-catching.
  • Short and Clear Copy: Write a concise headline and compelling description explaining your offer’s value.
  • Call-to-Action (CTA): Use strong CTAs like “Shop Now,” “Learn More,” or “Sign Up.”
  • Test Variations: Try different versions of the same ad to see which performs best (e.g., different headlines, and visuals).

8. Reviewing and Publishing Your Ad

Review everything carefully once you’ve set your targeting, budget, and ad design.

Checklist Before Launch:

  • Audience: Double-check you’ve selected the right audience.
  • Budget: Ensure your daily or lifetime budget fits your goals.
  • Ad Preview: Look at how your ad appears on different devices (desktop, mobile, etc.).

When everything looks good, click Publish to go live with your ad!

9. Monitoring and Optimizing Your Campaign

Your work doesn’t end once your ad is live. Monitoring performance is critical to ensuring your campaign is successful.

Use Facebook Ads Manager to Track:

  • Clicks: Number of clicks on your ad.
  • Impressions: How many times your ad was shown?
  • Engagement: Likes, comments, shares, and reactions.
  • Conversions: Purchases or actions taken on your website.

Optimizing Ads:

  • Adjust Your Budget: If you’re seeing good results, consider increasing your budget. If performance is poor, reduce it or stop the ad.
  • A/B Testing: Create multiple versions of the same ad with small changes (e.g., different images or CTAs) to see which performs better.
  • Refine Targeting: If your audience isn’t engaging with your ad, try tweaking your targeting criteria.

Final Thoughts

Creating a Facebook Ad Account and running ads may seem complicated at first, but following these steps gives you a clear path to launching successful campaigns. By defining your objectives, targeting the right audience, designing compelling ads, and monitoring performance, you can effectively use Facebook Ads to grow your brand and reach your marketing goals. If you liked the above topic then you can also check our topic on How to Make Landing Pages to Run Ads: A Complete Guide

read more
General

How to Design a Logo Professionally: A Complete Guide

How Design a Logo Professionally

A logo is much more than just a visual mark; it represents your brand, embodies your company’s values, and is often the first thing people associate with your business. Designing a professional logo requires creativity, thoughtful planning, and a deep understanding of the brand it represents.

Whether you’re a business owner looking to create your own logo or a designer working for clients, this guide will walk you through the essential steps to create a professional, memorable logo.

Why is a Professional Logo Important?

A well-designed logo:

  • Establishes Brand Identity: It visually communicates your business values, mission, and industry.
  • Increases Brand Recognition: A unique and consistent logo helps customers remember your brand.
  • Builds Trust and Credibility: A professional logo gives your business a polished and trustworthy appearance.
  • Creates Emotional Connections: People often form emotional bonds with brands through their visual identities.

Step-by-Step Guide to Designing a Professional Logo

1. Understand the Brand

Before jumping into the design process, it’s crucial to fully understand the brand you’re designing for. A professional logo should reflect the essence of the business.

Key Questions to Ask:

  • What is the brand’s mission and core values?
  • Who is the target audience?
  • What is the industry or niche?
  • What are the unique selling points (USPs) of the brand?
  • What tone and personality does the brand want to convey (e.g., modern, classic, playful, serious)?

The answers to these questions will guide your design choices, including colors, fonts, and imagery.

2. Research the Industry and Competitors

It’s essential to know what logos are trending in the industry and how competitors are positioning themselves visually. This research will help you:

  • Avoid clichés: Stay away from overused concepts, like lightbulbs for tech companies or leaves for eco-friendly brands.
  • Find gaps: Identify what makes your brand stand out and how you can differentiate it visually from competitors.
  • Get inspired: Look at the logo designs of successful companies in the same industry to understand what works and why.

3. Choose a Logo Type

There are several types of logos, and the type you choose will depend on the brand’s identity and design preferences.

Common Logo Types:

  • Wordmark (Text-Based): A logo that consists entirely of the brand’s name in a distinct, stylized typeface (e.g., Coca-Cola, Google).
  • Lettermark (Initials): A logo that uses the initials of the company (e.g., IBM, HBO).
  • Icon/Symbol (Graphic): A simple, abstract graphic that represents the brand (e.g., Apple’s apple, Nike’s swoosh).
  • Combination Mark: A combination of text and a symbol (e.g., Adidas, Burger King).
  • Emblem: A logo that has text inside a symbol or shape (e.g., Starbucks, Harley-Davidson).

Choose a logo type that suits the brand and the message it wants to communicate. For example, a law firm may prefer a clean, text-based logo to communicate professionalism, while a startup may go for a more playful icon.

4. Pick the Right Colors

Colors are an integral part of logo design because they evoke emotions and convey meaning. The colors you choose should align with the brand’s personality and the message you want to convey.

Color Psychology in Logos:

  • Red: Passion, energy, urgency (often used by brands like Coca-Cola and Target).
  • Blue: Trust, stability, professionalism (used by companies like IBM, Dell, and Facebook).
  • Green: Nature, growth, health (popular in eco-friendly and health-related industries, like Whole Foods).
  • Yellow: Optimism, happiness, warmth (used by brands like McDonald’s and Snapchat).
  • Black: Elegance, sophistication, luxury (commonly used in fashion and luxury brands like Chanel).
  • Purple: Creativity, royalty, wisdom (used by brands like Cadbury and Hallmark).
  • White/Neutral: Simplicity, cleanliness, modernity (popular in tech and minimalist brands).

5. Select the Right Typography

Typography plays a significant role in creating a professional logo. The font you choose must reflect the brand’s tone and personality.

Types of Fonts:

  • Serif Fonts: Classic, elegant, and traditional (often used by luxury brands like Vogue and Times New Roman).
  • Sans-Serif Fonts: Modern, clean, and simple (used by tech companies like Google and Microsoft).
  • Script Fonts: Cursive, flowy, and elegant (used for brands that want a more personalized, creative touch, like Coca-Cola).
  • Display Fonts: Decorative, unique, and often used in logos that need to make a bold statement (used by brands like Fanta).

It’s important to ensure that the typography is legible across all sizes. Consider how the font will look in different contexts, such as business cards, websites, and social media.

6. Keep It Simple and Versatile

One of the key principles of professional logo design is simplicity. A logo should be easily recognizable and memorable. Avoid overly complex designs that can be hard to reproduce and may lose impact when scaled down.

Tips for Simplicity:

  • Focus on one concept: A logo should communicate a single, clear idea.
  • Avoid too many colors: Stick to a color palette of two or three colors.
  • Limit font usage: Stick to one or two fonts to maintain clarity and consistency.

Versatility is also crucial. Your logo should work across various platforms and sizes, whether it’s printed on a business card or displayed on a billboard. Make sure your logo looks good in both color and black-and-white.

7. Create Several Sketches or Mockups

Now that you have a clear idea of the brand identity, color scheme, typography, and logo type, it’s time to start sketching ideas. You can do this on paper or digitally, but it’s essential to create multiple versions to explore different concepts.

Tips for Sketching:

  • Try different shapes and layouts: Experiment with circular, rectangular, or abstract shapes.
  • Play with fonts: Try various font weights, styles, and combinations.
  • Simplify as you go: Start with complex designs and gradually strip them down to the most essential elements.

The goal here is to explore as many ideas as possible before narrowing down to a few that stand out.

8. Use Design Software to Create the Logo Digitally

Once you have a few sketches, it’s time to bring your logo to life using design software. Adobe Illustrator is the industry standard for vector-based logo design, but there are also free alternatives like Canva or Inkscape.

Popular Design Software:

  • Adobe Illustrator: Offers advanced vector tools, making it perfect for creating scalable logos.
  • CorelDRAW: A professional vector graphics tool with a range of features.
  • Canva: A user-friendly design platform for non-designers, offering customizable logo templates.
  • Inkscape: A free, open-source vector design tool for creating logos and other graphics.

Make sure to create a vector version of your logo so it can be scaled to any size without losing quality. A vector file is essential for professional printing and digital use.

9. Get Feedback and Make Adjustments

Once your digital logo is ready, share it with colleagues, friends, or potential customers to gather feedback. Getting an outside perspective can help you identify any elements that may need refining.

Ask for Feedback On:

  • First impressions: What’s the initial reaction to the logo? Does it align with the brand identity?
  • Legibility: Is the text easy to read, even at smaller sizes?
  • Versatility: Does the logo work in both color and black-and-white? Does it look good on various platforms, from websites to printed materials?

Make adjustments based on the feedback, but stay true to the brand’s core identity.

10. Finalize and Export Your Logo Files

Once you’re happy with the final version of the logo, export it in different formats to ensure it’s ready for various uses.

Common File Formats:

  • .AI: Adobe Illustrator file, essential for future edits and scalability.
  • .EPS: A vector file that’s great for high-resolution printing.
  • .PNG: For web use with a transparent background.
  • .JPG: A compressed image file for web and social media use.
  • .SVG: A scalable vector file ideal for web design.

Export your logo in different sizes and formats to ensure it looks professional across all mediums.

Final Thoughts

Designing a professional logo requires a combination of creativity, strategic thinking, and a deep understanding of the brand. By following these steps — from researching the brand to sketching, refining, and finalizing the logo — you can create a timeless logo that not only represents the brand but also builds recognition and trust.

A successful logo is simple, versatile, and memorable, and it should effectively communicate the essence of the brand in a way that resonates with the target audience.

read more
General

How to Create an Ad on X (formerly Twitter): A Step-by-Step Guide

How Create an Ad on X

Advertising on X (formerly Twitter) offers a powerful way to engage with your audience, boost brand visibility, and drive conversions. With over 330 million active users, X’s platform allows advertisers to reach their target audiences through highly targeted ads in the form of promoted tweets, trends, or accounts.

In this guide, we’ll walk you through how to create ads on X, from setting up an account to launching a campaign and tracking results.

Why Advertise on X?

Before we dive into the details, it’s important to understand why advertising on X is valuable:

  • Targeted Reach: You can target users based on interests, demographics, keywords, and even their interactions with your account.
  • Real-Time Engagement: X is a fast-paced platform, allowing you to engage with users in real-time, during events, or trending conversations.
  • Multiple Ad Formats: X offers a variety of ad formats, from Promoted Tweets to Promoted Trends, which can help you achieve various marketing goals.
  • Cost-Effective: You can set a budget and bid for your ads, giving you control over your ad spend.

Types of Ads on X:

  1. Promoted Tweets: These look like regular tweets but are marked as “Promoted” and can be targeted to specific users.
  2. Promoted Accounts: This ad type helps you grow your follower base by promoting your account to users who don’t follow you but might find your content interesting.
  3. Promoted Trends: These ads promote a hashtag or trend and appear at the top of the trending list.

Step-by-Step: How to Create an Ad on X

1. Set Up Your X Ads Account

Before you can start running ads, you need to create an X Ads account if you don’t have one yet.

How to Create an X Ads Account:

  1. Go to X Ads: Visit the X Ads page at ads.twitter.com.
  2. Log In: Sign in using the X account you want to use for your ads.
  3. Select Your Country and Time Zone: Choose the correct country and time zone because this will affect billing and scheduling.
  4. Agree to Terms: Accept X’s Ads Terms of Service to proceed.

Once your X Ads account is set up, you’ll be directed to the Ads Manager dashboard.

2. Choose Your Campaign Objective

After setting up your account, the first step to creating an ad is to choose your campaign objective. This will determine how X optimizes your ads for results.

Common Campaign Objectives:

  • Awareness: To reach as many people as possible (ideal for brand recognition).
  • Tweet Engagements: To get users to like, retweet, comment, or interact with your tweet.
  • Followers: To grow your follower count.
  • Website Clicks/Conversions: To drive traffic to your website or encourage specific actions, like purchases or sign-ups.
  • App Installs: To promote your app and encourage downloads.
  • App Re-engagements: To get users to return to and use your app.

Choose the objective that aligns with your campaign goals, and X will automatically optimize your ads to achieve that goal.

3. Set Up Your Campaign Budget and Schedule

Next, you’ll need to define your budget and schedule.

Budget Options:

  • Daily Budget: The maximum amount you want to spend per day.
  • Total Budget: The total amount you’re willing to spend for the entire campaign duration.

Scheduling Options:

  • Run Continuously: Your ad will run until you pause it or your budget is exhausted.
  • Start and End Dates: You can choose a specific time frame for your ad to run (perfect for time-sensitive campaigns like promotions or events).

Make sure your budget aligns with your goals. For example, if you’re running an awareness campaign, you may want a larger daily budget to reach a wider audience quickly.

4. Define Your Target Audience

X offers powerful targeting tools, allowing you to reach the right audience based on specific criteria.

Targeting Options:

  • Demographics: You can target users based on their age, gender, language, and location.
  • Interests: Target users based on the topics they follow, such as technology, sports, or entertainment.
  • Keywords: You can target users based on specific keywords they’ve used in their tweets or searched for. For example, if you’re selling running shoes, you could target users tweeting about “running” or “fitness.”
  • Followers: Target users who follow specific accounts that are similar to your brand or industry.
  • Behavior: Target users based on their behaviors, such as purchase patterns or device usage.
  • Tailored Audiences: You can upload your email lists or target visitors from your website using tracking pixels (similar to Facebook’s Custom Audiences).

The more detailed your targeting, the more relevant your ads will be to users, which can improve your ad performance and reduce costs.

5. Choose Your Ad Format

There are several ad formats you can choose from on X, depending on your campaign objectives.

Promoted Tweets:

  • Single Image or Video: Choose a single image or video to promote in a tweet, accompanied by a caption, hashtag, and call-to-action.
  • Carousel Ads: Create a series of images or videos that users can scroll through in one tweet.
  • Text Ads: Promote a tweet with just text, which can be effective for generating discussion or engagement.

Promoted Accounts:

  • Grow Followers: Promote your account directly by encouraging users to follow you. Your profile will appear in the “Who to Follow” section and in users’ timelines.

Promoted Trends:

  • Trending Hashtags: You can promote a hashtag that appears at the top of the trending list. This format works best for large campaigns, product launches, or events.

6. Create Your Ad Content

Now comes the creative part! Crafting the right ad content is crucial to grabbing users’ attention and achieving your campaign goals.

Best Practices for Writing Engaging Ads:

  • Clear and Concise: X limits characters to 280, so make every word count. Get to the point quickly and clearly.
  • Strong Visuals: Images and videos are far more engaging than text alone. Use high-quality visuals that align with your message.
  • Call-to-Action (CTA): Include a compelling CTA, like “Shop Now,” “Download Today,” or “Learn More.”
  • Use Hashtags: Hashtags can increase the visibility of your tweet, especially if they’re trending or relevant to your audience.

Example of an Effective Promoted Tweet:

  • Text: “Looking to boost your fitness routine? Check out our range of running shoes with 20% off this week! #FitnessGoals #Running”
  • Image: A high-quality image of the product with clear branding.
  • CTA: “Shop Now” button leading to your website.

7. Review and Launch Your Campaign

Before launching your ad, review all the details of your campaign, including:

  • Target audience
  • Budget and schedule
  • Ad content (make sure there are no typos!)
  • Placement options

Once you’re satisfied, hit Launch to set your campaign live. X will start showing your ads to your selected audience.

8. Monitor and Optimize Your Campaign

Your work doesn’t stop once the campaign is live. It’s essential to track performance and make adjustments to maximize your return on investment (ROI).

Key Metrics to Track:

  • Engagement Rate: The number of likes, retweets, replies, and clicks your ad received.
  • Click-Through Rate (CTR): How many users clicked on your link compared to the number of impressions.
  • Conversions: The number of users who completed the desired action, like making a purchase or signing up for a newsletter.
  • Cost per Result: How much you’re spending to achieve your goal (e.g., cost per click or cost per follower).

How to Optimize:

  • Adjust Your Targeting: If you’re not getting enough engagement, try refining your audience.
  • Change Your Ad Content: Test different copy or images to see what resonates more with your audience.
  • Adjust Your Budget: If a campaign is performing well, consider increasing the budget to reach more users. If not, reduce or pause it and analyze what’s not working.

Final Thoughts

Creating and running ads on X is an excellent way to engage with a vast audience and grow your brand. By carefully defining your campaign objectives, targeting the right audience, and crafting compelling ad content, you can create successful ad campaigns that generate results. Remember to continuously monitor and optimize your ads for the best performance.

Whether you’re promoting a tweet, account, or trend, X offers a range of tools and formats to help you achieve your marketing goals.

read more
Social

How to Create Professional Cover Photos for Social Media

how Create Professional Cover Photos

Your cover photo is one of the first things people notice when they visit your social media profile. Whether you’re using Facebook, Twitter, LinkedIn, or YouTube, a professional and eye-catching cover photo sets the tone for your personal brand, business, or content.

A well-designed cover photo can make your profile look more polished, boost engagement, and leave a positive impression on visitors. So how do you create a cover photo that stands out and aligns with your goals? Let’s dive into the key steps and tips for designing a professional cover photo for your social media accounts.

Step 1: Understand the Dimensions and Requirements

Know the Platform-Specific Sizes

Each social media platform has its own specific dimensions for cover photos, and it’s important to get these right to avoid your image being cropped or distorted. Here are the recommended dimensions for some popular platforms:

  • Facebook: 820 x 312 pixels (desktop), 640 x 360 pixels (mobile)
  • Twitter: 1500 x 500 pixels
  • LinkedIn: 1584 x 396 pixels
  • YouTube: 2560 x 1440 pixels
  • Instagram Stories Highlight Cover: 1080 x 1920 pixels

Make sure to use the correct dimensions for the platform you’re working on to ensure your cover photo looks sharp and fits perfectly.

Safe Zones and Margins

Most social media platforms overlay text, profile pictures, or buttons over your cover photo. Ensure that important parts of your design aren’t hidden behind these elements by keeping the focal points of your design in the “safe zone”—the central area of the cover photo that won’t be cropped or covered by other elements.

Step 2: Choose a Clear Purpose for Your Cover Photo

Align It with Your Goal

Your cover photo should align with your social media goals. Are you promoting a business, building your personal brand, or showcasing your creative work? The purpose of your cover photo should be clear and easy for visitors to understand.

Some possible purposes for a cover photo include:

  • Business Promotion: Highlight your product or service, display your brand’s tagline, or promote a special offer.
  • Personal Branding: Showcase your personality, career expertise, or creative portfolio.
  • Events or Announcements: Use your cover photo to promote upcoming events, launches, or important announcements.
  • Content Creators: Display a cohesive theme related to your niche, such as gaming, photography, or fitness.

By clearly defining your goal, you can create a cover photo that effectively communicates the message you want to send to your audience.

Step 3: Use High-Quality Images or Graphics

Prioritize Professional Visuals

Nothing says “unprofessional” like a low-quality, pixelated cover photo. To create a professional cover photo, you need high-quality images or graphics that reflect the standards of your brand or content.

Here are a few options for sourcing high-quality visuals:

  • Original Photography: If you have access to professional-grade photos of your product, team, or work, use them! Original photos add a personal and authentic touch to your cover.
  • Stock Images: There are many websites like Unsplash, Pexels, or Shutterstock that offer high-resolution stock images. Choose images that align with your brand’s aesthetic.
  • Custom Graphics: If you’re skilled with design software, consider creating custom graphics, illustrations, or typography to make your cover photo unique and professional.

If you’re not a designer, you can use platforms like Canva, Adobe Spark, or Crello, which offer easy-to-use templates and design tools to create high-quality cover photos.

Step 4: Incorporate Your Branding

Stay Consistent with Brand Colors, Fonts, and Logos

To create a professional-looking cover photo, it’s essential to incorporate your branding elements, such as colors, fonts, and logos. Consistency across your social media platforms strengthens your brand identity and helps your audience recognize you instantly.

  • Brand Colors: Use your company’s colors (or personal brand palette) to create a cohesive look. Ensure the colors complement the background image and text.
  • Logo: Place your logo in a visible area, but don’t let it overwhelm the design. It should be clearly visible but not overpower the overall aesthetic.
  • Fonts: Stick to the fonts used in your brand’s marketing materials. Avoid using too many different fonts, as this can make your cover photo look cluttered. Two fonts, maximum, usually work best—one for the main message and one for supporting text.

By incorporating these branding elements, your cover photo will align with your overall identity, making it look polished and cohesive.

Step 5: Keep It Simple and Clear

Avoid Overcrowding

Simplicity is key to creating a professional cover photo. Overloading the image with text, graphics, and photos can make it look cluttered and confusing. Focus on one central message or image and keep the design clean and balanced.

Here’s how to keep it simple:

  • Limit Text: If you’re including text, stick to a few key words or a simple tagline. Make sure the text is easy to read by using bold fonts and contrasting colors.
  • Use White Space: White space (the empty area around your content) helps your design “breathe” and keeps it from feeling overcrowded. Don’t be afraid of leaving empty spaces in your design.
  • Focus on One Visual Element: Whether it’s a product image, a person, or a logo, make one visual element the focal point of your cover photo. This creates a clear visual hierarchy and guides the viewer’s eye to the most important part of your design.

Step 6: Add a Call to Action (CTA)

Encourage Engagement

If you’re using your social media profile to promote your business or content, a cover photo is an excellent opportunity to include a call to action (CTA). A CTA encourages visitors to take a specific action, like visiting your website, signing up for a newsletter, or following your account.

Here’s how to incorporate a CTA into your cover photo:

  • Text-Based CTA: Use clear, concise text like “Sign up now,” “Shop our collection,” or “Join our community” to guide your audience toward the desired action.
  • Button-Style Graphics: You can design a graphic that looks like a button to make the CTA more visually appealing.
  • Limited Time Offers: If you’re promoting a special offer, include a deadline or sense of urgency in your CTA to encourage immediate action (e.g., “Sale ends Friday”).

Make sure the CTA is easy to read and doesn’t clutter the design.

Step 7: Ensure Your Cover Photo Looks Great on All Devices

Optimize for Mobile and Desktop Views

Your cover photo needs to look great on all devices, from desktops to smartphones. Some platforms crop cover photos differently depending on the device, so make sure your design is adaptable.

  • Test on Multiple Devices: Before finalizing your cover photo, test how it looks on both desktop and mobile views. Adjust any elements that might be cropped or hidden on different screen sizes.
  • Keep Important Info in the Center: Many platforms crop the edges of the cover photo on mobile devices. To avoid important information being cut off, keep essential text and images in the center “safe zone” of your design.

By optimizing your cover photo for different devices, you ensure that it looks professional and polished no matter how visitors are viewing your profile.

Step 8: Refresh Your Cover Photo Regularly

Keep It Up-to-Date

Your cover photo should evolve as your brand or content changes. Refresh it regularly to reflect new campaigns, promotions, or announcements. Keeping it up-to-date shows that you’re active on social media and engaged with your audience.

Here’s when to update your cover photo:

  • Seasonal Changes: Update your cover photo with seasonal themes or holiday graphics to keep it fresh.
  • New Products or Services: If you’ve launched something new, update your cover photo to promote it.
  • Rebranding: If your brand has gone through a refresh or rebranding, make sure your cover photo reflects the new style and direction.

Regular updates also give you a reason to re-engage with your audience and keep your profile looking current.

Final Thoughts

Creating a professional cover photo for your social media accounts is a powerful way to enhance your online presence and make a great first impression. By focusing on high-quality visuals, clear messaging, consistent branding, and device optimization, you can craft a cover photo that reflects your brand or content in the best light.

Remember to keep it simple, stay consistent with your branding, and refresh your cover photo regularly to keep your profile up-to-date. Whether you’re promoting a business or building your personal brand, a well-designed cover photo is a key part of your social media strategy.

read more
General

How to Create Attractive Profile Pictures

Create an Attractive Profile Pictures

Your profile picture is one of the most important elements of your online presence. Whether you’re using Facebook, Instagram, LinkedIn, or any other social media platform, your profile picture is often the first thing people see. It’s your digital introduction, and making sure it’s attractive can significantly impact how you’re perceived online.

A great profile picture can boost your credibility, attract more followers, and make a lasting impression. So, how do you create a profile picture that stands out? Let’s dive into some practical tips on how to craft the perfect profile photo for any platform!

Step 1: Choose the Right Lighting

Lighting is Everything

Lighting can make or break a photo. For an attractive profile picture, natural lighting is almost always the best choice. It softens your features and gives a more flattering look. Here’s how to get the lighting right:

  • Natural Light: Position yourself in front of a window or outside during the golden hour (the hour after sunrise or before sunset). This provides soft, even lighting that makes your skin glow and eliminates harsh shadows.
  • Avoid Harsh Lighting: Overhead lights or direct sunlight can create unflattering shadows on your face. Try to avoid harsh, midday sunlight, as it can make your picture look too sharp or washed out.
  • Use Softbox or Ring Lights: If you’re taking an indoor photo and don’t have access to natural light, use a ring light or softbox to illuminate your face evenly. This will help mimic the effect of natural lighting.

Good lighting enhances the clarity and detail of your profile picture, making you look more polished and professional.

Step 2: Choose a Simple, Clean Background

Avoid Distracting Backgrounds

A cluttered or distracting background can take attention away from you. Instead, opt for a clean, simple background that enhances your overall look.

  • Solid Colors: A plain, solid-colored background like white, beige, or a soft pastel can make you stand out without competing with your face for attention.
  • Outdoor Settings: If you prefer an outdoor setting, choose a background that complements your look without being too busy. A park, garden, or wall with subtle textures can work great.
  • Blur the Background: If you want the focus to be entirely on you, try using portrait mode on your camera or smartphone. This effect will blur the background slightly, giving you a professional, polished look.

The key is to ensure that your background doesn’t distract from your face, allowing your profile picture to feel clean and well-composed.

Step 3: Focus on Framing and Composition

Get the Right Angle

How you frame and compose your profile picture plays a huge role in how attractive it looks. Here’s how to get the perfect shot:

  • Rule of Thirds: Imagine breaking your image down into thirds both vertically and horizontally, so you have nine parts. Position your eyes along one of the top-third lines. This creates a more engaging and dynamic composition.
  • Avoid Extreme Close-Ups: Make sure your face isn’t too close to the camera, as this can distort your features. Aim for a mid-close shot where your head and shoulders are in the frame. This gives a balanced view of your face.
  • Angles Matter: Tilting your head slightly or angling your face can add dimension to your features. Avoid taking photos directly from below, as this is typically less flattering. Instead, hold the camera slightly above eye level for a more attractive angle.

By focusing on composition and framing, you’ll ensure that your profile picture is both balanced and flattering.

Step 4: Express Yourself Through Wardrobe and Style

Dress for the Occasion

What you wear in your profile picture matters. Your clothing should reflect your personality and be appropriate for the platform you’re using.

  • Professional Platforms: For sites like LinkedIn, go for a professional look. Wear business attire or something formal that reflects the industry you work in.
  • Casual Platforms: On more casual platforms like Instagram or Facebook, you have more freedom to express your personal style. Wear something that makes you feel confident and reflects your unique personality.
  • Colors that Complement: Choose clothing colors that complement your skin tone and the background. Avoid busy patterns or neon colors, which can be distracting. Instead, go for solid colors that enhance your natural complexion.

Dressing appropriately and feeling confident in your style can elevate the attractiveness of your profile picture.

Step 5: Smile and Be Natural

Show Confidence and Positivity

Your expression is everything when it comes to an attractive profile picture. The way you smile and present yourself can instantly impact how others perceive you.

  • Natural Smile: A genuine smile goes a long way in making you look approachable and friendly. Avoid forced or exaggerated smiles, as they can come off as inauthentic. Think of something that makes you happy or laugh naturally while taking the photo.
  • Relaxed Facial Expressions: If smiling isn’t your thing, a relaxed, neutral expression can also work well, especially for professional platforms. Just make sure your expression doesn’t come off as too serious or stern.
  • Engage the Eyes: Whether you’re smiling or not, your eyes should convey warmth and confidence. Avoid looking away from the camera unless you’re intentionally going for a candid or artistic vibe.

A natural expression will make your profile picture more engaging and help you connect better with others online.

Step 6: Edit but Don’t Overdo It

Enhance Your Photo

Editing can help make your profile picture look polished and professional, but be careful not to overdo it. Here are some tips on subtle edits:

  • Brighten the Image: If the lighting wasn’t perfect, adjust the brightness to make your photo more vibrant and clear.
  • Smooth Skin Slightly: You can lightly smooth your skin or remove blemishes, but avoid excessive airbrushing. Over-editing can make your picture look fake.
  • Adjust Contrast and Saturation: A slight adjustment to contrast and saturation can make colors pop and give your photo a more dynamic look.
  • Use Filters Wisely: Filters can be fun, but avoid ones that drastically alter your appearance. Opt for light, natural-looking filters that enhance the overall mood of the photo.

The goal is to look like the best version of yourself, not a heavily altered one. Editing should enhance your natural beauty rather than changing your appearance entirely.

Step 7: Align Your Profile Picture with Your Brand or Personality

Consistency Across Platforms

If you’re building a personal or professional brand, it’s a good idea to keep your profile picture consistent across different social media platforms. This helps with recognition and branding.

  • For Professionals: Use the same profile picture or a similar one across LinkedIn, Twitter, and other professional platforms. This creates a cohesive online presence and helps people easily identify you.
  • For Content Creators: If you’re active on platforms like Instagram, TikTok, or YouTube, your profile picture should reflect your content style and personality. Fun, creative, or artistic pictures work well in this space.
  • For Businesses: If your profile represents a business, make sure your logo or brand image is high-resolution and easy to recognize, especially at smaller sizes.

Consistency helps you build a stronger and more memorable online presence.

Step 8: Test and Get Feedback

Test Different Photos

Don’t be afraid to take multiple shots and try different angles, lighting setups, and expressions. Once you have a few options, ask for feedback from friends, family, or even your social media followers. You can also:

  • Use Polls: If you’re torn between a few photos, use a poll feature on Instagram Stories or Facebook to see which one resonates best with your audience.
  • Check Thumbnail Appearance: Profile pictures often appear as small thumbnails. Make sure your photo looks good even when reduced in size.

Getting feedback can help you choose the most appealing photo, and you’ll gain insights into what others find attractive about your profile picture.

Final Thoughts

Creating an attractive profile picture is all about showcasing your best self. By focusing on good lighting, clean backgrounds, natural expressions, and subtle editing, you can create a profile picture that not only looks great but also leaves a lasting impression. Whether you’re updating your LinkedIn for a job hunt or refreshing your Instagram to attract more followers, these tips will help you create a photo that truly stands out.

So, grab your camera, follow these steps, and take your profile picture to the next level!

read more
1 13 14 15 16 17
Page 15 of 17