

Financial independence is a dream many strive for, and with a focused approach, it’s achievable sooner than you think. It means having enough savings, investments, and passive income to cover your expenses without relying on a regular paycheck. Whether your goal is to retire early or enjoy more freedom in life, these steps will help you get there. Here’s how to plan your journey toward financial independence by 2025:

1. Define What Financial Independence Means to You
The first step to achieving financial independence is knowing what it looks like for you. It’s not a one-size-fits-all concept—everyone’s vision is unique.
- Why It’s Important: Financial independence could mean quitting a traditional job to travel the world, pursuing a passion project, or simply not stressing over monthly bills. Defining your goals provides clarity and motivation, helping you stay focused even when challenges arise.
- How to Do It: Think about your ideal lifestyle. Do you want to maintain your current standard of living, or would you like to downsize for simplicity? Calculate how much money you’ll need annually to sustain that lifestyle. Multiply that by the number of years you expect to rely on your savings. This total becomes your financial independence target.
2. Create a Realistic Financial Plan
Having a clear plan is critical to achieving financial independence. Without it, you might lose sight of your goals or waste valuable time and resources.
- Why It’s Important: A financial plan acts as a roadmap, showing you how to allocate your money effectively while balancing savings, investments, and daily expenses. It helps identify areas for improvement and ensures progress toward your goals.
- How to Do It: Start by assessing your current finances. List all your income sources, debts, and expenses. Set short-term (e.g., paying off a credit card) and long-term (e.g., retiring by 50) financial goals. Break these goals into manageable steps and allocate a portion of your income to each category, including investments and an emergency fund.
3. Eliminate High-Interest Debt
Debt is one of the most significant obstacles to financial independence. Carrying high-interest debt like credit cards can quickly drain your finances, making it harder to save and invest.
- Why It’s Important: By eliminating debt, you free up resources that can be redirected toward savings and investments. Paying off high-interest loans first reduces the amount you lose to interest payments, accelerating your journey toward financial freedom.
- How to Do It: Focus on debts with the highest interest rates first, such as credit cards and personal loans. This method is known as the avalanche approach. Alternatively, if you prefer small victories to stay motivated, try the snowball approach by tackling the smallest debts first. Avoid taking on new debt unless absolutely necessary.
4. Prioritize Saving and Investing
Saving money is the cornerstone of financial independence, but investing helps your wealth grow significantly over time. Together, they create a powerful combination for building long-term financial security.
- Why It’s Important: Investments like stocks, bonds, and real estate can generate returns that outpace inflation, helping you grow your wealth faster than simply saving. Regular saving ensures you have a steady pool of resources to invest and use for emergencies.
- How to Do It: Commit to saving at least 20-30% of your income. Start with a high-yield savings account for short-term goals and emergencies. For long-term growth, explore diverse investment options like index funds, mutual funds, or real estate. If you’re new to investing, consider using robo-advisors or consulting with a financial advisor to minimize risks.
5. Create Multiple Streams of Income
Relying solely on one income source can be risky and limit your ability to save aggressively. Diversifying your income opens up new opportunities for financial growth and stability.
- Why It’s Important: Additional income streams provide a safety net in case your primary income source is disrupted. They also allow you to save and invest more, accelerating your progress toward financial independence.
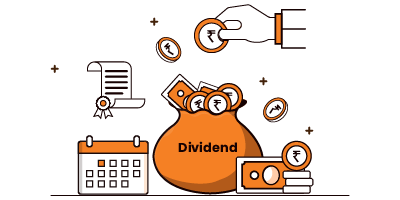
- How to Do It: Explore side hustles like freelancing, tutoring, or selling products online. Passive income options such as rental properties, dividend-paying stocks, or creating digital content like eBooks can also help. Choose opportunities that align with your skills and interests to ensure sustainability.

6. Live Below Your Means
Cutting back on expenses doesn’t mean sacrificing quality of life—it means spending intentionally and focusing on what truly matters. Living below your means is one of the fastest ways to build savings and achieve financial independence.
- Why It’s Important: The less you spend, the more you can save and invest. This strategy helps you avoid lifestyle inflation, where increased earnings lead to higher expenses rather than higher savings.
- How to Do It: Create a budget that distinguishes between needs and wants. Limit discretionary spending, such as dining out or buying the latest gadgets. Opt for cost-effective solutions, like meal prepping or carpooling, and redirect the money saved into your financial goals.
7. Automate Your Finances
Automation simplifies financial management and ensures consistent contributions to your savings and investment accounts, even if you’re busy or forgetful.
- Why It’s Important: Automating your finances eliminates the temptation to spend money earmarked for savings or investments. It ensures that your financial goals remain a priority.
- How to Do It: Set up automatic transfers to your savings and investment accounts each payday. Use apps or tools to automate bill payments and track your progress. This hands-off approach keeps you disciplined and reduces the chances of missed payments or overspending.
8. Educate Yourself About Personal Finance
The more you know about managing money, the better equipped you’ll be to make informed decisions that align with your goals.
- Why It’s Important: Understanding personal finance empowers you to take control of your financial future, avoid scams, and make smarter investment choices.
- How to Do It: Read books, listen to podcasts, or attend workshops focused on financial literacy. Topics to prioritize include budgeting, investing, tax strategies, and retirement planning. Staying informed about market trends and economic changes can also help refine your financial plan.
9. Build an Emergency Fund
Unexpected expenses can derail even the best financial plans. An emergency fund acts as a financial safety net, providing peace of mind during challenging times.
- Why It’s Important: A well-funded emergency account prevents you from relying on credit cards or loans, which can lead to debt. It also allows you to focus on your financial goals without interruptions.
- How to Do It: Save enough to cover three to six months of living expenses. Keep this fund in a high-yield savings account for easy access but resist the urge to use it for non-emergencies.
10. Monitor Your Progress Regularly
Achieving financial independence requires regular check-ins to ensure you’re on track and making necessary adjustments.
- Why It’s Important: Life circumstances and financial markets can change, affecting your plan. Monitoring your progress helps you stay adaptable and motivated.
- How to Do It: Set a schedule to review your finances monthly or quarterly. Analyze your spending, savings, and investment performance. Celebrate milestones to keep yourself inspired, and make tweaks if needed to stay aligned with your goals.
Final Thoughts
Achieving financial independence by 2025 is a challenging yet rewarding goal. With clear planning, disciplined saving, and strategic investing, you can build a secure financial future. Remember, the journey may require sacrifices, but the freedom and flexibility that come with financial independence are well worth the effort. Start small, stay consistent, and watch your efforts compound into long-term success.


