
As all of us know that Android is one of the most popular platform in which we can easily able to download apps and game very easily. Depending on that we are going to introduce one new game named as Snake vs. block which is a very interest game ever. This game is very easy to download from the Google Play but still, we are going to tell you how to download the Apk file. As there are many smartphones available in the market in which you can download Apk only for installing the Android apps. These phones do not come with integrated Google Play and thus we need to download the Apk file instead for every game and apps.
If you have a good configured Android phone then you can download the Snake Vs. block Apk for free. Even you can keep the Apk file saves in your SD card such that you can install it anytime without internet also. So, here we are going to discuss about how to download and install the Apk file for Snake vs. block game free in your Android phone. Even you can get know about all the detailed features of this game from the below point.
Complete Guide- How to download Snake vs. block Apk?
Some of you already know that how to download Apk file for your Android phone. But still, some users do not know properly that what the procedure to download Apk for their phone is. Now in the below point, we will guide you in the steps to download Snake vs. block Apk.
Step 1:
Initially, what you need to do is connect your phone properly with the internet connection Wi-Fi or any mobile data etc. Keep in mind that you phone battery having sufficient charge or plug it into power source.
Step 2:
To start download the Snake vs. block Apk in your phone then click on this Link now. When you will click on this link you will automatically redirect to the download page in your browser.
Step 3:
The process of downloading will be start automatically through your browser and you need to still wait until the whole download process has been completed successfully.
Step 4:
After completing the download process the file will get save in your phone or inside your external SD card memory. Now it’s the time to install this game and you will get to know about installation from the next point.
If you want to download this game directly from the Google Play then you can click on this Link also.
Complete Guide- How to install Snake vs. block Apk?
Hope you all have successfully completed the downloading process. If you are done then follow the installation guide which is very much easy to perform by following the steps mentioned below.
Step 1:
At first, you need to enable the permission to installing app from unknown sources i.e. the Apk files. To enable it you need to open Phone Settings and then select the option Privacy and security. From this option, you need to scroll down to choose the option Unknown Sources, in which you need to Tap or click once to enable it.
Step 2:
Open the Apk file from the containing folder in which it get saved after downloading via your browser. Click on that file once and you will get the installation page pop up in your screen.
Step 3:
Choose the Install button or click on the Install button once to start installing. If the app asking for any permission from your side then please accept or grant all those permissions and wait to complete the installation process.
Step 4:
Once the installation has been completed, one icon will get created on your home screen. Now the game is totally ready for playing in your phone.
Features of Snake vs. block Apk:
Now it’s the time to discuss about the features of Snake vs. block Apk. As it is very important to get know about the features of any game before playing them in your smart phones. So start to know about the features of snakes vs. block from the points mentioned below.
- Downloading the Snake vs. block game is totally free if you download in form Apk and directly from Google Play.(Required Android 4.1 and up)
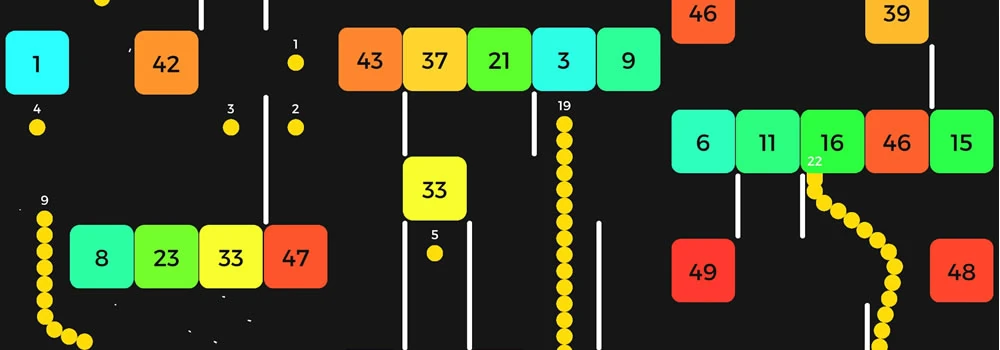
- You need to swipe your finger to guide the snake formed with balls to break the blocks as more as you can.
- If you need then take additional balls to make the snake longer.
- It is very easy to make the action in this game but it is very much hard to make the highest score.
- This is a most challenging game with simple controls, endless level and free play as always.
That’s all about the Snake vs. block Apk which is totally free to download in your Android phones. Hope you all have got all the needful details about this game from the context which we have mentioned above. If you download this game once then it will easily kill your off time or the boring time by playing this game. For the advantage of the users, we have provided all the links and steps to download and install this game in their smart phones. So, start downloading this game from the links given above and start enjoying the experience of this game play.