close

debjit

Technology

Complete Tutorial To Delete a Skype Account?

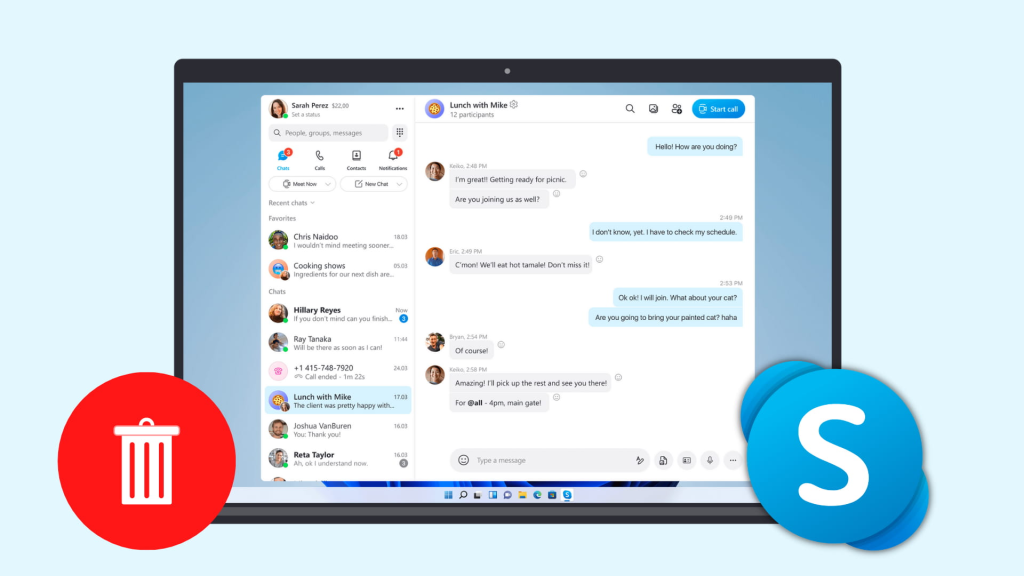
Deletion of a Skype account is very hectic now. And you must know that if the deletion of your Skype account is not done in the right way, it will continue to charge you with the Skype credits and subscription plans. Yes, it is right. So deletion of Skype in perfect way is required. But how? The lengthy process with so many complex formalities makes it problematic for all. If you are also one of them who is facing problem regarding to deletion or deactivation of your Skype account, then you must read the article.

In this article, we have provided information about how to delete a Skype account perfectly. In connection to that, we have included a brief detail about Skype and its premium features, and then steps to stop or disable them. So keep reading this article and follow the steps in which you are facing problem. Let’s get started with a brief description about Skype and its premium features.

About Skype

Skype is a free telecommunication as well as instant messaging app that provide free services with some premium options. It allows the users to call or video call to Skype, landlines, and mobiles too. Users can also enjoy the instant messaging features like texting, sending images, videos, GIFs, voicemails, documents, and lots more. But all the features are not free. Below we have enlisted the premium features and facilities of Skype.

  • Free unlimited calls to landlines and mobiles, in which users can call to the landlines and mobiles of one selected country for free.
  • Group video calling feature that allows the users to enjoy video calls with maximum 10 friends.
  • Group screen sharing allows the users to share each other’s screen.
  • Ad blocking feature for an ad-free user interface.
  • Live customer care services via chatting from Skype.

How to Delete a Skype Account?

Creating a Skype account is easy, but deleting the same is quite hectic, because of the features and facilities provided by it. All of us use those features and facilities by giving permissions. So before deleting a Skype account, we have to look into those factors and have to stop the functions. Otherwise, users have to face some problem after requesting for deleting the account till the deactivation.

Here we have explained all the factors to look upon, and then the steps to stop them. So keep reading and follow the guidelines.

Important Factors to look upon before deleting a Skype Account

Before deleting a Skype account in right way, users have to look upon on the factors mentioned below. So the factors are:

  • Look whether you have logged in to your Skype account with your Microsoft account or not? If logged in with Microsoft account, you have to unlink the account first.
  • Check how many active subscriptions you have and deactivate them. Else you will be charged till the deactivation.
  • You have to disable the recurring payments option and delete the payment details before proceeding to the deactivation process.
  • If you have any Skype number, then you have to cancel the number before deleting the account.
  • If you remain logged in from any other devices, then your account will not be deactivated. So sign out from all the devices.

These are the important points that you have to go through before deleting the account. Now follow the steps below to perform the activities mentioned above.

Steps to Remove Microsoft Account from Skype

  • First of all, log in to the Skype account that you want to deactivate from web browser.
  • After logging in, go to the Settings and Preferences option and click on account settings.
  • Check whether your Microsoft account is connected or not? If it is connected, it will give “Unlink” option, else it will show “Not Linked”. Click the Unlink option on the right side of the Microsoft account option if it is connected.
  • On clicking the Unlink option, a dialog box will appear. Click Continue to remove your Microsoft account from Skype.

Now you may be logged out automatically from your account. Logging automatically confirms that your Microsoft account is removed. Log in again to complete the next activities.

Sometimes Skype disallow removing Microsoft account. If you are facing the same problem, no need to worry. Just go to Skype Support (Help Home), fill up the form and request for the same. Your Microsoft account will be removed.

Steps to Deactivate Subscriptions

  • To deactivate all the subscriptions, go to the Account Settings option under Settings and Preferences.
  • On the left side, you will get the subscriptions you have activated. Click on the subscription(s) you want to deactivate.
  • A confirmation message will arise, click on Cancel Subscription to proceed.
  • Another message will come, click on the “Thanks but no thanks, I still want to cancel” option to deactivate the subscription permanently.

Do you know? Skype refunds the subscription charges for unused subscriptions. If there is any subscription plan that you have not used, then request a refund now. Click the hyperlinks and request a refund via Email or Live Chat.

Remember, Skype credits and active subscriptions are different things. So deactivating subscriptions is not going to stop recurring payments or the Auto recharge process. Here you have to disable the “AutoPay from your credit cards or bank account” option before requesting deactivation of your Skype account. Otherwise, you might be charged again and again till the expiry of the account. Follow the steps below to disable the recurring payments option.

Steps to Disable Recurring Payments (AutoPay)

  • To disable the AutoPay or Auto Recharge option, go to the Account Details section.
  • Now click on Billing & Payments settings.
  • Here you will get to see all the details of enabled auto-recharge (s). Click on the “Disable” button on the right side.
  • Your Auto Recharge option is disabled.

Steps to Cancel Skype Number

  • To cancel the subscribed Skype number, go to “Manage Feature”.
  • Now click on the “Skype Number” and then the “Settings” option.
  • Here you will get the “Cancel Skype Number” option. Click on it to request to cancel the number.

After requesting cancellation of the Skype number, the number remains active till the expiry of the account (90 days from the day of request). But it won’t charge further. Requesting a refund is not applicable for Skype number cancellation.

In these 90 days (between the day of the cancellation request and the day of expiry), you can renew the number if needed. Just go to Manage Features > Skype Number> choose the number and click Reactivate Settings. Your number will be reactivated.

Steps to Log Out from All Devices

Logging out of Skype from all devices is very easy. Just log in to your account from any device and type “/remote logout” (“remote log out” without space) on the chat window and enter. You will be logged out from other devices. After that, log out from your account on the device you are using. To log out, click on Files> and then “Sign out”.

After completion of these important steps, you can request for deactivation of your account. However, after requesting deactivation, it takes some time to deactivate. Till then, all your friends can search and watch your details on your account. So if you want no one to find you and try to contact you on the same day, then you must use the following tricks to hide yourself till deactivation.

  • Change profile picture: try to remove the profile picture so that it shows a mugshot image, or upload a generic mugshot picture as the profile picture. Changing the profile picture will let the friends realize that the account is not being used by you.
  • Update the mood message: Update the mood message from the original to any generic one. Or you can write something like “The account is under deactivation process” so that your friends can know that you have requested deactivation.
  • Setting status to offline or invisible: remaining offline or invisible for a long time will help the friends to realize that you have left the account forever.
  • Remove all the personal details: unavailability of information forces others to realize that the account is closed. So remove the details except for the email address. Otherwise, the Skype team will not recognize which account should they close or not.

Final Words

So this is how you can delete a Skype account perfectly by simply following these steps mentioned above. Here we have information about the Skype and its premium services and detailed steps to stop or deactivate them, including steps for unlinking Microsoft account, deactivating subscription plans, disabling auto recharge option from credit cards or bank accounts, cancelling Skype number, and logging out of Skype from all devices. All users may not have subscribed all the features. So do the steps that are required for your account and skip the rest. Thank you.

read more
Technology

How to Fix iMessage “Waiting for Activation” Error on iPhone?

Are you tired of iMessage activation errors in your iPhone? Looking for some ways to fix this serious issue? Apple offers its users to enjoy a seamless iMessage experience but activating iMessage sometimes becomes a big task for some, as it doesn’t usually work out smoothly. Although iMessage works perfectly fine after getting activated, but activating is a very hectic step. Quite a lot of fixes have been recommended for using this service but sadly most of them don’t even work. While activating FaceTime and iMessage, you might encounter with some of the following frequent issues

  • Activation unsuccessful.
  • Error occurred during activation.
  • Waiting for activation.
  • Could not sign in please check your network connection.

Do not worry as we have come up with some of the tricks so that you will no longer face these issues and can experience iMessage service without any hurdles. Do read the article and follow the steps properly. Try out the methods described here and we are working hard to come up with some new solutions.

Before fixing iMessage “Waiting for Activation” error on iPhone running iOS 9, iOS 10 and iOS 11.

  • You must put your phone number in the contact app of your phone. Place it on top of ‘Contacts,’ you should see your number listed. If it’s not there, you must do it and place it as soon as possible.
  • Date & Time should be correct. If not then select option “Set Automatically” and make sure to correct the Time Zone before the phone holds the right time.
  • iMessage activation may sometimes take about 24 hours. Wait for the time being and if it’s not done, do contact your carrier.
  • Do check that your carrier permits to send international messages and you must have proper amount to send them.

How to Fix iMessage “Waiting for Activation” Error on iPhone?

●      Check Out Internet Connection

Both FaceTime and iMessage requires a steady, stable and very good internet connection to work properly. Hence, make sure your internet connection is up to the mark. Also, make sure that you are on an active working internet network. Sometimes Wifi issues can cause iMessage activation problems so have your cellular network enabled.

Open Settings > Wifi/Cellular > Switch it off > Reboot the device and then again turn on Wifi/Cellular network.

If nothing goes your way, reset all the network settings and everything will move to the default factory settings. To reset the network settings move ahead and perform the steps given below.

                         Settings → General → Reset → Reset Network Settings.

●      Turn Off/On iMessage and perform a hard reset

Open Settings > head to Messages > Turn off iMessage function.

Now, hold the home button and volume ON/OFF button together for about 10 seconds, the phone will be in hard reset mode.

After performing hard reset, the phone will be rebooted. When the device gets restarted, turn on the iMessage again.

●      Check your iPhone’s carrier settings and update it if required

Also do check out whether the Cellular or Wifi network is enabled and working fine on your device.

                                             Open Settings → General

Click on About option to look for any updates. If any update is available, you will get the option to update it. Whenever you opt for a new SIM card on your phone, you always need to download the new carrier setting in your iPhone.

●      Sign-out, Sign-in your Apple ID

In most of the cases, you need to sign out of your Apple ID and then need to sign in again.

Step 1. First of all you will need to go to the Settings > move to Message and look for the options ‘Send & Receive’ and scroll down to tap on it.

Step 2. Sign out of your Apple ID and log out.

Step 3. Turn off iMessage now.

Step 4. Then wait for few moments, turn off and on the Wi-Fi connection and then again switch on iMessage.

Step 5. And finally enter your Apple ID details again to sign in and then try re-activating iMessage.

●      Turn airplane mode on and off

Sometimes iMessage activation issues occurs due to some small dumb hiccup in the system itself. Hence before heading out for any serious solution and before turning the Airplane Mode on, wait for a few moments and then turn it off again. You might get away with the problem quickly.

●      Turn off FaceTime and iMessage, then restart your device

Apparently, this is a useful trick that helps many people and might help you too.

Open Settings > go to Messages > and turn off iMessage.

After that in Settings > go to FaceTime > and turn off FaceTime. Later on reboot your device and activate both the options again from the settings.

●      Do make sure your cell plan must receive SMS

When you will be trying to activate iMessage and FaceTime on your iPhone, Apple will try to send you an SMS as confirmation and is a part of the activation process. Apple does this in order to verify your phone’s status although you will not be able to view the message.

Apple might not be able to authorize and verify your device and activate iMessage and FaceTime in your phone if you fail to receive messages. In this case, check your carrier whether you are facilitated to receive sms and text messages.

●      Always check and fill your empty credit if you’re a prepaid user

While you are on any prepaid plan, you must have enough credit to receive and send messages. In this case you might not be able to receive messages if you do not have sufficient credits in your prepaid account. During troubleshooting iMessage activation issue, you might feel the need to add credits to your prepaid account so that you can receive the activation messages easily.

●      Reset network settings

As we already came to know about it that Apple requires some SMS tricks to activate iMessage and FaceTime on an iPhone, hence you must have an active working cellular or Wifi connection. But if you are having any network issues, Apple won’t be able to activate iMessage for your device. To troubleshoot issues regarding your network connectivity perform the following steps properly.

                     Open Settings > go to General section > then Reset Network Settings.

Once you are done with the reset enter your Wifi password again and check if it is working fine.

●      Put your SIM card in a different iPhone, then reset that phone using your SIM card

Pop out the SIM card and place it in any other spare iPhone you can find. Then rest that iPhone with your SIM card in it. Follow the steps to perform a reset.

Open Settings > head to the General section > Tap on Reset > Click Reset All Content and Settings > then reboot the phone

After that put back the SIM card back in your main iPhone and wait for the iMessage to get activated. Well we are not so sure about this trick whether it will work out or not. But some users claimed to have worked out, we hope this does the same for you as well.

●      Update to the latest version of iOS

 Well this issue also occurs if you are running an older version of the OS. Hence, before heading out to find some solutions for the cause, it will be a good idea to check and update to the latest version of iOS. To update to the latest iOS version follow the following steps.

Open Settings > move to the General section > check for Software Update > if any update available, update your phone instantly.

We hope this will definitely solve your problem and your iMessage will get activated soon after the update.

If you are done with most of the solutions, consider some of the other points discussed below which might help you out.

Still not activated after a day?

Sometimes Apple take up to 24 hours to activate FaceTime and iMessage. However, if the problem persists even after 24 hours, follow these steps.

  • Do make sure that your device has been update to the the latest version of iOS. Head to the settings and look for the software update availability and update the phone instantly.
  • Try to contact your carrier to make sure that you are facilitated to receive SMS and text messages. First of all ask your carrier if they support iMessage or not. Verify with them if there is any limited condition or any Imessage blocks and text message filters.
  • If nothing goes your way after trying out all the solutions, try to contact Apple Support which we think will be the best possible way to get your hands on iMessage.
  • Send a mail to the email address of faceTime and iMessage stating your activation issues.

Final Words

When you are opting for a new phone or switching carrier or cell numbers, sometimes you might encounter FaceTime and iMessage activation issues. In this article, we have tried to pick out the issues as well as solutions to them and discussed everything in details. We hope you are now aware about how to fix “waiting for activation” errors in iMessage and FaceTime. Do let us know which method worked for you and also share your experiences with us. We will get back to you with new problems and solutions too. Till then keep texting!

read more
Technology

DIY Electronic School Projects For Students

For students project may be headache, as it includes lots of hard work and creative ideas which for a student may be difficult at beginning. Especially science and electronic projects are really very tough as you need to play with the circuits and create a new thing. Not only projects, as nowadays every school is taking part in hosting science fair, student really to be active in electronic projects. Here we have bought you the best electronic projects for school students. The projects that are mentioned here are very unique and are easy too, so that every school student can easily use the idea on their project or while representing in the science fair.

Electronic Project Images - Free Download on Freepik

The projects here are like better security features for your house, electricity without generator, doorbell function and much more. So these are all, you can use these projects for every standard kids in school. So without wasting anytime let’s have a look at the best projects for school students that you can use in both school and science fair.

Best electronic project for school kids:

  1. Doorbell function and making it musical: This is the simplest project that you can do for your school project. Here you will only need to do some simple circuit design and connect all with the UM66 which will produce the melodious music. Here in this project the main work is of the UM66 as this is the element which will produce melodic music when the doorbell is pressed and electric current is passed through the circuit. So this is the simplest project for you which you can represent in school, but make sure that this project is only for kids under fifth standard.
  2. Security alarm of home: This is one of the interesting science projects and this is meant to be the high school science project. As everything used in this electronic project are on another level. You can make this project using all the cheap electronic material from the market. The only important thing used in this project is the invisible laser beam which detects the unknown sources and the alarm starts. You can use it on your home for getting rid of thieve and other stuffs. So this project is massive and this is the best one for high school science project or science fair and the best part is that it is very useful in practical life too. 
  3. Circuit of emergency light at home: Yes, no doubt that LED bulbs consume less power and is very long lasting. But the main problem occurs when the powers shut down and there is no light at home. So in this project you are going to show how you can manage emergency lights on your house by using the power of sunlight or other natural resources. The science project is simple but it is also impressive at the same time, as it related to the practical daily life schedule.
  4. Making Daylight at home: Daylight is very important for both office and home and this is the first step for saving electricity. In this project you show how to use sun light as bulb light at day time. Here there is no much work of circuit but only some few modifications in the roof top. Simple place aluminium foil canal in the top and place a glass plate on top, now connect the aluminium foil canal in the light which means the sunlight will glow in the bulb in the day light. This is also one of the simplest science projects which you can make for representing your school in any science competition. And the best part is that you will also spend less in this project, as there is not much material required in this project.
  5. Lamp controlled by lamp: This is again a school electronic project for kids under fifth standard. The project is simple but is little complicated for kids as you will need to attach a IR receiver in the lamp and one in the remote control. Once the IR receiver receives wave from remote you can control the lamp light from the remote itself. So you can simply ON or OFF the lamp light from the remote itself.
  6. High Voltage Cut Of School Project: Most of us are familiar with the problems of voltage variation. It is a big issue in every house and due to few reasons the voltage power supply may reach between 110v to 230 v and more. Running this high voltage of power supply may lead to direct damage into you house electric circuits. And we have come up with the diy electronic projects to get safety and protect from the over power of voltage consumption. It is a science project that is especially for the students of the middle school. The most important part of the high voltage cut off circuit is the Zener diode voltage regulator.
  7. Water Overflow Indicator for Water Tanks: Water Tanks is one of the simplest electronics projects which are made available for the school students. It basically creates a “beep sound” at the moment when the water tank is filled up with water. This problem mainly helps to avoid the chance of over flow of water. One can simply get this school project straight to their house in a very less price that is $0.5. Water Overflow indicator will ignore the high chances of the wastage of water. Especially on the case when someone forgot to “Switch OFF” the power of the motor pump.
  8. Water Low & High Level Detector Circuit: Water Low & High Level Detector Circuit is an extra project created for the high students. The objective of this project is to detect water level inside a water tank or any other water storage. This project is quite different from the rest of the project as compared from the list. It has the ability to figure out the absence or the presence of water into the tank. This project for the school is build using the BC548 transistors and a 7432 OR gate IC. If the level of the water goes up beyond its storage limit level then the circuit will create a “beep noise”.
  9. LED Blinking Circuit: LED Blinking Circuit is a unique and simple circuit project for the school students. Into the project of the simple “LED Blinking Circuit” the 555 IC provide blinking effects to the LEDs and the “Astable Multivibrator” will create the continuous amount of pulses. The frequency is brought under the control by making the changes into the values of R1 or R2 and C1 as well. This project is very simple and is meant only for the school students. 
  10. Water Empty Alarm project: Water Empty Alarm project allows you to learn the quantity of water present inside the water tank. It will also help you to know whether to turn on the water pump set or not.  You can use the water empty alarm as a project in school. It is very easy to build and simple by using some transistors. And this project is also known as the low water level alarm project.   

So these are the best electronic school project for kids, all of these projects are simple and is not that costly. You can represent these electronic projects on any science fair or at any of your school science project. All of these projects are very simple and is also very easy to make, so this is all if you are having any doubts then you can comment down relating any project topic you want to know.

read more
Technology

iPhone 16 vs. iPhone 15: What Are the Major Upgrades?

Apple has done it again. With the launch of the iPhone 16, tech enthusiasts and everyday users alike are wondering: Is the upgrade from the iPhone 15 worth it? From the outside, the two models might not seem drastically different, but under the hood, Apple has introduced some key changes that could make the iPhone 16 the perfect choice for anyone looking for that next level in smartphone performance. Let’s break down the major upgrades and help you decide whether it’s time to make the switch.

Design: If It Ain’t Broke, Don’t Fix It (But Let’s Refine It)

When it comes to design, Apple sticks with what works—and that’s not a bad thing. The iPhone 16 and iPhone 15 have very similar form factors, and at first glance, you might not notice any major differences. But look a little closer, and the iPhone 16’s design tweaks start to stand out.

  • Bigger Display, Thinner Bezels: Apple has slightly increased the screen size on the iPhone 16 by reducing the bezel width. This results in a more immersive experience when streaming videos, playing games, or scrolling through social media. The size difference may seem small on paper, but once you hold it in your hand, you’ll notice the extra real estate.
  • Dynamic Island 2.0: The Dynamic Island feature introduced in the iPhone 15 made waves, but with the iPhone 16, Apple has refined its animations and added new app integrations. The improved responsiveness makes for a more seamless experience.
  • New Colors: Apple continues to expand its color palette with the iPhone 16, offering new shades that are vibrant yet sophisticated. A fan favorite is the bold electric blue, which joins the lineup of standard and pastel options.

While the iPhone 16 maintains the sleek, modern look of its predecessor, these subtle design improvements make for a noticeably better user experience.

Performance: The A18 Bionic Chip Raises the Bar

Let’s talk power. Every year, Apple introduces a new chip, and the A18 Bionic is the star of the show this time around. It’s faster, smarter, and more efficient than the A17 Bionic in the iPhone 15. But what does that mean in real-world use?

  • Better Multitasking: With the A18 Bionic, the iPhone 16 handles multitasking more efficiently than ever. Whether you’re switching between multiple apps, editing videos, or playing resource-heavy games, everything feels buttery smooth. This chip is built for speed, and you’ll notice it the moment you start pushing your device to its limits.
  • Advanced AI Integration: One of the standout features of the A18 Bionic is its improved AI capabilities. Apple has placed a big emphasis on machine learning, which powers everything from faster Face ID to smarter Siri suggestions. The phone also learns your habits to optimize battery life, ensuring it adapts to your usage patterns over time.
  • 5G Boost: While the iPhone 15 had excellent 5G performance, the iPhone 16 builds on this with enhanced connectivity, meaning faster downloads and smoother streaming in more areas. Plus, Apple has future-proofed the iPhone 16 by adding support for Wi-Fi 7, setting the stage for even faster internet speeds as the technology becomes more widely available.

Camera: Turning Everyone Into a Pro

Apple has been consistently improving its camera systems, and the iPhone 16 takes things up a notch. If you’re someone who loves taking photos or shooting videos, the upgrades here are worth considering.

  • 48MP Main Camera with AI: The iPhone 16 boasts a 48MP main camera—just like the iPhone 15 Pro—but now it comes with more advanced AI enhancements. This means better image processing, especially in low-light situations. You’ll get sharper, more detailed images with less noise, making your night shots look stunning without needing any editing.
  • Improved Ultra-Wide Camera: The ultra-wide camera has also seen some upgrades, making it easier to capture stunning landscapes and group photos with more clarity and depth. It’s perfect for those wide-angle shots that need to show every detail without distortion.
  • Cinematic Mode 2.0: Apple’s Cinematic Mode was a game changer for video lovers, and the iPhone 16 takes it to the next level. You can now shoot in 4K HDR at 60 frames per second, which means your videos will look smoother and more professional than ever. This upgrade is perfect for content creators or anyone who wants to capture life’s moments with a cinematic flair.

Battery Life: Power That Lasts All Day

Battery life can make or break a smartphone. While the iPhone 15 offered solid battery performance, the iPhone 16 stretches it even further.

  • More Efficient Power Usage: Thanks to the A18 Bionic chip, the iPhone 16 is more power-efficient, meaning you can expect better battery life even under heavy use. Whether you’re streaming, gaming, or multitasking, the iPhone 16 is designed to keep up without needing constant recharging.
  • Faster Charging: The iPhone 16 now supports up to 35W fast charging, compared to the 27W on the iPhone 15. This means you’ll spend less time plugged into a charger and more time using your device. Wireless charging has also been improved, making it quicker and more convenient to charge your phone on the go.

Software: iOS 18, a Perfect Match for the iPhone 16

Both the iPhone 15 and iPhone 16 run on iOS 18, but the iPhone 16 comes optimized to take full advantage of Apple’s latest software update.

  • Live Widgets: iOS 18 introduces live widgets that are more interactive and dynamic, and the iPhone 16’s improved processor ensures they run smoothly without any lag.
  • Smarter Siri: Thanks to the iPhone 16’s enhanced AI capabilities, Siri is smarter and faster. You can now ask complex questions, control more aspects of your phone, and even use Siri offline for certain tasks.

The combination of iOS 18 and the hardware upgrades in the iPhone 16 makes for a more responsive, intuitive, and powerful smartphone experience.

Sustainability: Apple’s Ongoing Green Commitment

Apple has been on a mission to become more eco-friendly, and the iPhone 16 continues that journey. While the iPhone 15 already made strides in sustainability, the iPhone 16 doubles down.

  • More Recycled Materials: The iPhone 16 uses even more recycled components than its predecessor. Apple has increased the use of recycled aluminum in the frame and rare earth elements in the internal components, helping reduce the environmental footprint of each device.
  • Carbon Neutral Option: Apple offers a carbon-neutral version of the iPhone 16, continuing its goal of becoming fully carbon neutral by 2030. If sustainability is a factor in your purchasing decision, the iPhone 16 is a clear winner.

So, Should You Upgrade?

This is the big question: Is the iPhone 16 worth upgrading to if you already have the iPhone 15?

  • Upgrade for Performance: If you’re a power user who craves the latest technology, the A18 Bionic chip’s speed and efficiency will likely make the iPhone 16 feel like a significant improvement.
  • Upgrade for Photography and Videography: The camera upgrades, particularly for low-light photography and video recording, make the iPhone 16 a compelling choice for anyone who values high-quality visuals.
  • Upgrade for Future-Proofing: With features like Wi-Fi 7 and better 5G performance, the iPhone 16 is ready for the future, ensuring you stay connected at the fastest speeds available.

However, if you’re happy with your iPhone 15 and don’t feel a pressing need for the latest upgrades, you might be just fine waiting for the next release. The iPhone 16 is undoubtedly an impressive device, but it’s not a must-have for everyone.

Final Thoughts

Apple has continued its tradition of delivering cutting-edge technology with the iPhone 16, packing it with meaningful upgrades in performance, camera capabilities, battery life, and sustainability. The decision to upgrade ultimately comes down to your personal needs and how much you value these enhancements. If you’re ready to embrace faster speeds, better photography, and future-proof connectivity, the iPhone 16 could be the perfect fit for you.

read more
Technology

What Are The Roles of Technology in Tracking Our Healthcare?

Technology is one of the greatest creations of mankind; it has boomed significantly in the recent decade. Technology advancements have impacted all aspects of our livelihood and the medical field. While medical professionals can perform better diagnoses using advanced equipment, patients are now availing better treatments. The use of technology in tracking our healthcare has opened many doors accessible from our palm of hand.

What Are the Benefits of Patient Tracking Systems in Hospitals?

The progressive nature of technology will bring more glory to the medical field in the coming years, let’s dive into some of the most crucial scenarios where the advancement of technology benefits in tracking today’s healthcare.

Digital Transformation in Healthcare with Smart Technology

Smart Technology refers to the utilization of artificial intelligence, cloud computing, machine learning, and big data analysis to facilitate modern technological features that did not exist earlier.

In the healthcare field, professionals use smart technology to monitor patient movements on the bed and alert the nurses when necessary. An AI-powered inventory management system can keep track of the inventory, and order supplies automatically when required.

So, what are the other uses of technology in tracking our healthcare? Let’s find out. 

Greater Care for Patient

The use of smart technology has increased patient engagement globally. It also enhanced personalized wellness an health plans using insightful data. Wearable devices such as fitness bands and Fitbits are among the most common wireless devices used vastly to monitor electrocardiographs (ECG) and blood pressure assisting both the specialist and patient to access personalized data.

Medical specialists are now efficiently able to keep track of patient’s health status. When it comes to elderly patients and the ones living alone, their family members or concerned health professionals are alerted promptly of any abnormality detection.

Such kind of health gadgets not only ensures greater healthcare services for patients but also enhance overall health quality for all.

Eliminating Medical Errors

Errors in Medical Statistics are one of the major concerns today which leads to inevitable circumstances in healthcare performance. The global index shows that the third most common cause of death revolves around errors in medical reports at hospitals.

Thanks to the smart technology that facilitated the Clinical Decision Support System (CDS). The CDS system has proven to efficiently eliminate medical errors, ensuring life-saving treatments.

The system provides patient-specific data and other important medical information to healthcare professionals. All the collected data by CDS are accurately filtered and sent to medical professionals at required times, enhancing their decision-making at critical moments.

By utilization of smart technology in tracking our healthcare and medical treatments, so far we have achieved to eliminate 55% of serious medication errors and 83% of overall medical errors; thus the system has aided better diagnosis for healthcare service providers.

Reducing the Cost of Medical Operations and Treatments

Medical operations and treatments have become more cost-effective with the improved quality of healthcare. It is vastly the result of utilizing smart technology in healthcare services. Improvement in patient outcomes also leads to a decrease in health difficulties and less requirement for follow-ups.

The use of technology in tracking our healthcare has resulted in enormous benefits such as breakthrough medical treatment facilities, improvement in clinical outcomes, and better financial management. Due to improvements in care flow for patients, more people are now involved actively in medical decisions compared to past days.

When a common person has a better understanding of the potential of advanced technology for media care, we can hope for even greater accomplishment shortly. Furthermore, it is a fact that technological impact on the medical field is consistent and hugely evident in the healthcare industry.

With society’s ever-growing reliance on advanced medical technology, it is obvious the trend of technological advancement in healthcare will only increase over time.

Wrapping Up with Smart Technology for Healthcare Services

 The healthcare field is certainly in the midst of a dramatic change resulting from smart technology and its digital transformation. This change in healthcare is efficiently paving the way for a greater medical future. With the available wider variety of treatments, greater accessibilities, and remote monitoring features, physicians are now able to utilize AI-powered data analysis, smart monitoring systems, and other technological tools to cater to better medical diagnosis in the healthcare industry.

On the other hand, common patients and individuals have access to better health monitoring and can stay cautious of any sort of health abnormalities with the use of smart technology.    


read more
Technology

A Complete Router Login Guide for Netgear, TP-Link, And Linksys, Asus, Belkin, Apple Airport

Wi-fi has always been a great option for accessing the internet. We can see a marginal landmark opting for this service for its certain users to provide exceptional internet space. Most of the services are dominated by D-Link, Belkin, Asus, Cisco, Apple Airport, NetGear, Huawei, TP-Link, Linksys, etc, routers.  Most of them come with a default login username and password. So, without connecting to any of these asking you a login details then you can enter administrative details into it. Hence, if you wish for a password-protected Wi-Fi network then it should help you get into the available network.

We have been into this research to get you a complete router login guide for NetGear, TP-Link, Linksys, Asus, Belkin, Apple Airport, etc. Resetting your device or network setting will wipe out all remembered Wi-Fi networks. If you struggling to remember usernames and passwords, there here we going to share with you all available complete login guides for mostly used routers. So, facing problems to connect a password-secured Wi-Fi network should definitely help log into password-protected WiFi networks.

Complete Login Guide for All Routers

Knowing the router brand or manufacturer you can provide a login database and surf the internet connecting to the available Wi-Fi signal. The router brand and model can easily be found on the router itself. Depending on the router brand and model we are going to list out the default login database for all popular router devices.

But before you get into the Wi-Fi connection process, you may need to reset the router to the default setting. As you may come to know the given database for the Wi-Fi login guide going to be the default password and username. Make sure the router is on the default login interface and if it is not you should reset it to the default mode. So that, you will be able to use the login guide or login details from the list.

How to reset Router to Factory Settings?

Most of us change the router’s login database with the proper username and password to secure the network. But sometimes strong passwords could trigger difficulty for you as well. The convenient process is to reset your router and then you can again manage your router device with a default password and username. Every router does come with an easy Factory reset feature to restore all settings to default. Here is how to reset the router using the physical reset button below-

  • To do so, first of all, power up your router device.
  • Two types of Reset buttons, one is a physical button and another one is a Reset hole. Push and hold the Reset button for at least 5 seconds and the same with the other Reset hole using a paper clipper or pen tip.
  • The LED light should blink after 5 seconds push and hold to the button or hole.
  • After that, the router device should restart by itself.

Following the shown steps should revert your router’s login database to default. And now you can use any of the following login usernames and passwords for certain router devices such as TP-Link, NetGear, Belkin, Asus, Cisco, Linksys, Apple Airport, and much more. After completing the steps, here you all need to enter your Wi-Fi router admin interface.

Login Database for TP-Link, NetGear, Belkin, Asus, Cisco, LinkSys, Apple Airport

In case you are looking for your router’s default username and password then you can follow the below given list. Depending on your device brand and model the login guide may differ. Hence, to make it convenient, here are the default password and username.

  • D-Link Username and Password List
  • Asus Router Username and Password List
  • NetGear Username and Password List
  • Belkin Username and Password List
  • Cisco LinkSys Router Username and Password List
  • TP-Link Router Username and Password List
  • And other mostly used Username and Password List

TP-Link Router Username and Password [Login Guide for TP-Link]

TP-Link Router Model NameDefault TP-Link Router Password Default TP-Link Router Username
AC1750adminadmin
TL-WR541Gadminadmin
TL-WR841NDadminadmin
TL-WR941NDadminadmin
Archer C2adminadmin
TD-W8901Gadminadmin
TL-WR542Gadminadmin
TL-WR642Gadminadmin
TL-WR641Gadminadmin
TD-8961NDadminadmin
TD-8961NDadminadmin
TL-WR642Gadminadmin
TD-8616adminadmin
TL-WR720Nadminadmin
Archer C1200adminadmin
TL-WR542Gadminadmin
Archer C9adminadmin
TL-WR740Nadminadmin
Touch P5adminadmin
TL-WR542Gadminadmin
Archer C7adminadmin
TL-WR2543NDadminadmin
TL-WDR4300adminadmin
TD-W8151Nadminadmin
TL-WR1043NDrootadmin
TD-W8910Gadminadmin
TL-WR1043NDrootadmin
Archer D5adminadmin
TL-WR340GDadminadmin
TD-W890iGadminadmin
TL-WR340Gadminadmin
Archer C50adminadmin
TL-WR1043NDrootadmin
TL-R600VPNadminadmin
TL-WR541Gadminadmin
TD-854Wttnetadmin
TL-WR541Gadminadmin
Archer C5400adminadmin
TL-WR1043Nadminadmin
TL-WR340Gadminadmin
TL-WA7210Nadminadmin
TL-WR841NDadminadmin
TL-WR1043Nadminadmin
TD-W8960Nadminadmin
TL-WR841Nadminadmin
TL-R460adminadmin
TD-8810adminadmin
TD-W8980adminadmin
TL-MR3240adminadmin
TD-W8951NDadminadmin
TD-W8960NBadminadmin
TL-R470T Plusadminadmin
TD-8800adminadmin
TD-W8980adminadmin
TL-MR3420adminadmin
TD-W8950NDadminadmin
TL-R402Madminadmin
TD-W8920Gadminadmin
TL-MR3220adminadmin
TD-8816adminadmin
TL-ER5120adminadmin
TD-W9810Gadminadmin
TD-W8961Nadminadmin
TD-8817adminadmin
TL-R402Madminadmin
TD-8840adminadmin
TL-R460adminadmin
TD-W8961NTadminadmin
TD-W8970adminadmin
TD-W8960Nadminadmin
TL-WR743NDadminadmin
TL-WR740NDadminadmin
TL-WR842Nadminadmin
TL-WR741NDadminadmin
 adminadmin
TL-WR940Nadminadmin
TL-WR741Nadminadmin
TL-WR842NDadminadmin

Asus Router Default Username and Password List [Asus Router Login Guide]

Asus Router Model Name Asus Router Default UsernameAsus Router Default Password
AM602adminadmin
DSL-N55Uadminadmin
G-136adminepicrouter
RT-AC1900Padminadmin
RT-AC56Radminadmin
AAM6310adminadmin
RT-AC56Uadminadmin
RT-AC66Radminadmin
AM604adminadmin
RT-N12adminadmin
RT-AC5300adminadmin
RT-AC3200adminadmin
RT-AC66Uadminadmin
RT-N15adminadmin
AAM6000EVrootroot
RT-N12B1adminadmin
RT-AC3100adminadmin
RT-N11adminadmin
RT-N16adminadmin
RT-G32unkownunknown
RT-N10Uadminadmin
RT-ACRH13adminadmin
RT-N10adminadmin
RT-N15Uadminadmin
DSL-N13adminadmin
AAM6010EVadminadmin
DSL-N11adminadmin
WL600gadminadmin
RT-AC88Uadminadmin
RT-N10Eadminadmin
AAM6010EV-T4Admin Admin
WL550gEadminadmin
RT-AC68Padminadmin
WL700gEadminadmin
RT-AC68Radminadmin
4G-N12adminadmin
RT-AC87Radminadmin
RT-N65Radminadmin
DSL-N10Eadminadmin
RT-N66Uadminadmin
RT-AC87Uadminadmin
RX3041adminadmin
RT-N56UB1adminadmin
RT-AC68Uadminadmin
WL520GCadminadmin
AM604Gadminadmin
WL520GUadminadmin
RT-N66Radminadmin
WL-530Gadminadmin
TM-AC1900adminadmin
RT-N65Uadminadmin
RT-N66Wadminadmin
WL-520Gadminadmin
RT-N56Uadminadmin
WL-500Wadminadmin
WL-500GPadminadmin
WL-520GUadminadmin
RT-N53adminadmin
WL-530gadminadmin
RT-N66Uadminadmin
WL-700GEadminadmin
WL-500Gadminadmin
WL500g Deluxeadminadmin
RX3041-Gadminadmin
WL-520GUadminadmin
WL500GPadminadmin
WL-520GCadminadmin
WL-566GMadminadmin
RX3041Hadminadmin

NetGear Router Default Username and Password [NetGear Router Default Login Guide]

NetGear Router Model Name NetGear Default Username NetGear Default Password
EVG2000adminadmin
Xtreme DIR-825adminadmin
DG814adminadmin
CG3000Dadminadmin
DG632adminadmin
DG834GUadminadmin
DG834adminadmin
CG3100adminadmin
AC1750 C6300adminadmin
DGN1000adminadmin
DG834GTadminadmin
DG834Gadminadmin
CG3000Dadminadmin
DGFV338adminadmin
DG834Nadminadmin
AC790Sadmin0000
DG480adminadmin
DG934Gadminadmin
DGN2000adminadmin
7550adminadmin
DG834GSPadminadmin
DG824Madminadmin
CG4500BDadminadmin
DGN1000SPadminadmin
DG834PNNone1234
AC1600 adminadmin
DGN3500adminadmin
DGND3700adminadmin
DGND3300adminadmin
DM111PSPadminadmin
CG3100D-2adminadmin
DM602adminadmin
DGN2200adminadmin
C6250EMRadminadmin
DGN2200Badminadmin
CVG824Gadminadmin
CG3101Dadminadmin
CGD24Gadminadmin
D7000 Nighthawk AC1900adminadmin
CG3000adminadmin
CG814WGadminadmin
CGW814WGadminadmin
C3000 N300adminadmin
FR31412341234
CBVG834Gadminadmin
FVG318adminadmin
FR318adminadmin
CG814Wadminadmin
D6300adminadmin
CVG834G12341234
CG814GCMRadminadmin
TA612Vadminadmin
CG814WGadminadmin
FR114Wadminadmin
FR328Sadminadmin
AirCard 782Sadminadmin
CGD24Nadminadmin
UTM5adminadmin
VMDG480adminadmin
FR114Padminadmin
FV318adminadmin
VMDG280adminadmin
FM114Padminadmin
CBVG834Gadminadmin
MBR814Xadminadmin
FVS318Gadminadmin
FWG114Padminadmin
MBR1210adminadmin
Nighthawk R8500adminadmin
FVS318adminadmin
MR314adminadmin
FVX538adminadmin
FVS336Gadminadmin
KWGR614adminadmin
MR814AdminAdmin
FVS338adminadmin
ME102adminadmin
MBR624GUadminadmin
FVS328adminadmin
Nighthawk R7000adminadmin
HR314none1234
FVS124Gadminadmin
FWG114adminadmin
FWAG114adminadmin
R7000adminadmin
FVS114adminadmin
RM356adminadmin
FVL328adminadmin
RH340adminadmin
R6300adminadmin
R9000 Nighthawk X10adminadmin
Nighthawk X6 R8000adminadmin
RP114adminadmin
R8500adminadmin
RP614adminadmin
RT314adminadmin
R6400adminadmin
RT311adminadmin
RT388adminadmin
Super Hub 2adminadmin
R6100adminadmin
RO318adminadmin
WGR613VALadminadmin
WNDR3300adminadmin
WNDR3700adminadmin
WNDR4000adminadmin
WNDRMACadminadmin
WGR614adminadmin
VMDG480adminadmin

Belkin Router Default Username and Password [Belkin Router Login Guide]

Belikn Wifi Router ModelBelkin Router Default UsernameBelkin Router Default Password
F5D5230-4 blank
F5D5730auadminadmin
F5D7010 blank
F1PI24EGau blank
F5D6231-4 none
F5D7231-4Punknownblank
F5D6231-4 0000
F1P1243EGau iiNet blank
F5D7130UK blank
F5D7630 blank
F1Pl242ENaunoneblank
F5D7633-4blankblank
F5D7231-4blankblank
F5D6230-3blankblank
F5D7633au4Ablankblank
F5D7630-4blankblank
F5D7230-4blankblank
F1P1242EGaublankblank
F5D7234-4blankblank
F5D5231-4Adminblank
F5D5630au4Adminblank
F5D7633-4A blank
F1PI241ENau blank
F9K1110 blank
F5D8233-4 blank
F7D3301 blank
F7D2301 F7D4302 blank
F5D8236-4 blank
F7D1401Noneblank
F5D8230-4 blank
F7D4402 blank
F5D8631-4 blank
F7D3302 blank
F5D8635au4A blank
F9K1002 blank
F5D8231-4adminblank
F7D2401 blank
F5D8630-4 blank
F9K1002nonenone
F5D8235-4blankblank
F5D9230-4blankblank
F5D8632-4blankblank
F9K1001blankblank
F5D8232-4blankblank
F7D1301blankblank
F6D4260-4blank0000
F9K1003noneblank
FSD7230-4blankblank
F5D7634-4blankblank

Cysco LinkSys Default Username and Password [LinkSys Default Login Database]

Cysco LinkSys ModelLinksys Default UsernameLinkSys Default Password
RT41-BUadminadmin
UTA200-TMadminadmin
WAG120Nadminadmin
BEFSRU31adminadmin
EA6100adminadmin
EA9200adminadmin
E8350adminadmin
E900adminadmin
EA9500adminadmin
BEFSX41useradmin
EA8500adminadmin
EA4500 Smart Wi-Fiadminadmin
EA6900adminadmin
E4200adminadmin
EA7300blankadmin
EA6350adminadmin
BEFSR81adminadmin
EA6500adminadmin
AG241adminadmin
EA2700adminadmin
HR200 Network Everywhere NR041lynksys0000
BEFSR11adminadmin
RT31P2adminadmin
HG200adminadmin
BEFDSR41Wadminadmin
E1550adminadmin
BEFW11P1blankadmin
E1000adminadmin
AM300adminadmin
E1200blankadmin
E2500adminadmin
BEFSR41blankadmin
E2100Lblankadmin
E3200adminadmin
AG300adminadmin
DD-WRTadminadmin
RV042adminadmin
BEFN2PS4adminadmin
E3000adminadmin
E1700adminadmin
BEFCMUH4adminadmin
WAG160Nadminadmin
BEFVP41adminadmin
RV042adminadmin
AM200adminadmin
E2000adminadmin
E1500adminadmin
WAG160Nadminadmin
BEFW11S4adminadmin

Conclusion

Now you have all the databases for all types of router login. Just make sure your router device is in default settings to get into the administrative interface. We have list out all of the default usernames and password for certain models. The router brands like TP-link, D-Link, Cisco Linksys, Asus, Belkin, Netgear, etc, all have been included in the list. So, without any wait restore to default setting your router to use these common passwords/usernames. However, after making it to the router admin interface, be sure to change your username and password to make your Wi-Fi network password-protected. Also, bookmark this page, so the in future if you forget your own wifi setup and then reset the device, this password can be used. Hope you like this detailed router login guide, then you can also check the next topic on 192.168.0.1 Login Page, Username, Password and Wireless settings, Funny Wi-Fi names-Way to make your SSID Different and Linksys Router Login & Modem Issue Fix.

read more
Technology

192.168.0.1 Login Page, Username, Password and Wireless settings

192.168.0.1 is an IP address that is necessary to get access to the router settings or configuration. This IP address is a default address that is used by many router manufacturers.  You can even change it and use a different one. In the market, you will get various brands of routers that use a default IP address which needs to remain in a certain range and when you change this default IP address then it too needs to be in that range. Before diving into the core settings of the router management console, you need to have some basic information regarding what is router.

192.168.0.1 – 9

It is an electronic connection device that is used to process server and client requests throughout the network. All requests on the network are called packets and the router needs to dispatch those packets to their address. As there are many different brands of routers, there are also different router types. At first wire routers were popular and all systems needed to be connected through wire. But as requirements are high and flexible so with advanced technology Wi-Fi routers are developed. This IP address is a private address and every router’s default address differs in this address. That means whenever you want to change any settings of the router of any brand you need to login through its private IP address which might be 192.168.0.1.

Steps for router login page

Whenever you need to configure a network in any place you need to configure all its settings on the router. To change any settings you need to go to the router control panel or management console. To get access to the control panel you need to connect the router with a system through a LAN cable. Before connecting the router you need to check whether the LAN driver is present on your system.  If you have a LAN driver then connect the router through cable to the LAN port. If it is connected then a notification will generate on the bottom left corner of your desktop.

Now you have to open a browser and type the default IP address like http:// 192.168.0.1. If your connection is successful then it will load and open a login page of the router’s main control panel. On the login page, you need to enter the username and password of the router settings. The default username and password of routers are the same for many brands. You need to try using the username- Admin and Password-Password or both admin. If you are facing any problems then you can get help from the router manual book.

192.168.0.1 Wireless Settings

It is recommended that all the default usernames, passwords, and IP addresses be changed. Hackers might try to get access to your wireless network. If they get access to your router control panel then they can steal your valuable information on the network.  To keep all your information secure you must need to change the default router settings.

Change 192.168.0.1username and password

After successfully login to the control panel of the router you will be redirected to the settings page. On the left side of the page, you will get many options from where you need to click on Security. On clicking on security a new page will open where you need to enter your new username and password. The settings option might vary from router to router but the basics always remain the same. On some routers, you need to click on the security tab or setup tab.

On the left side, you will get many options, from the many clicks on the wireless or wireless settings. In the wireless settings, you can name your network of choice. Here you can also assign a new IP address for your network.  There will be many options on wireless settings, if you are a newbie then it is recommended not to alter any other settings. Different router brands come with different management consoles, but if you are familiar with any console then you can easily get familiar with others.

Readers, please check the content on A Complete Router Login Guide for Netgear, TP-Link, And Linksys, Asus, Belkin, Apple Airport, and Funny Wi-Fi names-Way to make your SSID Different.

Conclusion:

The router control panel is simple and to get access to its panel you need to have the private address and default login credentials. Every router control panel comes with lots of customization options which takes time to get familiar with. Never disclose your router control panel access credentials to others. It is recommended that you change your credentials after regular intervals as it ensures more security. We hope that the provided information will be of help to you. If you face further issues do leave a comment below and let us know.

read more
Technology

How To Install Kodi on Amazon Fire Stick TV?

In Amazon Fire Stick TV, Kodi is using to manage your media files. By default, the user cannot be able to install Kodi on Fire Stick from the app store. However, here in this topic, we will show you the systematic process of how to download and install Kodi on Amazon Fire Stick TV. Kodi not only helps you to manage and view your media file only in Fire Stick, but it works on the other platforms including the Xbox One also. It also helps you to stream media from more than 100 of sources across the whole world. Kodi is one of the user-friendly as well as attractive applications for the users to use in the Fire Stick TV.

There are many ways available until now through which you can quickly install Kodi on Amazon Fire Stick TV. The process to download and install this Kodi software is very simple, and just within 10 minutes, you can complete the task easily. Nowadays, users use this software to stream and manage files on their Android phones, Windows, Linux PCs, and many more. If you are an owner of Amazon Fire Stick TV, then follow this content about how to install Kodi on Amazon Fire Stick TV.
Systematic Guide – How to install Kodi on Amazon Fire Stick TV?
At first, we want to tell you that to install Kodi on your device; there is no need to root that particular device. Be sure that you have connected your device with the proper internet connection such that it will save your time in completing the whole process. Without taking more time let us have a look at the process about how to install Kodi on Amazon Fire Stick TV.
Step 1: Open the Settings menu of your Device:
The first step you need to perform is to turn on your device and open the Settings menu. From that menu, choose the second option, i.e. the Device icon. This option has full permission to control your app installation process and all.
Step 2: Select the Developer Options:
In this step, after clicking on the Device icon, it will navigate you to the Developer options. It is the second option listed in the Settings menu.

Step 3: Now allow app installation from Unknown Sources:
By default, the device OS does not allow you to download any apps except choosing from the app store. If this setting is turned off then, you need to enable the app installation from the Unknown Sources. To enable this feature, you need to click on Developer Option and tap on Apps from Unknown Sources to turn it ON.
Warning: Allow installation of applications that are not from the App Store. Turn this option On only if you install apps from a reliable source as a developer.
Installing the app from unknown sources may raise the security issues that cause your system to malfunction. While you install Kodi on an Amazon Fire Stick TV, make sure about the security and other convenience in device performance.

Step 4: Install the Downloader App:
We already told you that our motto is to provide you with the best and simplest free way to install Kodi on Amazon Fire Stick TV. Therefore, you need to visit the Amazon App Store and acquire the app name Downloader which is completely free to own. Now click on that app and wait until it installs in your system successfully.

Step 5: Visit the direct Kodi website using the Downloader App:
Hope you have successfully downloaded the Downloader application in your system without any issue. If you are complete, then open the Downloader app and enter the URL http://www.kodi.tv/download in the URL bar under a Home section of Downloader app. After that, you have to tap on the GO button. It is the best URL to download the Kodi app. You can also choose other URL instead of this one.

Step 6: Choose the Android application:
The operating system of the Amazon Fire TV is Android-based. Therefore, the Kodi Android App will work very fine on the Amazon Fire TV stick.

Step 7: Choose a 32-bit type installation:
The 32-bit Kodi v17.1 is the recommended, best, and most suitable application to install on an Amazon Fire TV stick. Rather than that if you want to experience the other versions, then you can also go for that. Now click on the Install button to start up the downloading of the file and installation process as well. Wait for the time to complete the whole process, and it may vary depending on your internet speed and connection status.

Step 8: Customise the Kodi app:
As with the other applications available in Kodi, you can easily customize it depending on your needs. You can share, stream media files, and manage them according to your taste. Also, install Ad-On that may become helpful to you in any aspect. This app also allows you device access like remote media server (must having USB port), network access, Bluetooth devices, etc. Besides that, you can change your audio settings, prevent Fire Stick from sleeping and others.
Now your Kodi app is almost ready to use in your Amazon Fire Stick TV. Further, if you need to change the settings of this app according to your needs, you can do it easily. Otherwise, you can keep it by default to its recommended settings such that you can use it without any issues.


Conclusion:
That is all about the systematic guide ‘how to install Kodi on Amazon Fire Stick TV’ in an easy way. Hope you all are satisfied with the information given here about the installation of Kodi on Fire Stick. We always recommend you to use the above-discussed process because it is completely free and time-saving too in all respects. If you want, you can also go for another process, but they probably harm your device and start to malfunction at any time. Until now most of the users choose this above process to install the Kodi in Fire stick TV. Feel free and start to use this app in your Fire Stick now.

read more
Technology

How to Convert YouTube Videos to MP4 With VLC Media Player?

Do you know your favorite PC media player or VLC can also convert FLV files to MP4 format? Surprised! Well, yes, it is possible to do. Downloading videos from streaming sites like YouTube most YouTube Downloaders download it in FLV form. FLV is a popular format that is also known as Flash Video player. This format is used to deliver digital video content over the Internet using Adobe Flash Player. Yes, offline this video file format can be played but not many of the media players natively support it. If you have some of the FLV files then there is a chance to face some trouble. Most of the Smartphone native video player doesn’t support this format.

Yes, there is a lot of video converters to download, and can change the format of the FLV files. But if most of the premium video converters for PC cost a lot. Whereas the free version is useless with limited features. You can download a cracked version of the best video converter for your PC but again it is not good for your PC and user policy. VLC media player is an open-source, portable, cross-platform free media player and streaming media server developed by the VideoLAN project. It also doubles as an FLV to MP4 converter. Today, in this article we will let you know how to Convert YouTube Videos to MP4 With VLC Media Player because it is always better to try converting file format without downloading and installing another CONVERTER APPLICATION in your system.

How to Convert YouTube Videos to MP4 With VLC Media Player?

VLC is a widespread name among Windows PC users. It can play in almost any format video files and audio files. You can stream online videos on the go using this media player. The video player is free to download and available for most existing operating systems including Windows, MacOS, Linux, iOS, Android, and Windows Phone. It is most popular among Windows PC users and having a Windows PC, you might be using this awesome software.

Till now, you may not know that you can convert YouTube videos to MP4 using VLC Media Player. Well, there would a time when you need to use an offline FLV file and because of playback issue need to be converted. Or if you already facing the same problem here you can acknowledge HOW. Besides a Media Player application also double it as a converter and forget about other FLV converters for PC.

Convert FLV to MP4 using VLC

If your system doesn’t have this awesome Media Player then we suggest you to download the application first. As we already informed you, it is completely free to download for all platforms. Being free open-source media player still, there are no ads at all. So, proceed to download this software on your PC, if you are not enjoying this media player already.

Click Here To Download VLC Media Player.

After downloading the application, install VLC setup file. The installation is the same as usual. After installing the application follow the below given steps.

Please Note: To convert YouTube video or FLV files to popular MP4 format using a VLC media player, you will need the PC version only. You can’t do the same with other platforms’ VLC version. Therefore, we are sharing the FLV to MP4 conversion procedure using VLC Windows PC version.

Steps to be followed:

  • Open VLC Media Player, which you just installed. On Top-Left corner, you can see Media menu, select the option.
  • The very first option is Open File…, again choose this option. Or this action can be done directly using VLC shortcut keys. Press [CTRL] + [SHIFT] at the same time and followed by [O] key.
  • Now go to the FLV file directory or navigate to the folder you FLV files are stored. Select your desired YouTube Video or FLV video that you wish to convert. After choosing FLV video click on the Open button.
  • Play the video and again click on the Media menu on Top-Left Screen. In below you can see Convert / Save in the menu list. Shortcut Key for this action is [Ctrl + R].
  • Immediately you can see Window for media convert. Simply click on the Convert / Save button located at the Down-Right corner FLV video to new MP4 video file can be created using VLC Media Player.
  • One step more after Convert / Save, you can see another window. Tap on the Browse button to choose a directory for the new creating MP4 video file.
  • Now choose the desired folder destination for a newly creating FLV to MP4 with VLC Player, type a name for your new video and click Save button. And your convert YouTube Video to MP4 with VLC Media Player process is done. 

Conclusion:

So, in this way, you can convert a YouTube video to MP4 using VLC Media Player. It is really simple and not time-consuming. Instead of looking for the best converter to do the same on your Windows PC, we suggest you doing above shown video convert method using your favorite video player or VLC. Hope, this solution should help you a lot, as MP4 has become the universal video format for this generation. It compatible with all devices. So, from now, if any of your favorite FLV videos are not playing on your device and video player then convert it to MP4 easily with VLC Media Player.

read more
Technology

What Are The Best Teamviewer Alternatives?

Accessing your desktop using remote access software may help in many ways. You will be able to control your desktop even if you are not nearby. You can sort out many issues and even manage your files with ease. One of the best remote desktop software is the ‘Teamviewer’ which is a great tool to remotely access your desktop. There are a lot of alternatives, but choosing the right tool is a task.

Free TeamViewer Alternatives for Remote Support

Teamviewer is a handy remote access software for desktops that controls almost everything. This app offers a lot of features including file transfers between computers, desktop sharing, web conferencing, and remote access. It was specially designed to be compatible with Windows, Linux, Mac OS, iOS, Android, and even Chrome os. Although Teamviewer is a great utility tool it does not provide reliability as well as it is not simple enough to use. Moreover, security is one of the main concerns that most of the users are looking for a good alternative to this app. So here comes the question, are you looking for some Teamviewer Alternatives? Well in this article we have picked out some of the best alternatives that work as well as Teamviewer. Do have a look.

Best Teamviewer Alternatives:

  • Real VNC

You can use RealVNC as one of the best remote access software ever. The tool provides both free and paid versions of the Remote Desktop Client and was built on top of the VNC framework. Virtual Network Computing is an open-source technology and Real VNC is designed and developed on this platform. This tool is very reliable and offers a much more safe and secure connection than Teamviewer. This utility helps you to connect to a remote system or device individually. You can also connect to multiple PC’s behind a secure public IP Address.

Features:

  • File transfer,
  • Encryption,
  • Cross-platform remote control,
  • VNC authentication,
  • Chats.

Why should you choose RealVNC?

RealVNC is pretty reliable and offers features like chats, video conferencing, chats, encryption, collaboration tools, and more. The tool makes sure that your remote connection connects well to the receiving person from the other end.

Compatible Platforms:

  • Windows,
  • Mac OS X,
  • Linux,
  • UNIX,
  • Ubuntu,
  • Raspberry Pi.

Price: Use this app for free Private use, $30/desktop for Personal commercial use, and $44/desktop for Enterprise use.

  • Splashtop

This is one of the best alternative tools to Teamviewer. Splashtop offers both free and paid versions for both business and individual purposes. Although the app is for free when you are using it for your purposes only. You can use the tool for Free if you are using it for personal purposes on your computers. You can easily set up this tool on your Mac or Windows  PC and access Android and iOS devices. The app makes it easier to enjoy media remotely on other devices without any hiccups.

Features:

  • File transfer,
  • Stream audio and video,
  • Free for personal use up to 5 computers.

Why should you choose Splashtop?

Splashtop is a great remote desktop tool for remote access and troubleshooting problems. It makes life easier and more convenient. The tool provides an impressive user experience, is secured cross-platform, and is much cost efficient than Teamviewer. All these features make it a good alternative tool.

Compatible Platforms:

  • Windows,
  • Mac OS,
  • Linux,
  • Android and iOS.

Price: Free for 6 months, after that $1.99/mo for Individual use, $60/yr per user for business purposes.

  • Chrome remote desktop

Another one to add to the list is the Chrome remote desktop tool. It has been a good Teamviewer alternative which even does not need the requirement for installing any software. This is a free add-on for the Google Chrome and the most important part is that it is compatible to any platform running Chrome on it. This addon helps users to access any desktop and contents remotely from the browser itself.

Features:

  • Secured and Private use,
  • Files and folders accessible and Google Chrome-based remote desktop accessing.

Why should you choose Chrome Remote Desktop?

Chrome Remote Desktop is a pretty useful addon that will help you get your work done even without installing any software. You can complete almost all your work through the browser itself. This addon is simple to set up and it is available absolutely for free. You are getting a more secure connection with this tool.

Compatible browsers: Google Chrome

Price: Free

  • Mikogo

Mikogo offers a great deal for both business and individual purposes. The tool is a premium one which is used by many for commercial solutions. This is also an addon that does not require any software installation stuff or any plugins. Mikogo offers a lot of features to its users which include remote access to other systems, file sharing, live conferences, and much more.

Features:

  • Fully browser-based and does not require any software downloads or plugins.
  • You can remotely access any system and control it, transfer files, live video conference, Share documents, swap presenters, Free mobile apps, chat, and more.

Why should you choose Mikogo?

Mikogo comes with lots of features and the best value-for-money service. Add this extension to your browser and opening up to start your work is what made it so popular. The simpler setup of the tool does not even require the need to install any application or plugin.

Compatible Platforms:

  • PC,
  • Mac,
  • Linux,
  • iPhones,
  • iPads,
  • Android mobile devices.

Price: $13/mo for 3 participants, $19/mo for 25 participants, $39/mo for 25 participants & unlimited hosts and $78/mo for 25 participants with 3 session channels.

  • Windows Remote Desktop Connection

Window Remote Desktop Connection is a free tool that is available in the Windows version of the PC itself. You need to access the control panel of your system and set up the tool settings easily. Although you can’t control multiple PC using this nifty tool. This is a great utility tool for beginners who do not want to access other remote devices without installing any software or plugins.

Features:

  • Fast and complete access control over a remote PC,
  • Easy to set up and already built into Microsoft  Windows.

Why should you choose Windows Remote Desktop connection?

Windows remote desktop connection is a pretty simple and easy tool that is specially accessed designed and compatible to Windows os versions. This app is a great way to remotely access other devices or systems by establishing a secure connection.  If you are looking for a less bloated remote desktop client, Remote Desktop Connection is your best choice. The app is very useful for both beginners as well as professionals.

Compatible Platforms: Windows and Mac OS.

Price: Free, Built into Windows Professional, Ultimate, and Business versions.

  • WebEx Free

WebEx was designed by Cisco for various other functions other than just conducting meetings. The tool is premium yet free which helps you connect to different devices and systems through desktop or mobile apps. The app offers a lot of features to its users like remote access to other systems and devices, file transfers, live web interactions, and chat.

Features:

  • Free mobile apps,
  • Outlook Scheduling,
  • Conducting meetings and recordings,
  • Video conferencing,
  • Markup tools,
  • Password-protected messages, etc.

Why should you choose WebEx?

WebEx is a premium tool with a lot of features apart from just remotely accessing a desktop and sharing stuff with an established connection to other systems and devices. This is a must-have app for you before heading out to other options.

Compatible Platforms:

  • Windows,
  • Mac OS X,
  • Linux,
  • Mobile Apps.

Price: First free for 3 People, next onwards $24, $49 and $89/month for 8, 25 and 100 people respectively.

  • Ultra VPN

Ultra VPN tool is based on the VNC (Virtual Network Computing) technology. The tool is free to use and made compatible with windows os. You can use this tool to access other systems too. You need to establish a connection before accessing other remote devices and systems. The app is pretty fast to establish a connection which will help you transfer files very easily and rapidly.

Features: Complete remote access to desktop, File transfers, etc.

Why should you choose UltraVNC?

UltraVNC is a great handy and simple tool. The user interface is very easy and you will find it smooth as well as easy to operate. The app is available for free and lets you establish a fast connection within a few moments. You can use this app for remote access, file transfers, and controlling other connected systems as well.

Compatible Platforms: Windows

Price: Free

Final Words

Well these are the best remote access software which you can use by installing them in your PC. These are very helpful tools to command your control over other devices and systems easily from your desktop with ease. These tools and software act as the best alternative to the famous Teamviewer and are very secure as well as safe to use. Pick out the best tool for your system and share your experiences with us. We hope this article will help you out. We look forward to helping you out in the near future too. Till then signing off!

read more
1 24 25 26 27 28 70
Page 26 of 70