close

debjit

EducationTechnology

Top 5 Best Free Apps to Learn Language

As we all are learners there is no age limit to learn something new. Learning more and more languages rather than the mother tongue is not bad because everybody needs to know or be aware of some of the most common languages in our lifestyle. Somebody knows various languages but somebody does not know. So persons who do not know much language can learn these languages with the help of some Android applications which you can easily download from the Google Play store.

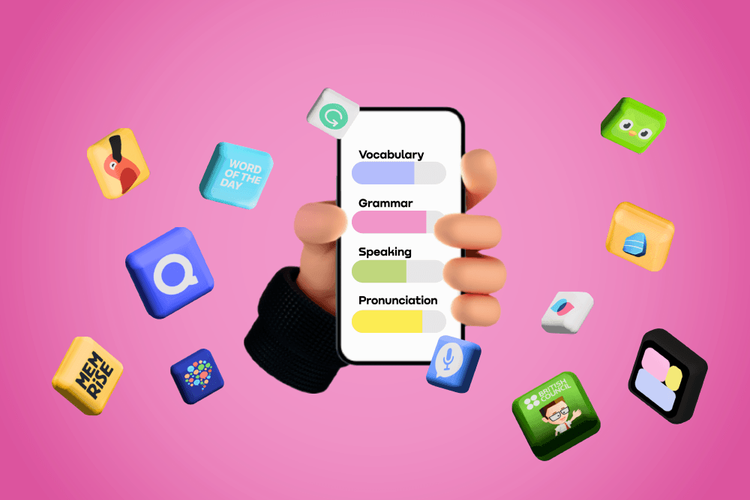
With the help of this application, you can also save your money in a way that you do not need to buy any extra books from the market. We will list out the top five best language learning application names for learning languages. Some users may be familiar with the names of these apps but some do not know about that apps. So follow up on the below-described applications to learn more.

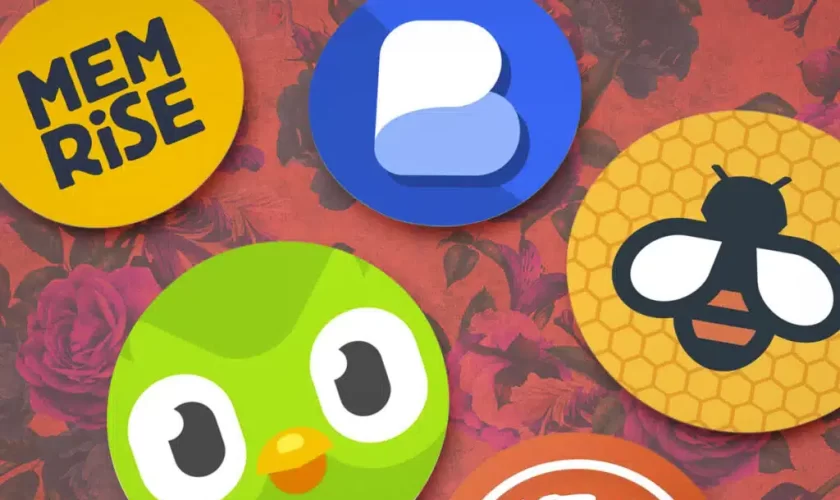
List of Top 5 Best Free Apps to Learn Language

Here we are going to explain the features of the best free Android applications for learning various languages easily through your smartphone. Let’s have a look at these apps below-

1. Duolingo –

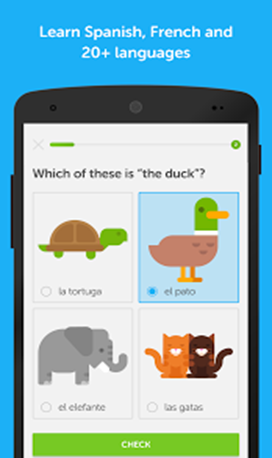
This is one of the best editor choice applications recommended for you all to learn a variety of languages according to your choice. It is a very fast and free app where you can able to read, write, and learn various languages comfortably. First,t this app allows you to learn the proper basic verbs, and sentence-making with the help of phrases and explore new words daily. This facility is available for each and every different language.

This app has been selected as the best of the best editor choice apps from the Google Play Store and the best language learning app by the Wall Street Journal. This affordable & fun language learning app provides the following languages to learn – (To download this app please Click Here)

  • English 
  • French
  • Spanish
  • Italian
  • Dutch
  • Irish
  • Russian
  • Turkish
  • German
  • Portuguese
  • Swedish

2. Memrise –

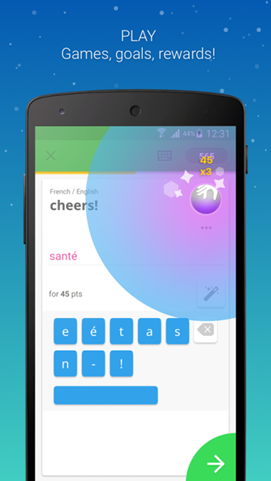
Explore your brain by unlocking your memory power by learning a language with the help of Memrise. This is also a new generation-based language learning technology with the help of your Android Smartphones. The content present inside this application can able to help near about 15 million people every day all over the world. Two million new phrases and words are learned by the learners with the help of a hat box, games to learn, etc. Even you can get about 30 Thousands of tutorial-type videos in your phone speaker.

The developers of this application are mainly language and linguist experts who work in a team together in one room to develop this language learning course.  This is one of the great jobs performed by the developer to develop and publish this app. The following languages are provided by this app – (To download this app please Click Here)

  • Arabic
  • French
  • Turkish
  • Japanese
  • Korean
  • Spanish
  • Chinese
  • Portuguese
  • Russian
  • Polish
  • Italian

3. HelloTalk –

HelloTalk is the first Android application that has been spread globally in the whole world. This app built up great connectivity between all the learners by providing all the global world-wide languages. This application provides more than 100 languages including all the common languages also. You can find out all those people who want to learn similar languages like you only. Start your conversation with the native speakers to practice your learning language via text and audio messages. Free audio and video conference calls also can be used to practice your listening, reading, and speaking skills.

Some of the other extra features like language grammar correction, translation of words, transliteration, voice-text conversion, and recognition of your voice are available to improve your speaking and writing skills. Some of the top languages out of more than 100 languages provided by this app are listed below – (To download this app please Click Here)

  • English
  • Chinese
  • Arabic
  • Indonesian
  • Gujarati
  • Nepali
  • Tamil
  • Telugu
  • Somali
  • Kannada
  • Danish
  • Latin
  • Thai
  • Persian
  • Marathi
  • Bengali
  • Hindi
  • American and More……..
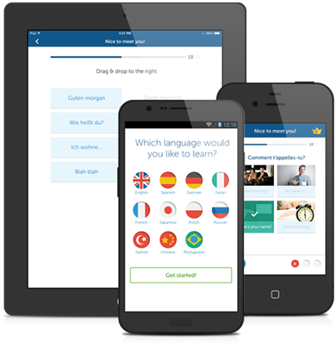
4. Babbel –

From the last user reviews it can be justified that more than 92 percent of the Babble app users are able to improve their language learning power just after approx. 2 months of using this app. Basically this application provides 15 languages to learn by the learners but don’t try all the languages to learn at the same time. This may hamper your memorizing power and can harm your brain. The developers of this app always regularly follow this app such that not a single learner will face any type of problems while learning from this app.

You can find one useful feature in this application i.e. learners can download content from this app for offline use purposes. On every topic, you can get a minimum 1 of 5 minutes of time elapsed. The following 14 languages are provided by this app – (To download this app please Click Here)

  • Danish
  • Dutch
  • Swedish
  • English
  • Turkish
  • Indonesian
  • Russian
  • Brazilian
  • German
  • French
  • Spanish
  • Norwegian
  • Polish
  • Portuguese

5. Busuu –

This is the most effective language-learning app from the past year. The Editors chooses to award this app as the best language learning app from the year 2015 on the Google Play Store. It provides various types of learning lessons like grammar tricks and tips, vocabulary, dialogues, writing sessions, pronunciation, n, etc. This is the best foreign language learning app that creates fluency in your language when you are talking with others. In a single language, you can get 3000 varieties of words with 150 separate topics to learn.

The offline mode provided by this application helps you to easily utilize this app wherever you want to go and have no internet connection. The languages offered by this app are listed below – (To download this app please Click Here)

  • Japanese
  • Chinese
  • Russian
  • Italian
  • French
  • German
  • English
  • Spanish
  • Turkish
  • Arabic
  • Polish
  • Portuguese

So, these are all the best language learning applications you ever find free to download from the Google Play Store. Rather than these apps also you can find many apps in the App Store but as we recommended the above five are the best of all. If you want to know about a single recommendation then Hello Talk can prefer first in your choice list as it provides more than 100 languages. Use your best choice app for learning various languages and just explore your memory by learning your needful languages rather than your mother tongue. Mother tongue is the first preference for your primary language to learn in your life.

read more
Game

Shadow Fight 2 Mod Apk

Many game lovers know that Shadow Fight 2 is a total power pack game for Android and iOS. However, do any of you know about the ‘Shadow Fight 2 Mod’ game? Yes, this game also exists on web for the Android mobile users only. The normal version of this game was released in the year 2015 globally, which catches the heart of everybody. Now, Shadow Fight 2 Mod is a special version of Shadow Fight 2 game, which you can install on Android devices easily. Without any doubt, you can say that this mod version is an amazing game until now for all. Gamers have at least some basic ideas who already played the regular version of this game. In this topic, we only discuss the Shadow Fight 2 Mod Apk with its features and everything.

One thing we want to clarify is that the Mod version of Shadow Fight 2 is not available to download from Google Play. Therefore, you need not get worried as the APK file of Shadow Fight 2 Mod is available on the web to download for free. In the normal version of Shadow Fight 2, you cannot make any types of changes or not able to do customize it. While in the mod version of Shadow Fight 2 you can customize it in your way. You also need not root your Android device to play the Shadow Fight 2 Mod game. Here we will guide you by discussing the complete process to download and install Shadow Fight 2 Mod Apk.

How to download Shadow Fight 2 Mod Apk?

Most Android users know the process to download any apk file from the web. Besides that, if any of you do not have any idea, then no need to get worried as the process of downloading is very simple. Follow the steps given below and perform the same on your device to start the process of downloading.

Step 1: While you start to download the Shadow Fight 2 Mod Apk, make sure that your phone is connected to the internet.  Even you also need to check that your phone completes the requirements to install this apk file.

Step 2: In this step open your web browser and search the Shadow Fight 2 Mod Apk file. Wait for the result and open any one of the web links from the list.

Step 3: While you open the website from the link, you need to find the proper download link or button and click on it once.

Step 4: Now the downloading will start on your phone and wait for a moment while the process is complete successfully.      

Step 5: After completion of the download process, the APK file will be saved in your phone’s memory.

Click here to download the latest version of Shadow Fight 2 APK.

Image result for shadow fight 2 mod app

How to install Shadow Fight 2 Mod Apk?    

If you have completed the download steps, then let us proceed to the installation steps of Shadow Fight 2 Mod Apk. To start the installation process, you need to follow the systematic steps, which are given in the points below.

Step 1: Before starting the installation process, you need to enable the installation from Unknown Sources. Therefore, you have to open the phone Settings and then scroll down to choose the Privacy SettingsNow inside the privacy settings, you will find the Unknown Sources option where you need to tap once or tick to enable it. If already enabled then ignore this action.

Step 2: In the next step, open the apk file from the download folder and tap on it once to start the installation.

Steps 3: While you click on the file, the installation window will open, and tap on the Install button, and hence, the installation process will start on your phone.      

Step 4: On completion of the installation process, you can launch this game by clicking on the icon created on the home screen of your phone.

Features of Shadow Fight 2 APK:

Before starting to play any game, it is required to know about the basic features of that particular game. Depending on this need, now we are going to discuss the basic features of this Shadow Fight 2 Mod Apk in the points given below.

  1. Get unlimited Energy: The first needful feature of Shadow Fight 2 Mod is that you can avail limitless energy. It means that while you are fighting with opponents, there is no need to worry about the energy. Using this mod version, you can get an unlimited supply of energy in every fight session.
  2. Access to Everything: In the normal version of Shadow Fight 2, there is limited access to the features of this game. While in the mod version of Shadow Fight 2, you can get access to every feature that remains hidden in the normal version of this game. Therefore, it is very helpful to access every feature during the gameplay.
  3. Avail unlimited coins and gems: In the virtual game world, coins and gems are very important as they work as a currency. Shadow Fight Mod 2 allows you to collect unlimited coins and gems and boost your game rapidly. You can buy more items in this game such that the needful resources of gameplay also get increased easily.
  4. HD Graphics: The overall graphics of this game is increased in the mod version. So, the visual effects also improve compared to the normal early version.
  5. Regular Updates: At last, another important thing you can get in this Mod version is regular updates. On a daily basis, you can get updates on battle logs with good hacks and other features as well.    

Image result for shadow fight 2 mod app

CONCLUSION:        

If you want to make the best modification in your Shadow Fight 2 game, then use this MOD version only. Hope you all will enjoy a lot in playing this Shadow Fight 2 Mod version rather than the normal one. This version has delivered the maximum features until now for all game lovers. You cannot be able to control your excitement once you start to play this game seriously. Without wasting your time, feel free to download and install the Shadow Fight 2 Mod Apk to feel the best experience. If you love to play this mod version, then share this information with your friends and other game lovers too.

FAQ:

Q: What is the latest version of Shadow Fight 2 Mod Apk?

A: The latest version of Shadow Fight 2 Mod Apk is 1.9.38 and last updated on 2 July 2018.

Q: What is the minimum Android version required to play this game?

A: To play this game you need to have Android 3.0 and up.

Q: How much free space is required to install this game?

 A: The file size of this game is 88.2mb, and you need to have a minimum 90mb or more free space in your phone memory.

Q: Does this game get regular updates?

A: Yes, this game always gets the proper updates to enhance the gameplay resources.

Q: To install this game, do we need to have a rooted Android device?

A: No, you do not need any rooted device to install and play this game. 

read more
Technology

PicsArt Apk Download

PicsArt Apk Download

Do you want the best photo editing cum camera app for your Android Smartphone? Yes, you can choose PicsArt which is a very good-rated photo editing app ever get in Google Play Store. PicsArt provides you with the best experience when you are going to edit any photos of yours and your favorite ones. One of the best creative tools you can get through this app is an instant sharing option to various social sites like Facebook, Instagram, Twitter etc.  This is the first collage maker application ever developed for the mobile platform. So start to Download the PicsArt application on your Android Smartphone and start using its benefits and tools regularly. Besides the editing tools, you can get other features like a camera, memes, clip art, stickers, custom drawing tools, etc.

You can increase your creativity in editing pictures through this app and show it off with your favorite ones as well as on social sites. PicsArt APK Download is totally free and all one feature you can get freely within this app only. Millions of users from across the world can create their own custom stickers and add to this app’s tools. So here users are going to learn about the features, downloading, and installation of PicsArt APK on their Android Smartphones.

How to Download PicsArt APK? 

Now users are reached in the downloading part of the PicsArt APK file. So here you will get some procedures and links to download the app for Android phones. 

  • You know that there is a web browser pre-installed on your Android phone. So click on the browser icon to open that browser.
  • Type the keyword like “PicsArt Apk Download” and start to search.
  • Keep patience and wait for the search results. You can get some links and sites which is the most up-to-date to download the apk file.
  • Open the site find the Download button or link and click to start the downloading process.
  • Once the downloading has been completed you can get the setup app inside your file manager.

To get the latest version of PicsArt APK download it on your Android phone then Click Here.

How to Install PicsArt APK?

Follow this guideline and perform the same on your phone to start the Installation process of PicsArt APK on your phone. So here are some detailed steps for you.

  • First, you need to open the APK setup from the file manager and click to start the installation. But you will get one on-screen pop-up warning of Installation Blocked. This happens because you are going to install a file from the Unknown Sources which is against the Security and Privacy of the phone.
  • Now you need to allow the installation from Unknown Sources by enabling it from phone settings.
  • So open the Phone Settings -> Security and Privacy option -> Unknown Sources -> Enable.
  • Now again you have to open the file manager and click on the setup App to start up the installation process.
  • You can open the PicsArt app from the App drawer menu once the installation has been completed.

Install PicsArt from the Google Play Store.

This is another procedure through which you can install the same app without using an APK file directly from the Google Play Store.

  • Initially, you need to sign in to Google Play using your Google ID. If already signed in then skip this test and do the next step.
  • Type the name of the App on the above search bar of Play Store and wait for the search result.
  • On the top of the list, you can find the App and click on it to get the Install button. Click on that button and then your installation will do automatically.
  •  Once the installation has been completed you can get the app icon on your home screen or inside the App drawer menu.

 To install the PicsArt App directly from Google Play then click on this Link.

Features provided by PicsArt APK.

Now you can know about the features provided by PicsArt Apk on your Android Phone. So go through the following points described below to get in-depth knowledge about it.

  1. This is the first app that provides you with he best collage-making feature on a mobile phone. PicsArt provides more than 100 no. of various templates through which you can collate your images easily through this app.
  2. Every day the PicsArt community has uploaded more than 1000s of images in high quality which you can explore freely.
  3. It helps you to make a grid style of images with some freestyles and collages which is a very easy way to share your pictures after editing is completed.
  4. Moreover, you can get 1000s of various editing tools that let you edit your favorite pic in a creative way. Change your normal photos in an artistic mode, apply HDR photo filter, crop, clone, stretch, add text with various fonts, apply frames, borders, etc.
  5. Inbuilt Prisma style effects also you to edit your photos.
  6. Apply the double exposures in your photo with adjusting transparency and layering. Edit your own pictures and your favorite ones with these creative features.
  7. Create your own stickers, apply memes, and texts, and share your own stickers with everyone. The community already created many custom stickers for the users on a daily basis.
  8. Get the Live effect camera in which you can apply filters or effects when you start to snap any photos.
  9. One inspirational feature is also there where you can show up your creativity by editing photos and sharing them in photo challenges and creative contests.
  10.  All these features provided by the PicsArt developing team in free to users, so install this app and enjoy yourself to remix your images now.

That’s all about the PicsArt APK Download hope you all got the complete information about all the features, downloading and installing this app on your Android phone. Most user loves this photo editing app compare to other photo editing app. On a regular basis updates, you can get many of the new features that will help you to enhance your photos more efficiently than before. All the links you can get from the above content to install the app as well as from Google Play. This is a recommended suggestion for you all who install the app for your phone only from trusted sites. Otherwise, your device may be harmed by viruses and bugs from our sources.

read more
Technology

Periscope for PC

Periscope is a live video streaming app, which is developed by Twitter Inc. This app allows us to broadcast live videos from any part of the world. Periscope is not made or available free for Windows PC. Just you can use this app officially on iOS and Android phones. Nowadays it seems that users want to use the Periscope for PC. In this topic, we will discuss the process of using the Periscope applications on PC as same Android as iOS. Do not think that there is any custom Periscope app developed for PC by any developers. However, there is an Android app emulator available on the web to download for free. Using that emulator app, you can easily run that Periscope Android app on your PC. So Blue Stacks is the most popular and recommended Android emulator PC to download and use it free.      

You can also say that Periscope is a social networking app in which you can meet new people daily. Watch the live videos broadcast by them to their friends and other followers too. To achieve all these things on your PC first download, the Blue Stacks PC file and then download the Periscope APK file on your PC. Therefore, from now you can easily broadcast your family videos, party videos, memorable occasions, birthday videos, get-together moments, trips, and much more. Periscope also provides you with a special feature as a replay option. If some of your friends miss, your live video then the replays option will help to play it again. In Instagram, these features are missing and after the live session, the video is not available to watch again. Without taking more time let us have a look at how to use Periscope for PC and start to learn about its exciting features too. 

How to download and use Periscope for PC?

As we already told you there is no direct Periscope installer, still developed or created for PC. So the user needs to use Periscope for PC by downloading the Android emulator Blue Stacks and Periscope APK file in their PC. Now we will show you the step-by-step guidelines to download and install Blue Stacks Android Emulator and Periscope APK files on your PC.

·      1st Step- How to download Blue Stacks Android Emulator on your PC:

First, we will talk about the process of downloading Blue Stacks Android Emulator on a PC. S you need to start up your PC and then keep it connected to the internet network. Open any one of the installed browsers on your PC and go to the URL bar. In that URL bar, type the words ‘download blue stacks for PC free’. Now it will show you the search result where you will get the official link of Blue Stacks site and other site links as well. Open any one of the top links and go through it to find the proper link to download the installer file. Click on the Link and hence the download will get started via the downloader or through your browser on your PC. Make sure you have chosen the correct path to save the installer of Blue Stacks on your PC. Wait for the time to complete the download process successfully. After completing the process of downloading successfully, now proceed to learn about the installing steps from the points below.      

Click here to download the latest version of Blue Stacks Android Emulator on your PC.

·      2nd Step- How to install Blue Stacks Android Emulator on your PC:

Hope you have successfully downloaded the Blue Stacks installer from the web to your PC. If you are done then now it is the time to install the emulator on your PC. So now, you need to open the folder where you have saved the Blue Stacks emulator installer after downloading it on your PC. Choose the installer file and double-click on it or Right click on it and choose Run as an Administrator. Instantly the pop-up installer dialogue will open where you need to agree or click OK to proceed. Thus, the installer window will open where you need to see the on-screen instructions and proceed to complete the whole installation process. Once you have completed the process of installation then the shortcut to launch the Blue Stacks emulator will be created on your desktop. Now open the Blue Stacks app by clicking on the launcher icon and log into the app using the Google ID to use the full-fledged features.  Hence, you are done with the download and installation of the Blue Stacks app.    

·      3rd Step- How to download the Periscope APK file on your PC:

Now we will show you the process to download the Periscope app on your PC. Open your web browser and start to search for download Periscope APK on your PC. After completing the search, the result will be displayed on your screen. Click on the preferred link and thus the download page will open where you will find the link to download the APK installer on your PC. Click on the download link to start up the downloading of Periscope on your PC. Now, wait for the process to complete up to the downloading successfully. Once the download has been completed the APK file will get saved in your PC.

Click here to download the latest version of the Periscope APK file on your PC

·      4th Step- How to install Periscope APK through Blue Stacks on your PC:

Hope you have downloaded the APK file of Periscope on your PC. If you are done, then open the folder where you have saved the APK file after downloading it on your PC. Click on the APK file and right-click on the APK Installer. Choose the option open with and then select the Blue Stacks app to open the APK file. Thus, the Periscope APK will start to install on your PC via the Blue Stacks emulator. During installation of the APK file in Blue Stacks, make sure you have turned on the installation from Unknown Sources by open Settings and then Privacy and the tick on Unknown Sources.  Once the installation has been completed, the icon will be created on the app page of the Blue Stacks emulator. Click on the Periscope App icon and login into it to enjoy the Periscope for PC.

Thus, you are done with the downloading and installation of the Periscope for PC using the Blue Stacks Android emulator. Without using the APK file, you can also open the Blue Stacks app, then go to Google Play, and directly download the Periscope app from there.  So, it is completely upon you which process you will choose to use Periscope for PC.

Image result for periscope for pc

Features of Periscope for PC:

Before using the Periscope for PC, it is required to know about the Features of the Periscope app. Let us have a look at the features of the Periscope app from the points given below.

  1. Apply the privacy to view the Live videos of yours by other viewers. You can also choose the private sharing of videos from the privacy option.
  2. Choose the Superfans from other users and see whether they are super fans of others else too.
  3. After starting with the Live videos, other friends will instantly get notified of it and they also join with it instantly.
  4. Follow and Unfollow people and even block the followers if you want any privacy.
  5. This app gets a link to the Twitter account and suggests friends from that network too. You can add the people from that network also.
  6. Meet up with new people and then start to share all your thoughts and interests with them.
  7. Around the whole world, you can start to connect with people who ever not known to you.

Conclusion:

Finally, we want to tell you that these are the complete ways to use Periscope for PC. If you also want to install and use Periscope on a PC, then follow the above steps and apply the same on your PC to use this app successfully. From now on, you can use this app easily on Windows 7, 8, 8.1, and 10. Hope your need will be fulfilled after reading this topic completely. If you are satisfied then share these steps with your friends and family members too. One thing we want to clear out is that it is recommended to use the Blue Stacks emulator to get the best results. Besides Blue Stacks, there is also another emulator present on the web. But try to use the Blue Stacks only to run the Android app on Windows as well as on Mac.   

read more
Technology

Make Pen Drive Bootable Without Software

First, we want to tell you why we need to make Pen drive bootable. There are many mini-notebooks available in the market which does not come with a DVD drive. Thus in that case, if you want to install the Operating System on your PC you need to install it by Pen drive or by external DVD drive. Maximum numbers of people generally use the bootable software directly to make their pen drive bootable. But do you know that there is another process available through which you can able to make your Pen drive bootable completely.

While you use the bootable software, it is sometimes found that some files get missing while creating the bootable pen drive using the software. Besides, without using the software you can create the bootable Pen drive using the Command prompt window. The Command prompt console window is generally available on all the Windows PC. Thus users need not get worried while making the pen drive bootable without software. So the complete process to make the pen drive bootable using the command prompt is discussed below. Without wasting more time let’s start to write about the process in detail below.

The Process to make Pen Drive bootable without Software:

As we already informed you by using the Command Prompt console we can easily make pen drive bootable without using any extra software. This CMD console process is very secure and safe thus there is no chance of malfunctioning while you are going to reinstall the Operating System on a Windows PC. Let’s start to have a look at the steps discussed below.

First Step: Download the Operating System .iso file:          

At first, user needs to download the Operating System file on their PC which they want to install after replacing the current Windows. Or if you have already downloaded the Windows .iso file then keep it safely in your drive. Make sure that there are no personal files saved in your ‘C’ drive. This drive will completely get formatted while you install the new Windows.

Now keep ready one Pen drive of Minimum 8 GB capacity or above for best result and process for the next step.

Second Step: Open the Command Prompt Window Console for making Pen drive Bootable:

The next step that you need to follow is to open the command prompt console window first. Make sure you have connected the Pen drive of a minimum of 8GB in your USB drive.  After opening the command prompt window as an administrator, enter the following codes which are described below.

  • At first, the user needs to type the code diskpart and press or hit the Enter button. While you have written this code on the console and press the Enter button, it will automatically refer you to get the details from the disk drive present or installed as hardware in your computer.
  • Now next you have to type the command list disk and hit the Enter button. Thus it will list out the available drives with details presently available in your computer. It will also show the total free space available in each drive of your computer.
  • Next, you have to choose the Pen drive from the list of the disk drive by entering the command select disk X. Where X is the number of the disk identity allotted automatically by the system to your Pen drive. For if the disk number is allotted as Disk 1 the type select disk 1 like this.
  • Hence Disk 1, for example, is getting selected successfully.
  • In the next step, you need to type the command clean and again hit enter. Thus the pen drive will start to clean its own memory space.
  • After successfully completing the cleaning process, try to enter the next command.
  • In the command, type create part pri and hit the Enter button. Now Windows will succeed in creating this drive as the primary partition successfully.
  •  Now type the command select part 1 and press Enter. Thus it is the selected current partition now.
  • Thus now it is the time to start formatting the pen drive by typing the command format fs=ntfs quickly and pressing Enter. The process of formatting will start and thus you need to wait until the whole process to format the pen drive will complete successfully.
  • After format, the pen drive then types the command active and press again Enter, which will make the partition active successfully.
  • Now type the command Exit and thus the process will complete successfully. Get ready now to proceed to the next step.

Third Step: Copy the .iso file of the new Windows:

 Now after leaving the command prompt console, directly you have to open the folder where you saved the .iso file of new Windows. Open that folder and find the image file in which you need to right-click once. After clicking on this file choose Open. Otherwise, you can double-click on that file to open the files. The internal files will open which you need to copy by pressing Ctrl + A >> Ctrl + C and then directly paste all the files on the Pen drive memory. Or you can open the pen drive and press Ctrl + V.  

That’s all after the copying is completed your pen drive is ready to boot your PC successfully. So you have created your pen drive bootable in a safe and secure way totally.

So this is the genuine and safe technique to make pen drive bootable without using any software. Hope you all are satisfied with the content that we have discussed here to create pa en drive bootable without any custom software.  If this topic is sufficient for you then try this method for once while you want to reinstall Windows by making your pen drive bootable.   

read more
Game

Ludo Bing APK Download- Guide to Learn

Ludo Bing is basically developed from an Indian game platform named Ludo, which is a very popular indoor game in real life. It is a very simple game compared to others and gives you a fine time pass to cover up your boring times. When you will start this game you can get random opponent from your opposite side. You need not to select the players or friends to play Ludo. This game has acquired a huge no. of installs and downloads thus helps in increasing the number of ratings on official Play store. This game has an option to play between 2 to 4 players or against your friends or even with the people from all around the world.

The main aim or objective of Ludo King Game is that each of the players will get 4 tokens and then these tokens will made a full turn on the board and then finish on the destination line which is pretty straight forward. Start to hit the other players and overtake them to reach the main goal before they visit that goal. The main reason to keep the Ludo Bing APK on your phone is that even you deleted or uninstalled that game from your phone, and then also you can install it anytime from APK file in absence of internet.

So in this below content we will tell you some of the best features of this game. As well as you can get the full information to download and install the APK file of Ludo Bing on your Android phone. So go through the below points and read carefully before downloading or installing this app on our phone.

How to download Ludo Bing APK on your Android Phone?

To download the Ludo Bing APK from the external 3rd party websites you need to go through the below steps completely. So start following the below steps and do the same on your phone.

  • You need to required initially one Android smart phone with Android version 4.0 or upper and RAM minimum up to 512 MB-1GB for best gaming performance.
  • Now open your phone web browser or any other installed browser like Google Chrome, UC browser etc. and search this game with keyword “Ludo Bing APK download” on the top search bar.
  • Once the searching has been completed now you can get the search result in which you need to select the latest up to date link to download the APK file. After selecting the download link your download will start automatically.
  • After the completion of download you can find it on the download folder of your phone memory or external memory card.

To download the latest version of Ludo Bing APK file you can click in this Link.

How to install the downloaded APK of Ludo Bing APK on your Android Phone?

Now it is the time to install the APK file of Ludo Bing APK on your Android phone for which you need to follow the below steps completely.

  • Open your download folder from the file manager of your phone where you can get the downloaded APK file in which you have to click for start the installation process.
  • You may now get one on screen warning pop where it’s showing that installation from Unknown Sources has been blocked due to phone’s Security and Privacy. Now you have to enable those settings or enable the installation from Unknown Sources by opening the Phone Settings -> Security and Privacy -> Unknown Sources -> Enable.
  • Now again open the APK file from your file manager-> download folder and then click the file to start the installation wizard.
  • The installation will starts by the mean time the app need to allow some permissions from your phone which you have to allow until the installation has been completed.
  • After installation you can get the game in your App drawer to open or start the game.

To install the Ludo Bing game directly from the Google Play you can click here.

Features of Ludo King Game –

Following are the best features which provides by this Ludo Bing game for all the android game players. So read out all the features to get aware about this game which is described below.

  • You can select your own players or randomly you can play with the players from across the world.
  • In this game you can create private table and to play that you can invite your friends and family.
  • There is an integrated chat box where you can chat or talk with your opponent players easily whiles you playing Ludo Bing.
  • Make your game environments and situation funny with the help of sending various Gifts.
  • After the game you can avail daily bonus to increase up your score.
  • In real time you can able to play with 2 and 4 players.
  • Special variation is there for Fast Ludo game.
  • Play the Snakes and Ladders with multiplayer mode.
  • You can play this game on offline with your friends.
  • Different colour of dice is there according to the Player colours.
  • Smoother game play experiences on 2G, 3G, 4G and Wi- Fi networks.

Player Contains:

  1. Ludo – 2 players and 4 players
  2. Private Table – 2,3,4 players / + Optional Fast Ludo
  3. Snakes and Ladders – 2 Players

These are all about the Ludo Bing APK download which may help you to get aware about this game easily. We want to inform you the entire user that do install the APK file from the best websites you can or from the given above link to avoid the unwanted viruses or bugs. This above content is all about the full description of the Ludo Bing APK Download which guides you to download and install this game completely on your Android device. Before using any app or game you always need to know about that thing completely such during using time you should not face any type of interruptions. For more details about this game you can visit the above links of Google Play and website where you can get the reviews and ratings completely.

read more
SocialTechnology

How to Use WhatsApp Without Number?

WhatsApp is a very popular free messaging app until now. The general process to use the WhatsApp is via your Mobile number. However, do you know that it is also possible to open a WhatsApp account without any phone number or SIM card? Here in this topic, we will learn ‘How to use WhatsApp without a number’. The process of using WhatsApp without a number is not so tough to perform. Even if you do not have, a SIM card with you or in your phone then also you can use WhatsApp.

In this topic, we will teach you how you can use WhatsApp without a number. The method is tested and hence you can use the method to verify your WhatsApp account without any SIM card. It is your wish to choose the Android, iOS or Windows device to install WhatsApp without a phone number.

Proper Guide: How to use WhatsApp without a number? 

As we have discussed above you can use WhatsApp without any phone number or SIM card through two processes available.  Now we will discuss in detail the method in the below points. You need to follow the steps properly and apply the same from the below method properly.

·      By using ‘Text Now’ to verify WhatsApp:-

  1. First, you need to install the WhatsApp app from the Google Play Store on your Phone.
  2. After that, the second step is to download another app i.e. ‘Text Now’ messaging app on your phone. If you want to use WhatsApp on your PC then you need to do the same using any Android Emulator.
  3. Once the Text Now application has been installed, you need to open the app on your phone. The app will ask you to complete the whole set up process by seeing the on-screen guides.
  4. While the set-up is completed, then note down the number shown by this app for you. Sometimes, it has been happening that you forgot to note the number, or Text Now does not show the number. In that case, you can find the number using the below steps:
  5. For Android: Open the Text Now app on your Android Phone and click on the 3-line icon located in the top left corner of the app. Thus, you will show the phone number.
  6. For iOS:  In the same way, you need to click on the three lines in the top left corner. Thus, you will get to know the phone number.
  7. For Windows Phone: After launching the app on your phone, click on the People tab menu and thus you will get your phone number.
  8. Once you have noted down the phone number, now you need to open the WhatsApp on your phone, tab, or PC.   
  9. After agreeing to the terms and conditions of WhatsApp you will get the screen to enter the Phone Number. Now choose your country code and enter the number given to you by Text Now number.
  10. Now, wait for the time to fail the SMS verification. After failing, you need to request for Call Me button to get an automated call from WhatsApp. By this time open the Text Now app and answer the call from the app to hear the repeated verification code. Note the code and enter it on the WhatsApp verification code page.
  11. Now, wait until WhatsApp verifies your code and thus you have successfully installed WhatsApp without any Phone number.
  12. Open the app and load the contacts saved on your phone to start chatting with them using WhatsApp.

Image result for text now

Final Words:

Finally, we want to tell you that it is better to register your WhatsApp account using your valid mobile number. Besides that, Text Now is there if you want to use WhatsApp without a number. This is one of the new tweaks for all those who want this feature to use WhatsApp on your phone, Tab, PC etc.  Hope you all are satisfied with the information given here about how to use WhatsApp without a number. If you do not follow the above steps properly then it will not work on your phone, as you want it in real. So make sure you have uninstalled the older valid phone registered WhatsApp before using WhatsApp with Text Now.

read more
SocialTechnology

How To Delete Skype account? – Step by step Tutorial.

Do you want to switch to another application that is similar to Skype? Ok, there is no problem as you can easily remove or delete your overall data from your Syour Kype account and thus switch to a new one. Performing this task is so much easier as there is nothing to worry about safely removing your existing account. To remove the Skype Account permanently, then you need to perform two tasks. At first, you need to remove the personal information from Account settings which are optional but needed for safety. Then you need to contact a Customer Service agent, which is strictly recommended and mandatory for Skype users.   The process which you need to apply for removing your information is generally multi steps based processes.

So, users need not get worried as in this topic we are going to discuss all the steps in detail to delete a Skype account. This is the totally right way through which you can able to remove your information permanently in a safe and secure way. Let’s start to discuss the procedures to close the existing Skype account in the right way permanently. 

Step-by-step Tutorial – How to delete a Skype Account in the right way?

You have reached the section from where you can start to learn about the step-by-step guide to correctly deleting your Skype account. Starting or creating a Skype Account is not so tough but to remove the account you need to be more attentive to removing every data. Start to perform the process by following the steps given below.

How to delete Skype Personal Information? (Optional but required for safety)

Here you are going to know about the steps that how you will delete the Skype Account personal information completely.

  • First, you need to connect your PC to a proper Internet connection and open the Skype Application.
  • Now the Skype Window will open and you need to select the option Skype from the top menu bar.
  • From that Skype option, you will get a drop-down menu from which you have to select the My Account option.
  • In My Account, we need to go under ‘Settings and Preferences’ and Click on Edit Profile.
  • Now you will get the ‘Personal Information’ Tab in which Click on Edit.
  • Delete the original information like the name, email ID, username, etc., and put some random selections in that form.
  • Now click on the save button and thus you are done.

Image result for how to delete skype account step by step tutorial

How to delete the Skype Account Completely? (Strictly mandatory)

Now, this is the next and last step in which you need to delete the Skype Account Completely. To delete your account, you need to get help from the customer support team via messages online. So this is not so tough as you need to visit the preferred link to reach the Customer support team. Start the task from the below steps to delete the Skype Account completely.

  • Initially, you need to visit the given link http://support.skype.com/support_selection and follow the next step.
  • While you click on the above link, it will automatically redirect you to the Skype support team page. Otherwise, you can directly visit the official site of Skype and navigate to the section Help and Support.
  • Now after opening the preferred Support screen, you need to log in with your Skype Username and Password.
  • After logging in to the page, you need to find the Help Category “Delete an Account” and Click on it.   
  • Now Delete an Account will be the related problem which you need to share with the Support team.
  • Then you need to click on the Next button.
  • You will find some options where you have to select Text Chat Support.
  • Thus you need to select Start Chat.
  • Now tell the Skype Support team about the reason for deleting your Account and follow the rules they prefer you to delete your Account.
  • That’s it you are now able to delete your account after successfully completing the steps preferred by the Support team.

So this is the total guide which you must need to follow for delete your Skype account for free. We have provided all the necessary steps with proper links in the above points through which you need to go accordingly. These are the best processes that are simple, genuine, and easy to perform on your PC. This is a recommendation that does not leave your account idle if you do not want to use it. Do delete all the information from the Account and then contact Customer Support to delete your Account completely.

read more
Technology

How to install Kodi on Amazon Fire Stick TV?

In Amazon Fire Stick TV, Kodi is used to manage your media files. By default, the user cannot be able to install Kodi on Fire Stick from the app store. However, here in this topic, we will show you the systematic process of how to download and install Kodi on Amazon Fire Stick TV. Kodi not only helps you to manage and view your media files only in Fire Stick, but it works on other platforms including the Xbox One. It also helps you to stream media from more than 100 sources across the whole world. Kodi is one of the user-friendly as well as attractive applications for the users to use in the Fire Stick TV. 

There are many ways available until now through which you can quickly install Kodi on Amazon Fire Stick TV. The process to download and install this Kodi software is very simple, and just within 10 minutes, you can complete the task easily. Nowadays, users use this software to stream and manage files on their Android phones, Windows, Linux PCs, and many more. If you are an owner of Amazon Fire Stick TV, then follow this content about how to install Kodi on Amazon Fire Stick TV.

Systematic Guide – How to install Kodi on Amazon Fire Stick TV?    

First, we want to tell you that to install Kodi on your device; there is no need to root that particular device. Be sure that you have connected your device with the proper internet connection such that it will save you time in completing the whole process. Without taking more time let us have a look at the process about how to install Kodi on Amazon Fire Stick TV.

Step 1: Open the Settings menu of your Device:

The first step you need to perform is to turn on your device and open the Settings menu. From that menu, choose the second option, i.e. the Device icon. This option has the full permission to control your app installation process and all.

Step 2: Select the Developer Options:

In this step, after clicking on the Device icon, it will navigate you to the Developer options. It is the second option listed in the Settings menu.

Step 3: Now allow app installation from Unknown Sources:

By default, the device OS does not allow you to download any apps except choosing from the app store. If this setting is turned off then, you need to enable the app installation from the Unknown Sources. To enable this feature, you need to click on Developer Option and tap on Apps from Unknown Sources to turn it ON.

Warning: Allow installation of applications that are not from the App Store. Turn this option On only if you install apps from a reliable source as a developer.

Installing the app from unknown sources may raise the security issues that cause your system to malfunction. While you install Kodi on an Amazon Fire Stick TV, make sure about the security and other convenience in device performance.

Step 4: Install the Downloader App:

We already told you that our motto is to provide you with the best and simplest free way to install Kodi on Amazon Fire Stick TV. Therefore, you need to visit the Amazon App Store and acquire the app name Downloader which is completely free to own. Now click on that app and wait until it installs in your system successfully.

Step 5: Visit the direct Kodi website using the Downloader App:

Hope you have successfully downloaded the Downloader application in your system without any issues. If you are complete, then open the Downloader app and enter the URL http://www.kodi.tv/download in the URL bar under the Home section of the Downloader app. After that, you have to tap on the GO button. It is the best URL to download the Kodi app. You can also choose another URL instead of this one.

Step 6: Choose the Android application:

The operating system of the Amazon Fire TV is Android-based. Therefore, the Kodi Android App will work very fine on the Amazon Fire TV stick.

Step 7: Choose a 32-bit type installation:

The 32-bit Kodi v17.1 is the recommended, best, and most suitable application to install on an Amazon Fire TV stick. Rather than that if you want to experience the other versions, then you can also go for that,

Step 8: Click on the Install Tab:

Now click on the Install button to start up the downloading of the file and installation process as well. Wait for the time to complete the whole process, and it may vary depending on your internet speed and connection status.

Step 9: Customise the Kodi app:

As with the other applications available in Kodi, you can easily customize it depending on your needs. You can share, stream media files and manage them according to your taste. Also, install Ad-On that may become helpful to you in any aspect. This app also allows you device access like remote media server (must have USB port), network access, Bluetooth devices, etc. Besides that, you can change your audio settings, prevent Fire Stick from sleeping and others.      

Now your Kodi app is almost ready to use in your Amazon Fire Stick TV. Further, if you need to change the settings of this app according to your needs, you can do it easily. Otherwise, you can keep it by default to its recommended settings such that you can use it without any issues.        

Conclusion:

That is all about the systematic guide ‘how to install Kodi on Amazon Fire Stick TV’ in an easy way. Hope you all are satisfied with the information given here about the installation of Kodi on Fire Stick. We always recommend you use the above-discussed process because it is completely free and time-saving too in all respects. If you want, you can also go for another process, but they probably harm your device and start to malfunction at any time. Until now most of the users have chosen this above process to install the Kodi in Fire Stick TV. Feel free start to using this app on your Fire Stick now.   

read more
Technology

Free Screen Recorder For Windows 10 PC

Windows screen recorder is very interesting software through which you can record your current operating screen. For example, currently, you are doing some important operation on your PC and you need to record the whole working process then you must need a screen recorder app. Depending on this need here we are going to discuss the best free screen recorder Windows 10 for free. There are many free as well as paid versions of screen recorders for Windows 10 are available. But here we will only discuss the free version of Windows 10 screen recorder for every user.

If any users need this type of screen recorder for Windows 10 PC then they can definitely go through context completely.  We will discuss here some of the best free screen recorder applications for Windows 10 PC to download. Moreover, this screen recorder does not consist of any watermark, and well as no annoying ads while you operate it on your PC. Besides that, you can crop, merge and select your actual screen portion according to your best need. So let’s start to get to know about those apps and try them on your Windows PC too.

Best free screen recorder Windows 10 PC:

Users have reached the actual section from where they can able to get an idea of the best free screen recorder apps for Windows 10 PC. So have a look on the features of those applications to download for free.

·      Bandicam screen recorder:

First, we will talk about the Bandicam screen recorder which is a good screen recorder for Windows 10 PC. It comes up with two capture modes you will not find any problem with recording your Windows screen. It has the ability to resize the area which you have captured with other editing options. It is free to download for Windows 10 PC too.

·      Icecream Screen Recorder:

The next one is the Icecream screen recorder which is made for both Windows as well as for iOS. If you think that you need to capture what you are doing on your PC currently then go for this software now. It will definitely provide you with the best screen recording feature ever. Compared to other applications this software will act well on your PC.

·      Action:

The action is a professional screen as well as a game recorder for Windows 10 PC. This is also free to download this software to your PC. This screen recorder has the capability to record higher frame rate videos thus taking more memory to save the videos on your PC. But the overall performance is too good for users.

·      Apowersoft Screen recorder:

If any user remains busy always and has less time to record their work then choose Apoersoft screen recorder. This screen recording app has an option to schedule your recording thus it will automatically start to operate while you are going to operate your PC. Thus this app provides you with some different features as compared to others.

·      ShowMore:

Another screen recorder for Windows 10 is Show More. This app can record screen videos including its audio. Thus both the Audio and Video files of the screen will get started to record in a single time only. Thus show more is another good screen recorder for Windows 10 PC.

So besides these apps, you can also choose the other apps available in online stores. But if you think that you want the recommended ones for your Windows 10 PC then these above five apps are the best option for you all. Hope you all are satisfied with the information that we have discussed here free screen recorder Windows 10 PC. So start downloading any one of the above screen recorders for your PC and start capturing or recording your current working screen.

read more
1 53 54 55 56 57 70
Page 55 of 70