close

software

Technology

iSkysoft PDF Editor Pro for Mac Review and Discount-Guide

Portable Document Format aka PDF files are one of the most used document files, from a student to an employee, everyone nowadays uses them. But there are many you don’t have a proper editor for creating or editing pdf documents, even though there are many editors out there in the market, but most applications miss out on some essential features. And many users doesn’t prefer to use some application which doesn’t give them a complete control over the pdf documents.

Now for those users who wants to have a complete control over their pdf files then you might be happy to know there is one feature rich application called iSkysoft PDF Editor Pro, which permits you to do anything you anything you want to with your pdf file. And while we are on this subject, we thought of doing a full review of the iSkysoft PDF Editor Pro version for MAC. Now before jumping onto the review, we would like to inform you that the iSkysoft PDF Editor Pro for MAC is now available at a discount price of $ 55, the original price of this application is $ 99, so if you buy now you will save $ 40.

Why go with iSkysoft PDF Editor Pro?

Well this is the big buck question, and surely there are editors out there in the market, but overall, if you look at the price to performance ratio, then iSkysoft PDF Editor Pro version for MAC tops the list, this PDF file editor takes editing to the next level, giving you more than editing, and cut, copy, and paste.

Key features of iSkysoft PDF Editor Pro-

1). Editing PDF files

Editing PDF files with the iSkysoft application are much easier. Now to begin editing a PDF file, first of all, launch the iSkysoft Editor Pro application, then import the PDF file , which you want to edit. Once the PDF file is open, move your cursor to the right-hand top most corner, and then click on the “OCR” button, and then choose from the specified language using which you want to edit the document.

After that, click on the “Edit” option available at the middle of the toolbar window. Now to edit any part of the text, you can double-click on it or select the particular area, where you want to do the editing.

Moving ahead, if you want to edit or import an image, you do that too, if you want to edit an image present in the PDF file, then first click on the “Edit” option, then double click or select the particular image to crop, delete or resize it.

Furthermore, you can even insert an image in a desired area if you want too, to do that, first of all, open the pdf file, then click on the “Edit” and select a particular area where you want to insert the image, then at the right-hand side click on the add image, then select the image you want to insert. Once the image gets inserted, then click you can easily resize it or crop it.

With the iSkysoft Editor Pro version, you can also edit an entire PDF page. To edit a PDF file page, import the file, next you see a bunch of options aligned right with the document, just select from the options like “Rotate Pages”, “Delete Pages”, “Replace Pages”,etc to modify the entire the page.

Apart from that, you can also combine, split and compress a PDF file using iSkysoft PDF Editor Pro application. First, let’s begin with splitting a document, for doing that launch the iSkysoft PDF Editor Pro application, and then just like before, import a document, at the right-hand side of the window, you will find an option “Split Document”. Once you click that option, a “Split Document” window will appear, select the number of pages you want to split the current file and then select the desired location, after that just click on “Ok”.

In case, if you want to combine multiple PDF files into one, then just launch the application, import the documents you want to combine, then click on the “Document” menu available at the top and select “Merge Document”. After you select that option a new dialog box will open now you can either drag & drop the files or you can click on the “Add files” button to add the files, once you are finishing adding the files just click on the merge option to merge the files.

The iSkysoft PDF Editor Pro also lets you compress a pdf file, in order to compress a file, just open that file, click on the “File” menu, and select “Optimize PDF” , before optimizing the file you can also see a preview of the file and modify some changes if you want to.

2) Markup and Annotate PDF

With the iSkysoft PDF Editor Pro, you can also annotate text or images, to do that, just launch the application, open a document, and then click on the “Markup” option, which you find right along with the “Edit” option. Under the “Markup” tab, you will find several options like adding sticky notes, text boxes, underline, radio buttons, etc, in addition to that, there is also some drawing tools available using which you can highlight some area by drawing arrows, rectangles, lines, etc.

3) Convert & Create PDF

The iSkysoft PDF Editor Pro also lets users convert and create pdf files, for instance, using this application you can convert an existing PDF file into a word, power point, excel, image, text and many other formats.

In order to format a pdf file, open the iSkysoft pdf editor, then open the desired pdf file, which you want to convert, now  click on the “Convert” option available in the toolbar menu, once you click that option, a dialog box will appear, now just select the format in which you want to convert the pdf document.

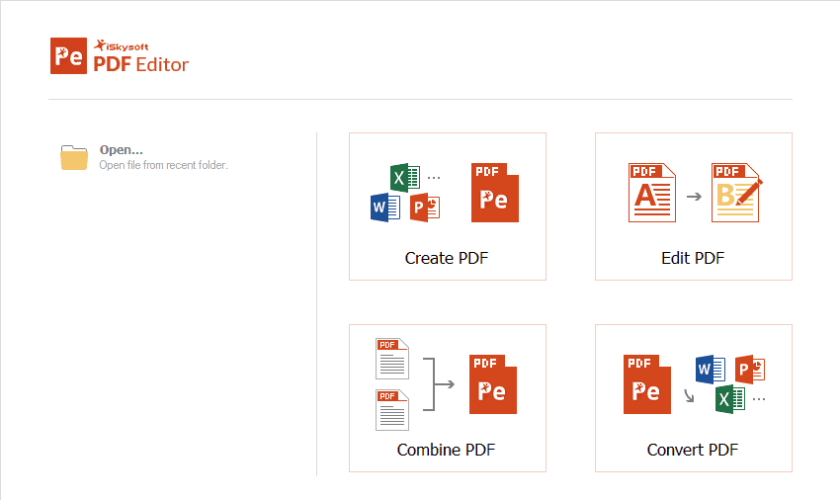
If you want to create a PDF file just open the application, click on  “Create PDF”, now a pop-up window will appear, click on the “Open” option and select the particular file, which you want to convert, once the file is opened up, click on “File” and select  the save as PDF option. With iSkySoft PDF Editor Pro, you can easily convert image, text, HTML, etc files into PDF documents.

4) Secure PDF files

As mentioned earlier, iSkysoft is a feature loaded application and comes with great set of features using some you can even secure your PDF files.

With this application you can lock your PDF document by providing a password, and the whole process is quite easy just open the pdf file, click on “File” >> “Security” >> “Security Settings” , and then enter your desired password.

You can also add “Watermark” in your pdf file, just open the particular file, on the right-hand side click on the “Watermark” option, after that a pop-up window will appear, enter the text or an image if you want to, you can modify other settings like Opacity, Rotation, vertical distance, etc and then click on “OK”.

Besides assigning password & watermark, you can also put your signature in a PDF document, and you can do that quite easily. Just open a particular file, from the toolbar menu, click on the “Stamp” icon, now from the drop-down menu, click on “More”. A Dynamic stamp dialog box will show up, at the bottom, you will find a plus sign, click on that and import the image file that contains your signature. Once you get the file, click on done, and the locate the image file on that pdf file that’s it.

5) Fill and Create Forms

The iSkysoft application also lets you fill and create forms. In order to fill a form, just load the target file and then click on the “Edit” option and click “Add texts” and then select “Text Box” after that move the text box in the particular area of the form and then fill it out.

Likewise, you can also create forms using this application, just import the PDF file, click on the “Form” menu, next, select the field, which you want to add in the selected form and place them.

6) Share PDF:

Using the iSkysoft application, you can easily share your PDF files, just open the pdf document, click on “File” menu and select “Email”. Once you click on that option a pop-up dialog box will appear, you will see multiple Email options to choose from, now select your preferred email and then click on “Continue”.

Final thoughts

Overall, the iSkysoft PDF Editor Pro is one of the best and intuitive tools you will find for editing PDF files; it includes some amazing features, which you will not find in other top most PDF editors. It’s UI is very user-friendly and can be used anyone without any hassle, in addition, the price of this application is also quite low compared to others.

read more
Technology

Data Recovery Software for Mac- A complete Guide

There comes a time while using Mac, we often meets a situation when we delete files by mistakenly or we simply lost it due to some errors. In that situation one must get data recovery software for Mac, but you might be having questions in your mind which one will be the best one? Perhaps EaseUS Data Recovery Wizard for Mac is finest one among the data recovery software available for Mac.

Completely designed with a strong lineup of data utilities and strong that allows IT professional to meet all of their requirements. Mac data recovery is software that is entirely capable of bringing you back the entire data, which you have lost from your MAC due to many reasons. EaseUS Data Recovery Wizard for Mac has a clean user interface and involves all the necessary functions that recovery software must possess.   

 According to the survey, that is done on the data recovery software the results show that the number of users is increasing and has reached over 30,000,000 people from worldwide. The Mac data recovery is totally 100 % free safe and one can completely rely on the product. In this review, we will be discussing all the necessary details that you need to know on EaseUS Data Recovery Wizard software for MAC.

Features of EaseUS data recovery Wizard for Mac:

This data recovery software gives you an access to recover all the deleted files or lost files. Even if have lost some of the most precious data from your Mac, you simply don’t have to get bother about it. Have a quick read on the exciting features of the data recovery software that it has to offer its users.

  • Recover the types of files that you wish to form your Mac be it Graphics, documents, Audio, Video, email archive and lots more.
  • Allows Mac device users to save the files from Mac notebook or desktop or hard drive, etc. 
  • Using this product you will be able to save your data very fast, and later let you recover data at any moment you lost it.
  • Easy to recover lost files of format partition or hard drive or any other storage file lost like due to virus attack.
  • EaseUS Data Recovery Wizard also brings with the Bootable Media features to solve the bootable problems that occurs in Mac OS, in an attempt to start the file recovery options. 
  • RAW recovery along with the latest support of .epb, .mlv and then .tax.
  • In the quick scan you can make a search in automatic mode for finding out the lost data quickly.
  • The software is compatible with the supported devices like USB Drive, Digital camera, Mac notebooks and desktops too.
  •  Recover any data when your Mac operating system device is not being able to boot up.
  • Gives the permission to recover the lost data from the Time Machine backup drive.
  • The file recovery software comes into several language supports such as English, Espanol, Italiano, Deutsch, Francais, portiguese and many others.
  •  Ability to perform deep scan that will allow you to track down the entire lost files-in-depth, that also includes find formatted along with the hidden files. You do not necessarily have to risk on overwriting your original data.
  • The user interface of the date recovery software is made up of the finest class and is very simple to operate.
  • Lost your partition recovery then you can get it back by recovering all the lost partitions in your Mac.
  • Premium version of the EaseUS Data Recovery Wizard software offers you unlimited amount of data recovery. Whereas the free version of the data recovery app offers you only around 2GB of data backup.

EaseUS data recovery Wizard for Mac Review:

Since the day, I have started using EaseUS data Recovery Wizard in my Mac. I have been getting lots of benefits from it. It has helped me recover each and every type of important files that I have lost accidently form my Mac. I have tried the free version and loved to use it as it allows you to recover around 2GB data files. The data recovery software comes with impressive features which fulfils all our needs. EaseUS data recovery Wizard for Mac has highly earned its reputation as it provides the best performance that one can ever witness. Recover any files that you wish to as it comes with wide range of file recovery support which is just awesome.

Conclusion:

I strongly recommend you to start using EaseUS data recovery software for Mac. It will help you discover and restore all the important files that you have lost accidently. This data recovery software is compatible for both MAC and windows version. There is a free version of this data recovery software and suggestive to go for premium version to enjoy complete features. While talking about the price of the premium EaseUS date recovery software it is quite expensive when compared to some other Mac data recovery software.   

read more
Technology

DesignEvo Review- A aproper Guide To Know

To make your identity and symbol unique and beautiful every business needs to be a logo. Not only online marketers, developers, or big farm needs a logo. It is a mandatory thing for all types of business irrespective of its service. If you have good knowledge of Photoshop or Illustrator then you can design your own. But to design a logo requires lots of time and effort as you have to identify the main point of interest and service offering and also color combination.

 If you don’t have a logo then without wasting time and money on hiring a logo developer you can visit Designevo logo development service. With more than 400 logo templates for all types of business and with different fonts and shapes, this platform is good for developing your identity, a Logo. Here in this content Designevo review you will know about its features, pricing, and collection depending on which you can decide whether it will be the right choice.

DesignEvo

If you are looking for a logo then Designevo is a simple and effective platform to make logo. Without any knowledge of Photoshop and graphics, you can design your own. It is free and here you can have largest online logo template. It has both free and paid version but on its free version it covers the most.

 Features or advantages of DesignEvo

  • The interface and layout of this website is clean and simple.
  • It offers online logo-building services in different fields like business, animal care, automobile, food, lifestyle, technology, and much more.
  • It has more than 4000 professional logo designs along with different font styles.
  • You will get support 24*7 from their support team.
  • Powerful editing tools that offer high-resolution images.

As I have said above it is available both in free and paid version. Maximum features of Designevo are available on its free versions but to have high resolution of 5000×5000 px you need to go with its paid version. Details about its pricing are enlisted below.

DesignEvo Free

In this free service you can design a logo with minimum access to its logo templates. If you have done logo designing for free, resolution will be low and format will be in PNG along with background.

Designevo Basic

With abstract design and with high resolution of 5000×5000 px offered in this basic plan. Image will be in PNG format with transparent background. You will get lifetime support for every products in this basic plan and with it you can even download and edit logo unlimited times. If you are looking for this plan you need to pay approx. 20 dollar for onetime.

DesignEvo Plus

In this plan you will have the same resolution as its basic plan. Here also you will get PNG images with transparent background. You will get lifetime support and images will be ready for print. Here in this plan too you can edit and download logo several times. Main feature of this plan is that you will get a copyright ownership on the logo you have developed. This plan is extraordinary with lots of additional feature which you can pick with a onetime payment of approx. 40 dollar.

They offers genuine and unique service so before choosing any plan and prices in Designevo you can download sample respect to its plans from below “Download Sample” button right below the plans and pricing.

Before going to pick any services there are many questions in mind which are FAQs. Below are some important and related FAQs answers.

  1. After you have purchase a Logo using from Designevo by a register account then you can download logo immediately and unlimited time.
  2. If you are facing any issues regarding product and quality then you can call to their support team for support and immediate refund.
  3. A purchased product can be downloaded and edited unlimited times.
  4. You will get your own copyright ownership of any logo purchased under Designevo PLUS plan.
  5. Image and color resolution is high.

How to create a Logo on Designevo?

The whole process of creating a logo is divided into 6 simple steps. Going through the steps one by one you can have your logo.

Step1:

First of all choose template from its largest collection of templates on different genre. Click on the template.

Step2:

Now you need to add icon or text in the image. It offers different types of icon and fonts for free which you can use to make logo abstract.

Step3:

This step is the customization level where you need to use your creativity and also can take help from their support team for colors, shape, images, etc.

Step4:

 After all types of editing and customization you logo is now ready for preview. Check here if it requires any further changes.

Step5:

As you are a free customer, after you have previewed the logo you need to share your Designevo review a social network like Facebook. Remember, if you are a paid user then you needn’t to share it on social platform.

Step6:

A good resolution logo with background in PNG format is ready to use. Download logo from Designevo.

Quality differs from plan to plan. If you are happy with minimum quality then go with free plan otherwise choose any from basic and plus plans.

If you want to know in details or to gather some practical knowledge on Designevo logo maker tools then on its homepage you will get a help video. Click here Designevo tools.  There are many online logo making services or platforms but Designevo is different. Its quality, services and approaches towards client are friendly. Their customer support team will help you in every problem. This is a anew platform but within short span of time gained lots of users and followers. In this content Designevo review I have summarized here all its features, pricing and other related information regarding it. Hope, this review might help you all all to choose the best online logo maker.

read more
Technology

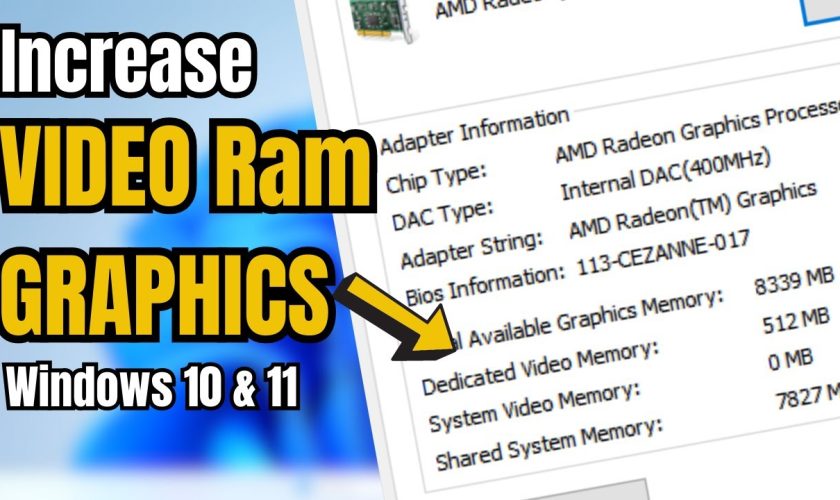
How to Increase Dedicated Video RAM in Windows 10?

As we know, Windows 10 is the latest version of Microsoft Windows Operating System. The overall performance and the speed of this operating system are much better than earlier. However, we need to prepare our PC so that you can run Windows 10 well on your device. Depending on this, generally, we use 2GB, 4GB, 6GB, etc. sizes of RAM to speed up our PC according to the processor. Similarly, we also need to have a good capacity of Graphic Card to get the best visual output in our PC Display. Thus, we have two options i.e. Dedicated Video RAM and External Video RAM. Dedicated video RAM is the chip, which remains fixed in the motherboard with the Processor and other component capabilities. Whereas the External video RAM can be, replaced and attached externally. Here in this topic, we will talk about how to increase Dedicated Video RAM in Windows 10 with ease.

The dedicated video RAM comes integrated with the CPU by fixing the board from the manufacturer unit. V-RAM or video RAM helps us to control the computer Graphics Processing Unit. V-RAM and the Graphic Card are eventually responsible for displaying the objects and pictures on the screen properly. It also helps you to increase the Video and the gaming quality largely, so after increasing the V RAM you can view videos in high quality, or play games in high graphics. The system to increase the dedicated video RAM is a little tricky but you will find it easy after reading this article, as we have shared the easiest steps you can ever find on the internet. Even if you have graphics cards of NVIDIA, RADEON, ATI, etc. You can follow the same steps to increase the video RAM of the system with Windows 10. So let’s have a look at how easily you can increase the dedicated video RAM in Windows 10

Proper Guideline: How to Increase Dedicated Video RAM in Windows 10?

 Follow the below-given guidelines to increase dedicated video RAM in Windows 10, before doing all these you have to make sure that you have some basic technical knowledge. All of the steps that are given here are practically done, simply follow this step by step and you are done.  

Step1: At first start up your PC and make sure you are using the latest version of Windows 10. Besides that, the Graphics driver should be properly installed in your PC to receive the proper output after increasing the RAM size.

Step 2: Now in this step, you need to press the Windows + E, keys simultaneously. Thus, it will help you to open the file explorer instantly in your PC. Next to it, it clicks on This PC or My Computer, which is present on the left side of your screen.

Step 3: After getting in the My Computer, here you need to right-click in your mouse and the menu will appear on the screen. Here choose the last option i.e. the properties and it will open the next window.

Step 4: From the Properties window, you need to choose the Advanced System Settings option, which is present on the left side of that screen. Sometimes the PC also needs the administrator’s permission to access the setting. So press the OK button from the pop-up window if needed and continue further.

Step 5: After opening the advanced system setting, now from the tab choose Advance tab, which is available with another tab on the top of this screen.

Step 6: In this tab, you are required to click on the Settings button, which is available on the label of Performance.  

Step 7: Thus, the Performance settings will get displayed on your PC screen. This setting will allow you to change the graphical performance and other setting on your PC. Again, on the Performance Option Window you need to choose the Advanced tab from the top of the screen. This option is present next to the Visual Effects menu tab.

Step 8: In this step, you have to choose the Change Button, which is present under the Virtual memory label of the same windows. Now it will navigate you to the next window and you will need to change some settings there.

Step 9: At first uncheck the first option, which is written as, Automatically manage paging file size for all drives. After that, some of the options will get highlighted and customization will be allowed now.

Step 10: Select the secondary drive, which is present next to the C: drive. Then click on the Custom Size bullet option. Now set up the Initial Size and the Maximum size of the virtual memory according to your needs. If you are getting an error in increasing the memory size then change the parameter and input high memory if it is less. The memory size should be optimum according to the requirements of your PC.

Step 11: Finally click on the Set button, which is present on the bottom of the Windows, and you are done now. Now it is recommended, that you for restart the PC after making the changes to apply and see the effects on your Screen and PC. 

Conclusion:

So these are all the steps that you need to follow if you want to increase the dedicated video RAM of your system in Windows 10. The steps that we have mentioned above require some technical work, so if you have a basic knowledge then you can do it yourself. But if you are blank with the technical information of your PC then you shall let the professional do the work. Because if you mess up with any of the steps you can end up destroying your system forever. Overall this is one of the easiest steps that you can follow to increase your dedicated video RAM of your system in Windows 10. So this is all, simply follow the steps carefully and you are done, comment us below if you have successfully increased your video RAM.

read more
Technology

iClouds bypass tools

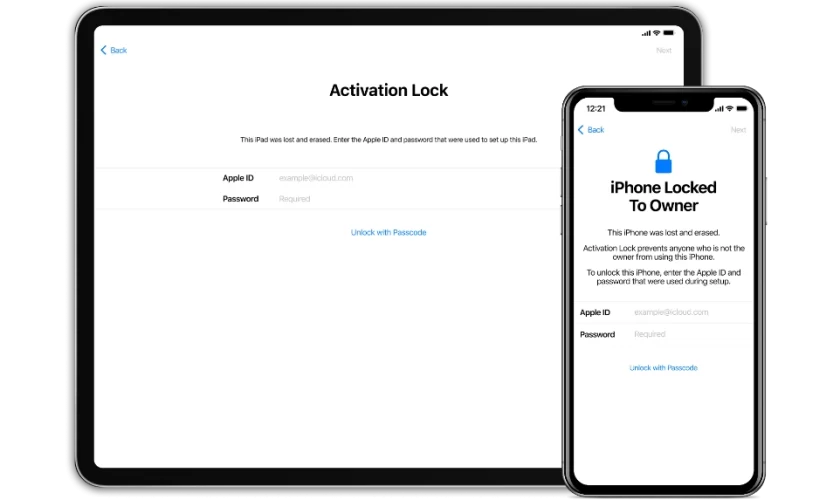
Looking for some best iCloud Bypass tools? Confused to choose the right tool to bypass iCloud? Well you have come exactly at the right place. Everything you are looking for will be discussed here upon. iCloud is a cloud storage developed by Apple for most of its iOS devices. But most of the users remain unsatisfied by the limited amount of access provided to them. Hence they urge for the need to bypass iCloud so that they can access it the way they want to.

For iCloud bypass there are numerous tools available but a few of them works fine without any hiccups. Choosing the best one is a task. To make it easier for you, we have picked out the best working iCloud bypass tools for you.
Best iCloud bypass tool for you:

  1. Official iPhone Unlock:

Official iPhone Unlock is a very good utility tool that you can use. It is much more of a service than a tool. The working of the tool is exactly like other iCloud bypass tools. The tool offers some of the best offers which includes the iCloud Activation and lock removal service. There is also a little chance of any issues and something getting wrong.

Pros:

  • Official iphone Unlock is a professional service that is run by professionals. There is no need to use any software for this and is perfectly safe and secure.
  • The tool is very simple, easy, and much more efficient than what other tools offer.
  • The service is very popular and has a great reputation among users around the world.

Cons:

  • The service is a paid one. Hence you have to pay a certain amount for the service. The service cost starts from $19.95 and the amount you pay is device-dependable.

Compatible iOS devices:
This iCloud bypass tool is compatible with all iOS devices like all the iPhone models, all iPad models, and all iPod models. Also, this bypass tool works with all versions of iOS such as iOS 7, iOS 7.1, iOS 8, iOS 9, iOS 10

  1. iCloud bypass tool

iCloud Activation Lock Bypass has always been one of the best and most widely used iCloud bypass tools available in the market today. The tool also offers a lot of features to its users like iCloud account removal, bypass iCloud activation as well as bypass iCloud lock too. So this is also one of the best bypass tools that you can use.

Pros:

  • The tool is very effective and functional It is very functional which is used by users for many multipurpose tasks.
  • The tool has thousands of satisfied users across the globe.
  • It is compatible to almost all iOS versions and works fine with most of the iOS devices.

Cons:

  • The download speed of the tool has been very sluggish and lot of users have been complaining about that from quite a long time.
  • Although the app offers a lot of features and users are widely satisfied with the overall performance, yet the rating of the app is average which is just 3.5 stars.

Compatible iOS devices:
iPhone 6S Plus, iPhone 6S, iPhone 6 Plus, iPhone 6, iPhone 5S , iPhone 5C, iPhone 5, iPhone 4S, iPhone 4, iPad Air, iPad Mini, iPad 4/3, iPad 2

Compatible iOS versions:
iOS 9.0, iOS 8.1, iOS 8.0.2/1, iOS 8, iOS 7.1.1 , iOS 7.1, iOS 7.0.6, iOS 7.0.5

  1. Doulci iCloud Unlocking tool

Doulci iCloud Unlocking is one of the most efficient tool so far in the market. The app is pretty easy to operate and is made compatible to almost all the iOS devices available. You can use this tool to bypass the iCloud server easily.

Pros:

  • The app interface is very simple and is pretty easy to use in compared to other bypass app.
  • It works on all iOS devices available in the market.
  • The app is available for absolute free.
  • You can watch tutorials for the installation as well as working of the app from the website.

Cons:

  • You have to complete a survey after that you will be allowed to download the app which takes quite a time.

Compatible iOS devices:
All iPhone models, all iPad models, all iPod touch models and version iOS 7, iOS 7.1, iOS 8, iOS 9

  1. iCloud bypass tool-iCloudin

iCloudin is another very good iCloud bypass tool which will help you bypass iCloud pretty easily. It is compatible to most of the iOS versions and works perfectly fine on all Apple Devices. The user interface of the app is simple as well as very easy to use. Moreover the app is available for absolutely free of cost. The app is very efficient and users have claimed that it is pretty reliable too. Visit the website to watch the tutorials about the working of the app.

Pros:

  • The app is completely free to download and use.
  • It is very easy and simple to use.
  • You can watch tutorials to install and operate the app with ease.
  • It is compatible to most of the iOS devices.

Cons:

  • You may suffer some cluttered experience along with a few problems finding what you are looking for in the website.
  • There is no perfect rating or reviews whatsoever for this bypass app.

Compatible iOS devices:
iPhone 6s Plus, iPhone 6s, iPhone 6 Plus, iPhone 6, iPhone 5S, iPhone 5C, iPhone 5, iPhone 4S, iPhone 4, iPad Air, iPad Mini, iPad 4/3, iPad 2 and with all the iOS version iOS 9.0, iOS 8.1, iOS 8.0.2/1, iOS 8, iOS 7.1.1 , iOS 7.1, iOS 7.0.6, iOS 7.0.5

  1. Gadgetwide iCloud Bypass tool

The Gadgetwide iCloud Bypass tool has been credited as one of the best and top tools which is used to bypass iCloud activation. The tool is pretty simple and easy to use. The app comes with tutorials to help you out with the installation and working procedure of the app.

Pros:

  • This app is one of the best and high rated app available in the market till date.
  • You can easily download and use this app.
  • The tool is effective, simple and easy to use.

Cons:

  • You have to download and install some software on your computer to use this tool.

Compatible iOS devices:
All iPhone models, all iPad models, all iPod touch models and with all versions like iOS 7, iOS 7.1, iOS 8, iOS 9

  1. Bypass iCloud activation tool

Bypass icloud activation tool easily connects directly to Apple servers to activate or bypass iCloud. It is very simple and easy to use. This app is gaining a huge popularity in the recent times.

Pros:

  • You can easily download and use the app.
  • The official website features round the clock support. This will help you to cope with any upcoming issues.

Cons:

  • This app is much more complicated than rest other tools that have been featured in this list.

Compatible iOS devices:
iPhone 6, iPhone 6 plus, iPhone 7 and mostly other iOS devices available. Also this app supports all the version operating system iOS 9.0, iOS 8.1, iOS 8.0.2/1, iOS 8, iOS 7.1.1 , iOS 7.1, iOS 7.0.6, iOS 7.0.5

  1. Open my iCloud easy unlock tool

Open my iCloud Easy unlock tool is a widely used app across the globe. You can easily bypass iCloud within a very short time of 10 minutes only. The app also features a tutorial to let you know how to use the app. The app is very popular among iOS users.

Pros:

  • The app helps you to bypass iCloud and unlock it within just 10 minutes which is very fast.
  • It is compatible to most of the iOS versions and works perfectly with all iOS devices.
  • You can use your IMEI code to unlock your phone by using this app.

Cons:

  • The app is only limited to the Windows version.

Compatible iOS devices:
iPhone 6S Plus, iPhone 6S, iPhone 6 Plus, iPhone 6, iPhone 5S , iPhone 5C, iPhone 5, iPhone 4S, iPhone 4, iPad Air, iPad Mini, iPad 4/3, iPad 2 and with all version of iOS 9.0, iOS 8.1, iOS 8.0.2/1, iOS 8, iOS 7.1.1 , iOS 7.1, iOS 7.0.6, iOS 7.0.5

  1. Remove the iCloud activation unlock tool

Remove iCloud activation unlock is a very good tool which allows you to easily bypass iCloud. You can find many valuable information from the website which will guide you how to install and run the app in your device.

Pros:

  • The app is available for completely free.
  • You can easily download the app and use it.
  • You will get information and good support from the developers.

Cons:

  • The app has very average ratings from the users.

Compatible iOS devices
This app is compatible with all.

Final Words

Well in this article we have given some of the best available iCloud Bypass tools in the app market that you can use on your device. These entire bypass tools are very great to use with some of the best user interfaces in their class. You can use any of the apps from the above list, as they are all handpicked and you can trust the app blindly. So pick any one of them according to your needs and use it for free. So this is all, if you are having any issue with picking the correct one then you can comment down below.

read more
Technology

Root Explorer Apk

Root Explorer Apk is the ultimate file manager, especially for root users. Root Explorer is an Android app that is one of the most powerful tools that is being used by people to date. With the help of this file, you can access to the whole Android system. Root Explorer APK allows you to manage and save files from your phone memory and also to your SD Card.

Root Explorer is useful file manager and it is compatible with only rooted devices. This post will be for all the rooted device and root users where you will get more information on how to get access to your large data folders and how to handle files data while browsing on your Android device or tablet. Root Explorer is also compatible for PC users.

Root Explorer works perfectly well and smoothly with several taps open. The Root Explorer Apk helps you to browse faster on your SD Card files and the files from your device storage as well without any complications.

Features of Root Explorer – Everything you need to know!!

The Root Explorer Apk brings to you several exciting features for root users. Check out the features and start removing, copying or moving the apk files rar files, and zip files easily.

  • With the help of Root Explorer file manager, you can easily manage and remove zip files, .rar archives, etc.
  • It allows the users to move any files or copy and erase files.
  • The app comes with a built-in text editor and you can also bookmark several folders and files.
  • Root Explorer also allows you to share and send files through Bluetooth and Mail.
  • This amazing tool also helps you to search for files as there is an inbuilt search option provided within the app.
  • This app also helps you to directly stream any videos, music with the media players of your cloud services or networks available.
  • It also helps you to check folder and files properties like the date, the file size and many more.
  • This app also helps you to create a shortcut home screen for folders and files on your home screen to access quickly.
  • The interesting feature of Root Explorer is that it enables you to access to any hidden data from your device for the security purpose so that there is no harm in your existing apps or games.
  • This app allows you to open multiple tabs and can use it without interruption smoothly.
  • The other important feature about Root Explorer is that it has SQLite database viewer through which you can send files with the help of Bluetooth or emails and also remount files.
  • With this app, you can choose several files and explore it. Root explorer app supports Google Drive, Dropbox, etc.

These are the important and amazing features of the Root Explorer you need to know about, especially for the rooted devices and root users.

How to download and install Root Explorer?

To download Root Explorer for the Android users is simple because you can get this amazing file manager from Google Play Store. However, you can also get this app from the unknown source which is Root Explorer APK file. The process to download Root Explorer Apk is as follows –

  • Firstly, you need to open the web browser and download the Root Explorer Apk file from the sites.
  • Once the download is complete, you need to install it in your device. If you are downloading the file through PC, you can transfer the Apk file on your Android device.
  • As this is a third-party installation, the user must enable an unknown source from your device settings.
  • Now go to the folder and navigate the folder.
  • This is it and you can now start removing or copy or move any files, rar archieves or zip files according to your convenience. You can hack any game with this ultimate file manager.

How to download and install Root Explorer Apk for PC?

Root Explorer is an Android app which is useful and powerful tool allowing you to manage and save data, files and also enables you to hack Android games or other popular games. Sadly, there is no official site for PC to download Root Explorer. Therefore, one has to download this app for PC through the use of Android Emulator. If you haven’t tried this app for PC then simply follow the instructions below absolutely for free of cost and enjoy the hassle free services. 

  • First of all, you have to open the web browser and download the Android Emulator Called Bluestack player on your PC. 
  • Once you download the Bluestack installer on your PC, install the app.
  • Now you can search for the Root Explorer APK file in the site and select the options Bluestack to download it on your PC.
  • After the download for Root Explorer Apk file is complete, now you can tap to open the file and run the file through the use of this Bluestack Player.
  • Next, the Root Explorer Apk will be installed on your PC and it might ask to follow the instructions.
  • The installation of Root Explorer is successful on your PC, and you can now enjoy the app in a bigger screen and experience the better way of editing, moving or delete any files or folders and also hacking games.

Conclusion:

These are the process to download and install the ultimate file manager Root Explorer on your Android device. You can also get this Apk file on your PC through the use of Android Emulator. The steps to download as mentioned in the above are simple and easy to follow. If you are a root users then downloading Root Explorer is highly recommended where you can easily remove files or remount folders and files on your home screen for quick accessibility. So, get the Root Explorer Apk for free download and start enjoying all the services.

read more
Technology

SB Game Hacker Apk

Are you searching for the best and easiest game modifier? If so then you have landed to the right place. In this post, I will be sharing with you the best game modifier which is SB Game Hacker APK. If you are one of those game lovers then choosing SB Game Hacker will be the best option I would suggest. This app helps you to enhance your level of playing and also helps you to modify games, and shape your playing skills.

SB Game Hacker is an Android app and this best app is also compatible with all the rooted devices too. You can get this app free of cost. SB Game Hackers well and what is more interesting about this app is that there is no contain of ads that will help you play any games both online or offline without any annoying ads.

With the help of SB Game Hacker Apk, you can unlock gems, coins, gold scores, etc, and also change the game according to your wish. In other words, you have the full control over Android games.

Features of SB Game Hacker: Everything you need to know!!

The SB Game Hacker has features that are amazing and interesting. Before downloading the app, these cool features are all you need to know so that you can easily access the App. The SB Game hacker works for the rooted devices as well.  Check out these amazing features and explore what’s hidden!

  • SB Game Hacker app comes with a user-friendly interface that makes it easy to use and understandable.
  • The app comes with complete ads free allowing the users to access the app freely.
  • The app size is small yet powerful where you have the facility to earn unlimited free coins, gold, money, gems, etc.
  • SB Game Hacker lets the users search for any popular games and play the games they like for free.
  • The app offers users free access and works perfectly well without complications.
  • This app supports for the Android rooted devices.
  • You don’t need to spend much data while searching for any games because there is an option to exit data.
  • The most exciting feature of the app is that it will keep you updated about the usage of data because you have the option to filter the used data which will improve your effectiveness.
  • It gives you the full control of apps to use it easily.
  • You can change the game or modify it according to your wish. Using this app, you have the first facility to earn points, get unlimited gems, coins, money, lives and much more.

How to download SB Game Hacker for Offline Games for Android Device?

To download the SB Game hacker on your device, you need to make sure that your device is rooted to allow the app function well without any interruptions.  .

  • First of all you need to download the SB Game Hacker Apk file on your Android Smartphone. Click on the link given below to download the latest Game Killer apk file.
  • Wait for a while until the download is complete. Once it is done, you can find the downloaded file on to your device file or folder.
  • Now, you have to open the SB Game Hacker Apk file to install it. But before you install it, you need to make sure that your device is enabled to unknown source installation.
  • To enable unknown source, go to your device settings and on security tap unknown source and enable it.
  • By enabling the unknown sources, the SB Game Hacker Apk file will be installed into your device.
  • That’s all you have to have to do and you have the SB Game Hacker Apk on your Android device. Download it following these steps and enjoy all the services.

How to download and Install SB Game Hacker Apk for PC?

If you want SB Game Hacker app on your PC, you need to first download the Android Emulator because this app is officially not available for the PC versions. Check out the below simple instructions and start downloading the app for PC.

  • You need to first download the Android Emulator Bluestacks Player on your PC from their official website.
  • Click on the link given below to start downloading the Bluestacks Emulator on your PC for free of cost.
  • Once the download is complete, install the Bluestacks on your PC. It will take some sometime to install so keep patience.
  • Now you have to downlaod the SB Game Hacker Apk file on your PC. Now open the APK file using the Bluestacks Player to install it on your PC.
  • Once the installation of Apk file of SB Game Hacker is completed, you will be notified.
  • So, this is all you have to do to download the SB Game Hacker Apk for your PC without any complications. That’s it!

Conclusion:

These are the easiest and simplest process to download and install the SB Game Hacker Apk on your Android device and PC absolutely for free of cost. By following the above easiest steps, you can now get the app for free of charge absolutely. This is the best game modifier that comes with ads free. Change the game and play for free anytime.

SB Game Hacker Apk is just amazing and useful that users love till date and have downloaded the app already. If you are a game lover and love hacking, then I would highly recommend SB Game Hacker to choose for your rooted device.

With the help of this app, you can hack any popular games and modify games, earn unlimited gems, coins, lives, etc. Isn’t it cool enough to download this app without having to pay single penny and you can play instantly for your favorite games.  

read more
Technology

How to install Kodi on Amazon Fire Stick TV?

kodi on amazon fire stick

In Amazon Fire Stick TV, Kodi is using to manage your media files. By default, the user cannot be able to install Kodi on Fire Stick from the app store. However, here in this topic, we will show you the systematic process of how to download and install Kodi on Amazon Fire Stick TV. Kodi not only helps you to manage and view your media file only in Fire Stick, but it works on the other platforms including the Xbox One also. It also helps you to stream media from more than 100 of sources across the whole world. Kodi is one of the user-friendly as well as attractive applications for the users to use in the Fire Stick TV.

There are many ways available until now through which you can quickly install Kodi on Amazon Fire Stick TV. The process to download and install this Kodi software is very simple, and just within 10 minutes, you can complete the task easily. Nowadays, users use this software to stream and manage files on their Android phones, Windows, Linux PCs, and many more. If you are an owner of Amazon Fire Stick TV, then follow this content about how to install Kodi on Amazon Fire Stick TV.
Systematic Guide – How to install Kodi on Amazon Fire Stick TV?
At first, we want to tell you that to install Kodi on your device; there is no need to root that particular device. Be sure that you have connected your device with the proper internet connection such that it will save your time in completing the whole process. Without taking more time let us have a look at the process about how to install Kodi on Amazon Fire Stick TV.
Step 1: Open the Settings menu of your Device:
The first step you need to perform is to turn on your device and open the Settings menu. From that menu, choose the second option, i.e. the Device icon. This option has full permission to control your app installation process and all.
Step 2: Select the Developer Options:
In this step, after clicking on the Device icon, it will navigate you to the Developer options. It is the second option listed in the Settings menu.

Step 3: Now allow app installation from Unknown Sources:
By default, the device OS does not allow you to download any apps except choosing from the app store. If this setting is turned off then, you need to enable the app installation from the Unknown Sources. To enable this feature, you need to click on Developer Option and tap on Apps from Unknown Sources to turn it ON.
Warning: Allow installation of applications that are not from the App Store. Turn this option On only if you install apps from a reliable source as a developer.
Installing the app from unknown sources may raise the security issues that cause your system to malfunction. While you install Kodi on an Amazon Fire Stick TV, make sure about the security and other convenience in device performance.

Step 4: Install the Downloader App:
We already told you that our motto is to provide you with the best and simplest free way to install Kodi on Amazon Fire Stick TV. Therefore, you need to visit the Amazon App Store and acquire the app name Downloader which is completely free to own. Now click on that app and wait until it installs in your system successfully.

Step 5: Visit the direct Kodi website using the Downloader App:
Hope you have successfully downloaded the Downloader application in your system without any issue. If you are complete, then open the Downloader app and enter the URL http://www.kodi.tv/download in the URL bar under a Home section of Downloader app. After that, you have to tap on the GO button. It is the best URL to download the Kodi app. You can also choose other URL instead of this one.

Step 6: Choose the Android application:
The operating system of the Amazon Fire TV is Android-based. Therefore, the Kodi Android App will work very fine on the Amazon Fire TV stick.

Step 7: Choose a 32-bit type installation:
The 32-bit Kodi v17.1 is the recommended, best, and most suitable application to install on an Amazon Fire TV stick. Rather than that if you want to experience the other versions, then you can also go for that. Now click on the Install button to start up the downloading of the file and installation process as well. Wait for the time to complete the whole process, and it may vary depending on your internet speed and connection status.

Step 8: Customise the Kodi app:
As with the other applications available in Kodi, you can easily customize it depending on your needs. You can share, stream media files, and manage them according to your taste. Also, install Ad-On that may become helpful to you in any aspect. This app also allows you device access like remote media server (must having USB port), network access, Bluetooth devices, etc. Besides that, you can change your audio settings, prevent Fire Stick from sleeping and others.
Now your Kodi app is almost ready to use in your Amazon Fire Stick TV. Further, if you need to change the settings of this app according to your needs, you can do it easily. Otherwise, you can keep it by default to its recommended settings such that you can use it without any issues.
Conclusion:
That is all about the systematic guide ‘how to install Kodi on Amazon Fire Stick TV’ in an easy way. Hope you all are satisfied with the information given here about the installation of Kodi on Fire Stick. We always recommend you to use the above-discussed process because it is completely free and time-saving too in all respects. If you want, you can also go for another process, but they probably harm your device and start to malfunction at any time. Until now most of the users choose this above process to install the Kodi in Fire stick TV. Feel free and start to use this app in your Fire Stick now.

read more
Technology

Todo Backup Review

Working with your personal PC then it is very important that you do keep some backup softwares in your PC so that your work can be back up in your PC any time even when it is permanently deleted from your computer. There are many backup software for PC that brings many features with it that you will love downloading that backup app in your PC.

Todo backup is one of the software which helps in keeping the backup file of our PC safe and secure. This means if you are using a premium and a new version of Todo backup in your PC then you can do any work in your PC securely. As per as I know there is two types of todo backup that you can download Todo Backup home and Todo Backup Workstation and this both work in different manner.

I recently used this Todo Backup software in my PC as I was working for some important project. I find that this app is very beneficial in working, there are many benefits on using this backup software.

You can directly buy this software for premium use for $29, you can also download it for free but for upgrading the software you will need to pay some $14.50. I must say if you are using this beneficial software in your PC you will not hesitate to pay for this software.

Today I will be telling you about some features and review of this backup software. This backup software is very much good for me and according to me for those who do important work in their PC with out any backup software must use this software. So please keep patience and read the article I am sure you will feel interesting  to read the review of such an interesting backup software that every official worker will need.

Benefits of Using Todo Backup:

First of all I have decided you to tell about some features of this backup software, for sure on hearing these benefits you will be like wow! Because till date I don’t think any backup software is been providing so much of features in it.

  1. The first and the main thing is that Todo backup software comes at an affordable price and very powerful. This is one of the fastest working software and this software is very much easy and safe to use.
  2. On using this software you don’t have to take any tense for storing your data here. This software is very safe, you can just fully rely on this software. For me this is the best way to protect way to safe any file or documents in the PC from any hackers.
  3. One of the most important thing is that this software is compatible with any type of Windows that is 7/8/8.1/10.
  4. If you are looking for some steps to install this app in your PC then I must say installing this app is the same as the way you install any other third party app. As I have said you will feel very free to use this app.
  5. This software is also supported with multiple languages like English, Dutch, Franch etc. So you don’t have to worry about languages you will have multiple numbers of languages to choose in this software.

So this is some of the features that is given in this software to make the user feel comfortable on using this app.

Backup Features of Todo:

  1. Using Todo backup you will be able to backup selected files, so now you don’t have any tension for choosing the correct file for backup.
  2. On using this you can also easily be able to backup your operating system too. You can directly backup your operating system  under which al the files of your PC will also get back up.
  3. Todo backup software also allows you to do full backup your PC. This means you can fully backup your PC including all the information of your OS, application, system and all the other files where all your important documents will be also be included.
  4. If you have no time to spend in doing backup your important files or folders, then you can easily schedule the backup function may be in weeks, months or days. So on doing this you will not need to do any backup as it will automatically backup your computer every week or month as it is scheduled.

So this is the way you can backup any type of windows. Yes, windows 10 is all new in the market so you might be thinking that does this feature will be same for windows 10? In this question I will tell you that you can also do Windows 10 backup in the same process.

Advanced tools of Todo backup:

Here I will be giving you some of the advanced tools that has been added in the premium version. This tools is much more interesting than you get in the free version. It’s not that you can enjoy this features only after paying but this features comes in to more effect after you upgrade this software to a premium one.

  1. For recovering directly the backup files or folder just click on the image and copy paste the files or folder that you want to recover. So you know it is very easy to restore the backup files.
  2. For restoring the image files you must keep in mind that you check the integrity of the files and see whether the file can be restored in your PC successfully or not.
  3. You can easily transfer files from one hard drive to another hard drive. The most important features Is that you can also clone your hard drive. There will be procedure given for how to clone hard drive

So this is all the advanced features that you are getting in upgrading the Todo backup software for your PC to premium one. I hope you won’t get features like this in other backup software for your PC. This is the reason why I am sharing this review with you because I think that everyone must know about this Todo backup software features.

This is all the features that you are getting on using this software in your PC. When I first heard about this software I was all unknown about all this features. But I tried using this app with out having any knowledge. After spending two months with this software I have come to know all about this software like it’s features, benefits etc.

According to me every office workers should have Todo backup software in the PC because this is the best way to backup your important work files free from any other sources in your PC.

I hope you have liked reading this review of Todo backup software. Thanks for reading

read more
GeneralTechnology

DVDFab DVD Ripper

DVD Fab for Mac

DVDFab DVD Ripper is considered as one of the best DVD ripping software which helps you to rip DVD and convert it into different file formats for making playable on every electronic device such as Smartphone, iPad, iPhone, tablet, Xbox, iPod and even in 3D devices.

Currently, this software is available for Windows and Mac. One of the main advantages of this software is it is a user-friendly interface that makes very easy to convert into most format as per your requirements.

The company is still upgrading this software, and now it supports all 4K videos and also H.265. It can also convert DVD to iPhone 7 and iPhone 7 Plus suitable files which is very good news for the new iPhone users. There are many features available for this DVDFab DVD Ripper software.

So in today’s article, I am going to share some features in details about this software and how actually this software works. So read out the full article to know more about DVDFab DVD Ripper software.

DVDFab DVD Ripper Feature Review:

There are many features available for this software, and I am going to list it down one by one in details.

Convert DVD to audio formats

This software will allow you to rip and convert DVD to different audio formats such as MP3, M4A, WAV, AC3, MP4, and WMA. It can also extract all the DVD audio from all videos.

Convert DVD to video formats

DVDFab DVD Ripper software not only convert DVD to audio formats but also it can convert rip DVD to any video formats such as MP4.4K, MPEG-4, H.265, MKV.4K, Xvid and much more. These are all compatible with many devices such as iPhone, Ipad, Tablet, Cell Phone, Xbox, etc. It can also rip DVD to different 3D video formats such as MKV, AVI, MP4, TS, WMV, and M2TS.

Customize video format

This software is very easy to use, and it helps you to customize the format of the video including the resolution of the video, aspect ratio, frame rate, image cropping and also the size of the video file which is really very amazing.

Setting conversion segment

This software is very user-friendly software, and it can allow you to take full control over your videos or any movies, you will be able to do whatever you want.

Customize audio format

You can also change the format of your audio system including the bit rate, volume and also the channel.

Set Audio tracks and subtitle

You can also add your favorite audio tracks or the subtitles in your video or movies. DVD Ripper software also enables you to watch the forced sub-picture of any movies if you wish to.

Customize video effects

You can set the resolution of your video screen by cropping it, resize, and you can also pan the required video for getting the perfect video effects.

Multiple conversion

Using this DVDFab DVD Ripper software you will be able to rip many files multiple at a time. You don’t need to wait for each and every file and the speed of conversion is very fast. It will save your time then what you need more?

Supports Multi-core CPUs, NVIDIA CUDA and Intel Quick Sync

This software has been updated simultaneously after every few days. And now it supports NVIDIA CUDA and Intel Quick Sync technologies too.

DVDfab DVD Ripper – Compatibility

The software is available for both Window and Mac Operating system. For Windows, this software supports in Windows 7/8/8.1/10 and Vista as well. And for the Mac user this support in Mac 10.7+ version.

Requirements for installing DVDFab DVD Ripper in PC

  • This software can be installed and run in Windows 7/8/8.1/10 and Vista(32 bit and 64 bit).
  • Minimum 512 MB RAM required.
  • Your system must have at least 20 GB free Hard Disk space.
  • Minimum Pentium II 500 MHz required.
  • Internet connected is needed to register your DVDFab DVD Ripper software.
  • DVD + R (W) or DVD-R (W) Drive is required.

Now finally I would like to say that DVDFab DVD Ripper is the best DVD ripper currently because it has many features which will make you very interesting. And it is compatible on many devices. Till now, it is the fastest DVD converter that has ever launched, and you can fully customize your videos, Mp3s or any movies.

I hope you really like this article and if you have anything to share then you can freely give your comment.

read more
1 2
Page 1 of 2