close

debjit

Health

Ways to Prevent Food Poisoning in Children.

Introduction

I will start this piece by quoting some of the most recent news on food adulteration causing food poisoning in children.

In June alone, over 4-5 widely shared cases surfaced, with consumers posting images of non-edible items in their food products, such as ice cream and chips.

In the latest, a resident in Jamnagar, Gujarat, was left shocked after discovering a dead frog in a packet of popular brand wafers he had purchased. 

A woman in Kerala discovered a dead rat in a bottle of chocolate-flavored popular syrup she had ordered from the grocery delivery app. 

In Noida, a woman reported discovering a centipede inside a popular brand of ice cream tub she had ordered through an instant delivery app. 

A Mumbai-based man had claimed to find a piece of flesh, apparently a severed human thumb, in the ice cream that he ordered online. 

Source: https://www.republicworld.com/india/

Looking at these news pieces, we can easily make out that the food that is consumed by us, especially minors and children is being adulterated with harmful things and objects. Since food poisoning is caused by germs or other harmful adulterations in food, it is a given that:

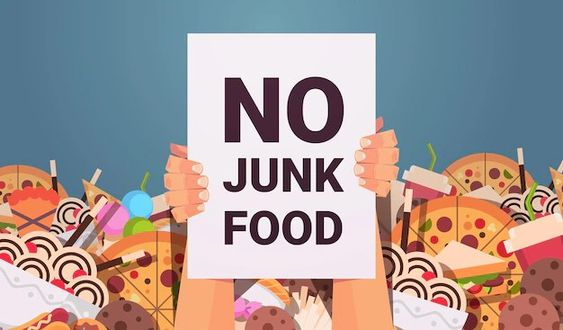
  • We should avoid giving junk food/packaged food/frozen food to our children.
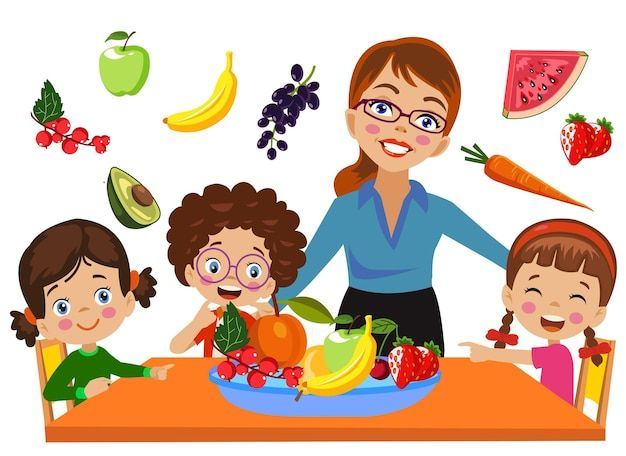
  • Second, we should foster healthy eating habits in our children.
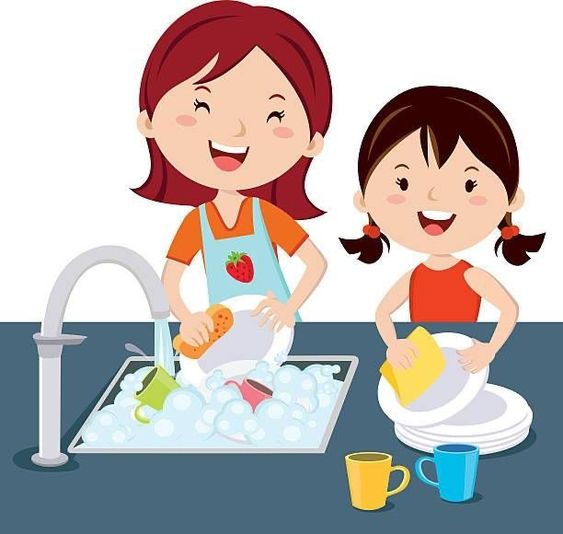
  • Third, we should encourage our children to wash their hands whenever they come back home from outside, especially after playing.
  • Fourth, the dishes that we use to serve food to the children should be properly cleaned and washed, especially utensils, cutting boards, surfaces, etc.
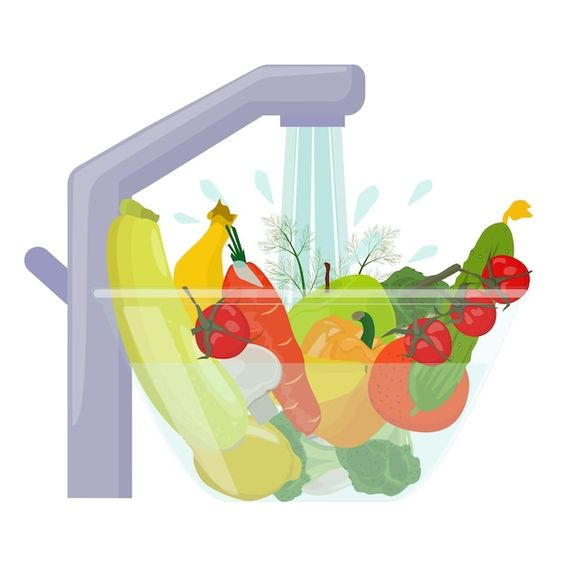
  • Fifth, when we bring fruits and vegetables from vendors, we should wash them properly to avoid germs from penetrating and thriving in the refrigerator before giving them to children.
  • Sixth, we should always use a thermometer when cooking.
  • Seventh, do not at any cost give outdated food items to children.
  • Eighth, do not encourage children to drink water from ponds or wells that are not medically treated. Ask them to drink water that has been treated or chlorinated.
  • Ninth, we should order food online, only from trustworthy food delivery vendors for our children.
  • Finally, always keep up-to-date on news on food. We should be alert about the contaminated food airing in the news.

Now, let us discuss these talking points on ways to avoid food poisoning in children in detail.

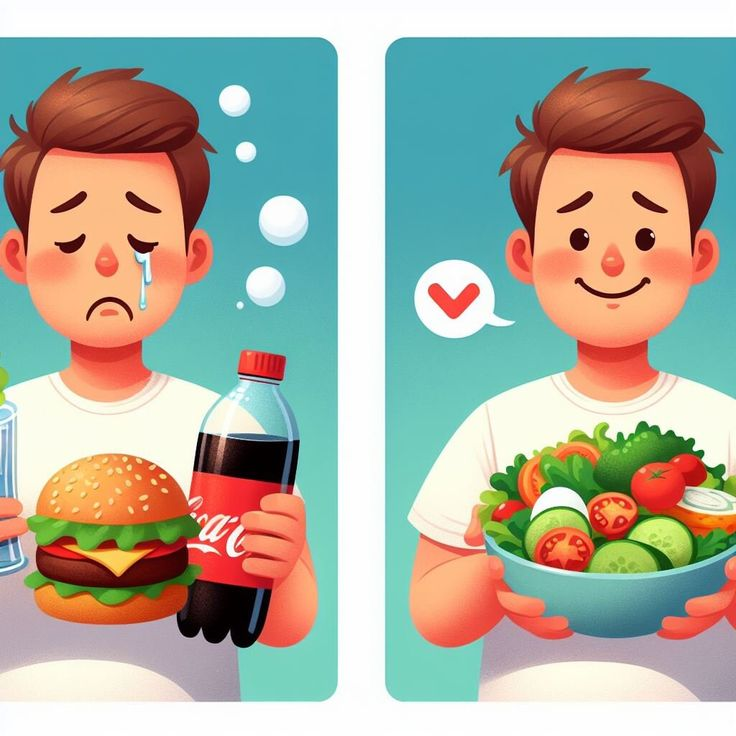
>Avoid Junk Foods/Packaged Food/Frozen Food: Children in recent times are more and more inclined toward eating junk and packaged food such as chips, chocolates, ice cremes, cold drinks, canned juices, sodas, etc. It is always advisable that when buying these food items, we should check the brand and expiry of these food items. Buy these food products, such as junk and frozen food only if you must from trustworthy vendor partners. Meats such as ham, bacon, salami, and hot dogs can be a source of food poisoning. And if we as parents, would know how our children are fond of eating these food items. It is very significant to keep in mind that all meat carries a risk of food poisoning if it is not cooked or stored properly. Some meat items are packaged and frozen for a long time. In a report, published recently it was found out that 83% were caused by meat sliced and packaged at counters. Apart from meat, other food items such as frozen food like snacks that can be fried and used later can be hazardous too if expired and not refrigerated properly.

>Foster healthy eating habits in children: The first step toward attaining our child’s health is by setting an example ourselves. Be a role model and start eating healthy food yourself. Our children often imitate us and parents are the direct source of that inspiration. Eat meals together, encourage family meals, and set a good example by opting for healthy food items. Limit junk and frozen food to just a day in the week or only on weekends and encourage children to follow the same.

>Ask children to wash their hands often: Asking children to wash their hands whenever they eat something, and asking them to wash their hands when they come back from outside are very important habits to inculcate because these habits help prevent the germs from spreading. Nurturing the habit in children to wash their hands often may prevent children from illnesses like food poisoning, the flu, or diarrhea. Germs can be transmitted to their body through hand-to-mouth contact, or by touching their face, mouth, nose, or eyes with contaminated hands. Thus, play safe by fostering the habit of washing hands often, in children.

>Clean utensils, cutting boards, and surfaces properly: Bacteria that are present in the food can be transferred to the utensils, cooktops, and cutting boards causing illnesses. Clean and wash the kitchen utensils, counters, and appliances, to avoid bacteria from developing on these surfaces and causing food poisoning in children. It is imperative to take the compulsory steps to clean before, during, and after preparing and eating the food to keep us and our children safe from food poisoning.

>Wash fruits and vegetables before consuming: We all know and our children also know that while growing fruits and vegetables on farms, pesticides and other medicines are sprayed on fruits and vegetables. These pesticides can cause food poisoning if our children consume these fruits and vegetables without properly washing them in running tap water. If the fruits or vegetables are consumed without washing, pesticides can enter the body, causing serious health problems including food poisoning. Other than pesticides, these fruits and vegetables might also contain dirt, and bacteria because they are often placed in the open. Thus, wash them properly before using them.

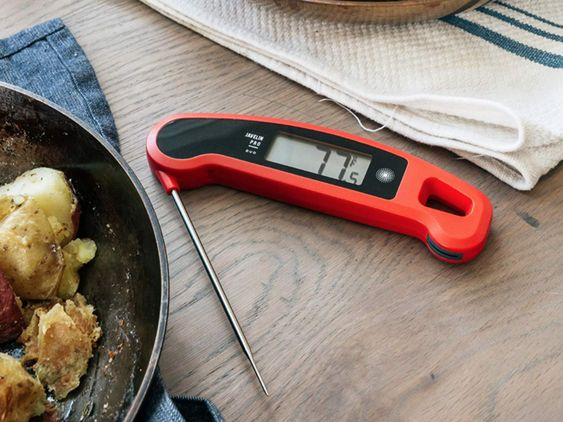
>Use a thermometer when cooking: Using a thermometer while cooking is the only reliable way to ensure food safety and determine food especially non-vegetarian food such as meat, poultry, and eggs is cooked to the desired level of doneness. Cook beef to at least 160°F (71°C), poultry to at least 165°F (73.8°C), and fish to at least 145°F (62.7°C).  Bacteria can rapidly grow in low temperatures and multiply at an increasing rate at mid-range temperatures. To avoid such conditions, a food item must be cooked to an internal temperature high enough to destroy harmful bacteria. Using a meat thermometer is a dependable way to ensure that food has reached the appropriate temperature. This is yet another way to prevent food poisoning from occurring in children.

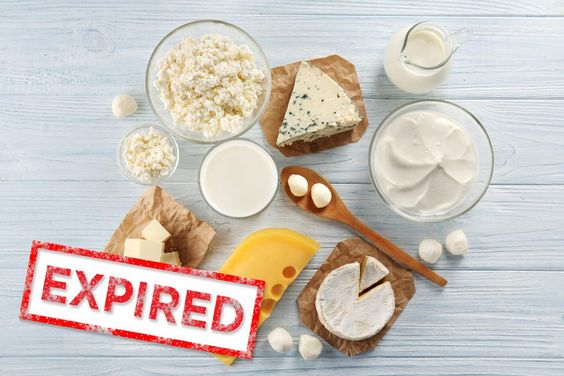
>Never give expired food items to the children: Never give children and encourage them to consume food after its use-by date, even if it looks and smells okay, as it could make them prone to food poisoning. But sometimes some food items like shelf-stable foods and frozen foods, can be given to them to eat as they can be used longer than their expiration date. You can use your senses to judge whether a product has gone bad by looking for signs of spoilage.

>Do not drink water that has not been treated or chlorinated: Water from ponds and dirty water sources can cause havoc with our children’s health and can be a source of poisoning in children. Water can cause food poisoning when it is contaminated with bacteria, parasites, viruses, or toxins. This can happen if water meets infected people’s stools, or if contaminated water is used to wash. Shellfish that have lived in contaminated water can also contain viruses. Additionally, water that is used to grow food can become infected with animal or human feces.

>Order food online only from a trustworthy food delivery vendor: When choosing a food delivery service, we should consider things like reliability, customer support, menu, etc. to be able to get hold of them in case of an eventuality of food poisoning. Considering the news that has been coming in the last 2-3 months on adulterated food items being delivered, we should encourage our children to eat at home instead of buying online food. If it cannot be avoided, always check the credibility of the vendor food partner, and ask them to deliver only fresh food from most trusted food outlets.

>Keep up-to-date on news on food Adulteration: So much food adulteration news in circulation, these days that it is not difficult to stay abreast with the latest happening on this front.  Here are some ways to prevent food adulteration as a consumer:

  • Choose trusted brands
  • Be wary of colors
  • Clean and store properly
  • Check seals/Read labels

Conclusion

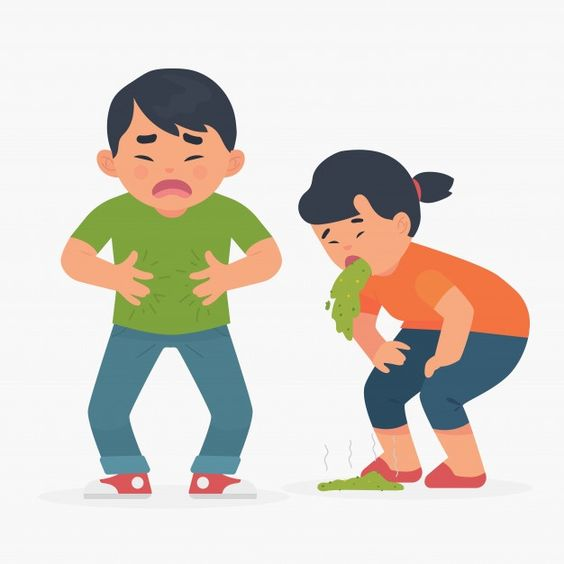
We must be vigilant and, on our feet, when it comes to our children’s health. This holds for food poisoning because it can lead to a complete drain of their health by way of upset stomach, vomiting, diarrhea, diarrhea with bloody stools, stomach pain, cramps, fever, and headache.

There are certain precautions that if we take can prevent food poisoning in our children. It is very difficult to find out the real reason for food poisoning and you cannot trace it to its source. Eric Schlosser once said, As a matter of fact, most cases of food poisoning are never linked back to their source.”

As an age-old saying goes, prevention is better than cure; follow simple tips to avoid food poisoning in children, and do not be sorry later.

read more
Technology

How to Increase Dedicated Video RAM in Windows 10?

As we know, Windows 10 is the latest version of Microsoft Windows Operating System. The overall performance and the speed of this operating system are much better than earlier. However, we need to prepare our PC so that you can run Windows 10 well on your device. Depending on this, generally, we use 2GB, 4GB, 6GB, etc. sizes of RAM to speed up our PC according to the processor. Similarly, we also need to have a good capacity of Graphic Card to get the best visual output in our PC Display. Thus, we have two options i.e. Dedicated Video RAM and External Video RAM. Dedicated video RAM is the chip, which remains fixed in the motherboard with the Processor and other component capabilities. Whereas the External video RAM can be, replaced and attached externally. Here in this topic, we will talk about how to increase Dedicated Video RAM in Windows 10 with ease.

The dedicated video RAM comes integrated with the CPU by fixing the board from the manufacturer unit. V-RAM or video RAM helps us to control the computer Graphics Processing Unit. V-RAM and the Graphic Card are eventually responsible for displaying the objects and pictures on the screen properly. It also helps you to increase the Video and the gaming quality largely, so after increasing the V RAM you can view videos in high quality, or play games in high graphics. The system to increase the dedicated video RAM is a little tricky but you will find it easy after reading this article, as we have shared the easiest steps you can ever find on the internet. Even if you have graphics cards of NVIDIA, RADEON, ATI, etc. You can follow the same steps to increase the video RAM of the system with Windows 10. So let’s have a look at how easily you can increase the dedicated video RAM in Windows 10

Proper Guideline: How to Increase Dedicated Video RAM in Windows 10?

 Follow the below-given guidelines to increase dedicated video RAM in Windows 10, before doing all these you have to make sure that you have some basic technical knowledge. All of the steps that are given here are practically done, simply follow this step by step and you are done.  

Step1: At first start up your PC and make sure you are using the latest version of Windows 10. Besides that, the Graphics driver should be properly installed in your PC to receive the proper output after increasing the RAM size.

Step 2: Now in this step, you need to press the Windows + E, keys simultaneously. Thus, it will help you to open the file explorer instantly in your PC. Next to it, it clicks on This PC or My Computer, which is present on the left side of your screen.

Step 3: After getting in the My Computer, here you need to right-click in your mouse and the menu will appear on the screen. Here choose the last option i.e. the properties and it will open the next window.

Step 4: From the Properties window, you need to choose the Advanced System Settings option, which is present on the left side of that screen. Sometimes the PC also needs the administrator’s permission to access the setting. So press the OK button from the pop-up window if needed and continue further.

Step 5: After opening the advanced system setting, now from the tab choose Advance tab, which is available with another tab on the top of this screen.

Step 6: In this tab, you are required to click on the Settings button, which is available on the label of Performance.  

Step 7: Thus, the Performance settings will get displayed on your PC screen. This setting will allow you to change the graphical performance and other setting on your PC. Again, on the Performance Option Window you need to choose the Advanced tab from the top of the screen. This option is present next to the Visual Effects menu tab.

Step 8: In this step, you have to choose the Change Button, which is present under the Virtual memory label of the same windows. Now it will navigate you to the next window and you will need to change some settings there.

Step 9: At first uncheck the first option, which is written as, Automatically manage paging file size for all drives. After that, some of the options will get highlighted and customization will be allowed now.

Step 10: Select the secondary drive, which is present next to the C: drive. Then click on the Custom Size bullet option. Now set up the Initial Size and the Maximum size of the virtual memory according to your needs. If you are getting an error in increasing the memory size then change the parameter and input high memory if it is less. The memory size should be optimum according to the requirements of your PC.

Step 11: Finally click on the Set button, which is present on the bottom of the Windows, and you are done now. Now it is recommended, that you for restart the PC after making the changes to apply and see the effects on your Screen and PC. 

Conclusion:

So these are all the steps that you need to follow if you want to increase the dedicated video RAM of your system in Windows 10. The steps that we have mentioned above require some technical work, so if you have a basic knowledge then you can do it yourself. But if you are blank with the technical information of your PC then you shall let the professional do the work. Because if you mess up with any of the steps you can end up destroying your system forever. Overall this is one of the easiest steps that you can follow to increase your dedicated video RAM of your system in Windows 10. So this is all, simply follow the steps carefully and you are done, comment us below if you have successfully increased your video RAM.

read more
Technology

How to Hide Your Number With *67?

Introduction:

Privacy has become a very important concern among mobile and online users. Mobile number one big thing that requires special care or is ready for the consequences. There are many tricks to hide your mobile number permanently & temporarily, block someone’s mobile number even if your device doesn’t let you do so by default. Did you know how to hide your number with *67? No surprise; it is possible to hide using some prefix codes according to your number carrier.

Know how to block a number from calling your mobile phone and read a complete guide to blocking your number here. If you want to know how to block a number and prevent from that specific user and want to hide your caller ID while calling someone. Let us know, all the important features that you have been in a shadow and share with tricks with someone you care for.

How to Block Your Caller ID When Making a Call?

Yes, you can hide your caller ID or mobile number when calling to another person. This comes handy when you don’t want to share your number to an unknown person. There are some prefix codes, which are helpful to block your caller ID for a limited time. Also, there is a default option to make it possible on your device. All the possible ways to block calls on mobile will be shown in below we will share all methods using your device and by using a prefix. 

Dial *67 to Hide Your Caller ID:

Using *67 code before your dialing number could hide your Caller Details. When you don’t want to share your personal number or info then just add *67 before the number your dialing number. Using this code, the other won’t see your number or caller ID. In this way, you can prevent unknown caller without letting him known your details. Hiding your number with *67 works per-call persist or you need to put this prefix code every time you call. This comes really handy when you will be calling an unknown user without sharing your number. The call receiver wouldn’t see your number but a call notification without your information. So, if you in search for how to hide mobile number with *67 then try out this.

Please Note: This code works in North America using their mobile carriers. This works mainly for landline and yes, works on some mobile phones provided by the carrier itself. If you live in that region and using a carrier device then simply put hide your number using *67 before dialing a number.

How to block a number on Smartphone?

As you can see *67 prefix code allows the user to block in a specific region and using a supporting carrier only. But you can hide your number using the default setting on your device. To hide a number on your Smartphone, here we shared the steps to follow for Android and iOS device users.

How to hide numbers on Android Smartphones?

  • Tap on the Dialer or Phone icon and go to the Settings of Dialer app.
  • There you can see the Caller Settings menu.
  • Tap on the More Settings option, where you can see Show My Caller ID.
  • Untick the box of Show My Caller ID. And all future calls will be hidden to unknown contacts.

How to block a number on iOS, iPhone, and iPad devices?

  • Go to the main Settings of your iPhone or iPad.
  • Scroll down and tap on the Phone menu icon.
  • Now select the Calls option, where you need to tap on Show My Caller ID.
  • Turn off it by tapping on the Toggle button and your all further calls will be hidden.

Conclusion:

So, in this way, you can hide a number or hide your number using the *67 prefix code. If you don’t meet the requirements to use *67 code then no worries; we shared the ways to hide your number using inbuilt settings on Android and iOS devices. So, if you are concerned about sharing your number with an unknown person then follow the above-given steps. And be safe from all unknown calls and hide your number from now.

read more
Technology

How To Cast VLC To Chromecast?

VLC Player is probably the best free way to watch DVDs and media files on your smartphone as well as computer. But it does not feature the Chromecast support for now. Hence you will not be able to use it as your default browser either in your smartphone or in your personal computer. Presently VLC is working for Chromecast support on Windows. However, the feature is not yet available for the stable versions of the VLC media player. 

But thankfully there will be an upcoming version of VLC for Windows, VLC 3.0 which has added Chromecast support for Windows and other devices. So you might be wondering how to cast VLC to Chromecast and stream videos in your Chromecast devices. Worry not as you can now easily use your VLC media player to watch media and cast them to your Chromecast devices or Television.

What are your requirements?

VLC Chromecast is only available for the latest and updated version 3.0 of VLC just for Windows. You will need a Windows system as well as an updated 3.0 version of the VLC media player to perform the task. 

Moreover, you must get a Chromecast device, or opt for the NVIDIA SHIELD which is an Android TV device (because they can accept Chromecast-standard streams, too) or go for a good television that features Android TV software (like the newer generation of Sony Bravia TVs). Do note that your Chromecast device and the Windows machine have to be on the same network either wired or wireless.  

Now before going ahead let us provide you the information about what VLC and Chromecast relate to. All through the article we have been talking about these two frequently but we must know in detail what these both stand for and what is their main function.

What is a Chromecast?

Chromecast is a device that is powered by a USB cable and is plugged in the HDMI port of your TV. Chromecast is used to access video content from Google Play Store, Hulu, YouTube, Netflix, and many other services. This can be done by using your computer or smartphone as a remote control. You can stream almost any kind of Chrome content on your computer using this feature.

What is a VLC Player?

A VLC player is an open-source and free streaming media player. This is a cross-platform as well as portable player which was developed by the VideoLAN project. It is widely popular across the world with millions of users around.

How to stream VLC Player to Chromecast from a PC

In this article, we are going to describe in detail so that you can easily stream content from VLC player to Chromecast on your Windows PC. Before beginning the task, you must notice that your VLC player must be updated or you will need a recent version of the media player. Depending on your Windows operating system, you need to download the VLC player in either 32-bit or 64-bit. You will easily find the processes and links for downloading the latest version of the VLC player on the internet. 

Install the file downloaded ‘.exe’ file of the player on your Windows computer. Now you are ready to go. Do carefully follow the methods and steps provided below to stream the VLC media player contents to Chromecast on your Windows computer. Now you can easily stream your favorite content from a VLC media player onto your Chromecast device just by following these simple procedures.

⦁ First, you need to connect your Chromecast device to your TV using the HDMI port. Now switch on to power up your TV.

⦁ You must buy a Google Chromecast.

⦁ Install Google Chrome and after that add the Google Chromecast extension to the browser.

⦁ Then follow the steps to set up your Chromecast to start working with your Windows PC.

⦁ Now open the VLC media player and stream your favorite media content to watch it on your TV.

⦁ Open a new tab in Chrome and using Google Cast select the option “Cast window/screen (experimental)”.

⦁ Finally, most of your is done. Now your entire computer desktop will start streaming to your Chromecast. Go back again to VLC Player, switch it to fullscreen mode and that’s it, you have got VLC Player streaming via Chromecast and now you can enjoy your favorite media player content easily on your TV.

How to stream VLC Player to Chromecast on Android?

Well presently VLC Player does not support Chromecast for for Android. Hence, you are left with only two options, one is to find an alternative Android video player that supports Chromecast Streaming, and the other option is to wait for the long-winded way as you have to use VLC media player only.

Now if you are going for the second option, you must follow the following steps in order to stream your VLC media player to Chromecast on Android.

⦁ You need to install the Chromecast app on your Android smart device and have to pair your Chromecast to the device.

⦁ Then open the VLC media player and choose the file you want to cast.

⦁ After that open the Chromecast app on your Android device.

⦁ From the app, tap on the menu button to select the option “Cast screen/audio”.

⦁ Now follow the instructions provided which will guide you successfully to cast your device’s screen to your Chromecast.

⦁ Head back to the VLC media player again and switch to a fullscreen mode of the video and that’s it, you’re done.

How to stream VLC to Chromecast on iOS?

Just like the other processes it is quite easy to stream VLC Chromecast on iOS. Just follow the below-provided steps.

⦁ Download the Android VLC media player app from the Google Play Store and pair it up with the Chromecast using the Chromecast app.

⦁ Sign in to this Chrome app and it will display an icon that will notify the nearby available devices.

⦁ Either you can opt for the ‘casts screen/audio’ option from the menu bar.

⦁ Then you will be notified of the available devices. Choose the phone or tablet you are using.

⦁ When the connection to the TV is established, just open the VLC player and start playing your favorite video.

⦁ Now enjoy that video on the large screen of your Television.

How to stream VLC to Chromecast on Mac?

VLC has yet to add Chromecast support to stream and play videos on Mac OS. Sadly, you cannot find any alternative workarounds available at the moment that could help you to cast video from a VLC media player and Chromecast it on your Mac.  However, if you are in real need to cast your favorite media files from your Mac to Chromecast, you have to opt for some other choices rather than using VLC.

You can go for Airflow, which is a free streaming app on Mac that will definitely help you to stream video content to Chromecast. The app is pretty simple and easy to use, you just need to add the content and drop it to your Mac to watch it. Just drag and drop your videos choose the right Chromecast and watch it go live.

It Didn’t Work! Help:

You might have problems with this feature of the VLC. Well, certainly this new feature will take some more time to get everything right. You just need to have patience and wait for a time. If this VLC feature doesn’t work well for you at the moment, you might have to look out for some other alternative ways to stream and watch your video files on your Chromecast device.

There is an easy way to stream your computer’s desktop video to a Chromecast. This can be done by using Google Chrome’s built-in casting tool. To begin with, open your Chrome browser and head to any website you want, click the Menu button and select ‘cast’ or opt for the Chromecast icon. Then change the source from the Chrome tab and choose “Cast Desktop.” Finally, select your Android TV or Chromecast device.

Then open the VLC media player and select the video file you want to play fullscreen. Note that, the video quality will be much lower compared to the original video. In the future, if you wish to downgrade to a stable version of VLC, you just need to visit VLC’s official homepage download a stable, current version of the VLC media player, and install it.

Wrapping Up

Presently the newer versions of the VLC media player come with Chromecast support. But this feature is quite far away from being perfect and is actively under progress and development. VLC Media Player’s version 3.0 release is expected to add Chromecast support. Yet, there is no official information about when and whether version 3.0 will be available to download with Chromecast support. We hope this will help you out. Do share your experiences and let us know which method worked well for you. We hope to see you soon. Till then signing off!

read more
Technology

How to Remove Password from PDF?

Removing password from PDF is the best option to open protected PDFs, because it is very irritating to type password every time you open the file. Removing the password will let you open the protected files anytime, without providing the password. There is no need to remember the password too. But what is the way to remove password from PDF? It is a common question from almost all the users. That is why we have come with the permanent solutions of this problem.

How to Remove Password from PDF File?

In this article we have provided, not only one, all the possible ways to unlock PDF files permanently. Here we have added the methods using Adobe Acrobat Pro, Chrome, in-built PDF printer on Windows 10, third party PDF printer for Windows, and online PDF unblocker tools. So keep reading this article and apply the tricks to save all the password protected files without password.

How to Remove Password from PDF?

It is very easy to remove password from PDFs if you know any one trick from the article. That is why we have provided 6 different ways to unblock PDFs for you to choose from. All the six method are tested and found the best methods to make PDFs password free. Here we have included solutions for both windows and Mac users. So try the suitable method for you devices to remove password from PDF by simply following the steps mentioned below.

How to Remove Password from PDF using Adobe Acrobat Pro?

Almost all of us know about the Adobe Acrobat that allows the users to create, edit, convert, encrypt, digitally sign, and publish PDF files. But many of users use the free version of the application i.e. Adobe Acrobat Reader. It has a premium version too. The premium version of this app is Adobe Acrobat Pro. It gives various features and facilities to the users. One of the features is removing password from PDFs. If you have this version, then it is very easy to unlock PDFs. Follow the steps to remove password from PDF using Adobe Acrobat Pro.

Step to Follow:

  • Click on the PDF file you want to unlock and type the password to open.
  • After opening, there will be a lock icon available on the left side of the screen, click on it.
  • Then choose “Permission Details” and then the “Security” option.
  • Choose the “No Security” option and then “OK” to remove the password from PDF.
  • Now click the “Files” and click on “Save” to save the change you have made.
  • Now your PDF file has become password-free.

Alternative way to Remove Password from PDF using Adobe Acrobat Pro

There is another way available for Adobe Acrobat Pro users to remove passwords from PDFs.  The alternative way is mentioned below.

Steps to Follow:

  • Open Adobe Acrobat Pro on your devices.
  • Now right click on the file from which you want to remove password and then go to Properties.
  • Then open the Security tab,
  • Select No Security option and then click OK.
  • The file has become unblocked.

How to Remove Password from PDF using the “Print to PDF” option of Chrome?

If you are a chrome user, then you can also remove password from PDFs very easily. The best thing of chrome is that, it allows the users to save the password free PDF file directly to their local storage. No need to download the file and then go through the password removal process. Just open the file online providing the password, use the “Print to PDF” option and save. The new file will be password free. Those who have not used the facility yet, follow the detailed steps mentioned below.

Steps to Follow:

  • First of all, open the chrome browser.
  • Now if you already downloaded the PDF file, then drag & drop the PDF file on Chrome browser, and open it by providing the password. If not, then just open the PDF file online using the password.
  • After opening the file, click on the Customize & Control button (3 dots) on the right corner.
  • There you will get the “Print” option, click on it.
  • Now click on the “Change” button below the “Destination” on the left side of the window.
  • Choose “Save as PDF” from the list and then click on “Save” above the “Destination” option.
  • Now choose the “Location” and type the “File Name” you want to give to the new unprotected PDF file.
  • Click on “Save” and the newly saved PDF has become password free.

The above mentioned trick is applicable on print protection free PDF files only. For print protected PDF files, Adobe Acrobat Pro may help the users to remove the passwords.

How to Remove Password from PDF using “Microsoft Print to PDF” option on Windows 10?

There is good news for Windows 10 users. If you are using windows 10, then you do not need to follow the trick of chrome mentioned above. You can simply unblock PDF files using the in-built PDF Printer facility on any PDF viewers. Follow the steps to remove password from PDF using PDF printer option on windows 10.

Steps to Follow:

  • Open the PDF file on any PDF viewer and provide password.
  • Now click on the “Print” option available on the toolbar.
  • Select the “Microsoft Print to PDF” under the “Printer” option.
  • Then click on print, it give you options to choose the “Location to Save” and to rename the file.
  • So choose the location and rename it.
  • And click on “Save”. Your newly saved PDF file will have same content, but password free.

Windows 10 users can use to save the password free PDF file from online directly. Just open the file online, tap on “Print” button, and then choose “Microsoft Print to PDF” to save. Other Windows users (windows 7, 8, 8.1) can also use this facility i.e. “Microsoft Print to PDF” to remove password form PDF by installing any PDF printer application like doPDF, NCH Software, on their system.

How to Remove Password from PDF using PDF Printer App “doPDF”?

doPDF is a third party PDF printer application. It allows the users to convert printable documents like Word, Excel, PPT, and image into PDFs. Users can also use the “doPDF” for removing password from password-Protected PDF files. The best thing of this application is that it is compatible with all the 32 & 64 bit versions of Windows including Windows 10, 8.1, 8, 7, Vista, XP, 2008, 2003, and 2000. So if you do not have the application, then no need to be worried. Just follow the steps below to download & install “doPDF” and then remove password from PDF files.

Steps to Follow:

  • First of all, go to the official site of “doPDF” and download the application and install it.
  • Now open the protected PDF file that you want to make password free.
  • After opening the file, click on “File” menu, and then “Print”.
  • Choose “doPDF” in the printer section and click on “Print”.
  • It will give you options to choose location to save and rename the file. So choose the “Location” and Rename the file.
  • Finally click on “Save”. Your password free PDF file has been saved in the desired location.

How to Remove Password from PDF using Online PDF Unblocker Tools?

Last but not the least option for unblocking PDF files for ever is using online PDF unblocker tools. These tools can be used to Unlock & Protect PDFs, Compress, Split & Merge, View & Edit, and sign digitally. Users can also use those tools to convert PDFs to word, excel, PPT, JPG, and vice versa. And the process is mostly automatic. Users just need to select the purpose, upload the file, and after processing download the file. So those who cannot use the three ways mentioned above can chose the fourth way.

There are many online service providers available on the web that use to provide all the services mentioned above. Some of the popular online PDF unblocker tools are:

  1. https://smallpdf.com/unlock-pdf
  2. https://www.ilovepdf.com/unlock_pdf
  3. https://pdf.io/unlock/
  4. https://www.sodapdf.com/unlock-pdf/
  5. https://pdfio.co/unlock-pdf/
  6. https://online2pdf.com/remove-pdf-password

Though the first three methods are little lengthy and boring, they are safer than the fourth one i.e. the online PDF unblocker tools. On the basis of the security, it is very hard to trust on those online tools for any classified PDF files to unblock, protect, or any other purposes. So users are suggested to think twice in case of classified file. Normal PDF files can be uploaded on these sites for different purposes.

Final Words

I hope this article will help you to remove password from PDF files and use them uninterruptedly. Here we have provided 6 different ways as well as their detailed steps to unblock PDF files. The safest ways to unlock PDF are using Adobe Acrobat Pro, Chrome browser, and the in-built PDF printer feature of windows 10. The online PDF unblocker tools are also useful but for normal PDF files. So for now, use the tricks and unblock all your PDF files for uninterrupted use.

read more
Travel

Best Gadgets for Traveling to Out-of-Network Zones

Heading out to remote places where your phone doesn’t get any signal can be both super exciting and a bit challenging. Imagine hiking through beautiful mountains, wandering in dense forests, or embarking on a thrilling desert adventure. 

Sounds fun, right? But to make sure your trip is safe and enjoyable, you need the right gadgets. These gadgets will help you stay connected, find your way, and keep you safe even when you’re off the grid. 

Let’s look into the best gadgets you should bring along for communication, navigation, power, and emergency situations. So, let’s get into it and make sure you’re all set for your next big adventure!

Communication Devices

Satellite Phones

When traveling to areas without cell service, a satellite phone is an invaluable tool. Unlike regular mobile phones, satellite phones communicate directly with satellites, ensuring connectivity in remote locations.

Top Picks:

  • Iridium 9575 Extreme: Known for its global coverage, rugged design, and reliable service.
  • Inmarsat IsatPhone 2: Offers excellent voice clarity, GPS tracking, and an SOS button for emergencies.

Personal Locator Beacons (PLBs)

Personal Locator Beacons are crucial for emergency situations. When activated, they send a distress signal to rescue authorities, providing your exact location via GPS.

Top Picks:

  • ACR ResQLink 400: Compact, lightweight, and highly reliable with a built-in GPS.
  • Garmin inReach Mini: Not only a PLB but also offers two-way messaging and weather updates via satellite.

Two-Way Radios

For group communication in out-of-network zones, two-way radios (walkie-talkies) are essential. They allow you to stay in touch with your group members over short distances.

Top Picks:

  • Motorola T600 H2O: Waterproof, with a range of up to 35 miles, and comes with NOAA weather alerts.
  • Midland GXT1000VP4: Features 50 channels, a range of up to 36 miles, and emergency weather alerts.

Navigation Tools

the navigation tools

GPS Devices

A dedicated GPS device is more reliable than a smartphone in remote areas. These devices are designed to work without a mobile network, using satellite signals to provide accurate location data.

Top Picks:

  • Garmin GPSMAP 66i: Combines GPS navigation with inReach satellite communication, offering topographic maps, weather forecasts, and SOS functionality.
  • Garmin eTrex 32x: Affordable, durable, and comes preloaded with TopoActive maps.

Compass and Map

While electronic devices are fantastic, having a traditional compass and a physical map is a must for any adventurer. They serve as a reliable backup in case your electronic devices fail.

Top Picks:

  • Suunto MC-2G Compass: Highly accurate and durable, with global needle and adjustable declination.
  • National Geographic Adventure Maps: Waterproof and tear-resistant maps for various regions.

Power Solutions

Portable Solar Chargers

Keeping your gadgets powered is crucial during extended trips. Portable solar chargers are an excellent solution for charging devices in the wild.

Top Picks:

  • Goal Zero Nomad 7 Plus: Lightweight, foldable, and efficient, suitable for charging small devices.
  • Anker PowerPort Solar Lite: Affordable and reliable, with high conversion efficiency.

Power Banks

High-capacity power banks are essential for storing power and recharging your devices when solar charging isn’t an option.

Top Picks:

  • Anker PowerCore 26800: Massive capacity with three USB ports, capable of charging multiple devices multiple times.
  • RAVPower 20000mAh Solar Power Bank: Combines solar charging with a high-capacity battery, ideal for emergency power.

Lighting and Safety

Headlamps

A good headlamp is essential for nighttime navigation and camp activities. Look for models with long battery life and adjustable brightness.

Top Picks:

  • Black Diamond Spot 350: Offers a strong beam, waterproof design, and multiple brightness settings.
  • Petzl Actik Core: Rechargeable, lightweight, and provides excellent brightness.

Multi-Tools

A multi-tool can be a lifesaver in many situations, from repairing gear to preparing food.

Top Picks:

  • Leatherman Wave Plus: Features 18 tools, including pliers, knives, and screwdrivers.
  • Gerber Suspension-NXT: Affordable and versatile, with 15 tools for everyday tasks.

Emergency Blankets

Emergency blankets are compact and lightweight, providing essential warmth and protection against the elements.

Top Picks:

  • Swiss Safe Emergency Mylar Blankets: Durable, waterproof, and capable of retaining up to 90% of your body heat.
  • SOL Emergency Bivvy: Offers more coverage and protection than standard blankets, made from tear-resistant material.

Health and Safety Gadgets

the health and safety gadgets

First Aid Kits

A comprehensive first aid kit is vital for treating injuries and illnesses in the field.

Top Picks:

  • Adventure Medical Kits Ultralight/Watertight .9: Lightweight, waterproof, and includes supplies for common injuries.
  • Surviveware Small First Aid Kit: Well-organized, with a wide range of medical supplies and tools.

Water Purification Systems

Access to clean water is crucial. Water purification systems ensure you can drink safely from natural sources.

Top Picks:

  • Sawyer Mini Water Filter: Compact, easy to use, and can filter up to 100,000 gallons.
  • LifeStraw Personal Water Filter: Lightweight, portable, and capable of filtering bacteria and parasites.

Portable Stoves

Portable stoves allow you to cook meals and boil water, which is essential for sustenance and hygiene.

Top Picks:

  • MSR PocketRocket 2: Lightweight, compact, and highly efficient.
  • Jetboil Flash: Integrated stove system with rapid boiling time, perfect for quick meals and drinks.

Entertainment and Comfort

Portable Speakers

Enjoying some music or podcasts can make your downtime more enjoyable. Look for rugged, waterproof speakers suitable for outdoor use.

Top Picks:

  • JBL Flip 5: Durable, waterproof, and delivers excellent sound quality.
  • Ultimate Ears WONDERBOOM 2: Compact, waterproof, and provides 360-degree sound.

E-Readers

Bringing a lightweight e-reader can provide entertainment during your trip without adding much weight to your pack.

Top Picks:

  • Kindle Paperwhite: Waterproof, with a long battery life and a glare-free display.
  • Kobo Clara HD: Compact, with adjustable brightness and a wide range of e-book formats.

Final Thoughts

Traveling to out-of-network zones presents unique challenges, but with the right gadgets, you can enhance your safety, navigation, and overall experience. 

From satellite phones and GPS devices to portable solar chargers and emergency blankets, these tools are essential for any adventure in remote areas. 

Prioritize safety and preparedness by equipping yourself with reliable gear, and you’ll be well-equipped to enjoy the beauty and thrill of exploring off-the-grid destinations.

read more
Technology

PCUnlocker: Reset Forgotten Windows Password in Minutes

You may need to reset your existing Windows password for many reasons. Some of the common causes can be portrayed as sneaking into a computer (Yours or others) using a different password, the administrator password is expired in Windows or disabled, resetting the password of the Windows active directory, mistyping the password excessively ending up with locked Windows account, and simply forgot the Windows password you have set last time. Forgetting the existing password is one of the most common cases and this happens mostly with newly set passwords. Yes, when you set a new password and unintentionally fail to keep it in mind, you are prone to forget it. The passwords that have been used for a long time are hard to forget. Anyways, regardless of the situation, you may regain access to your Windows PC using the PCUnlocker utility. And, in case you are concerned about forgot Windows password, we are sharing the ultimate guide to resetting your forgotten Windows password in minutes using the PCUnlocker tool.

Reset Forgotten Windows Password in Minutes with PCUnlocker

What do people do generally when they forget their Windows password? Reinstalling Windows machines is the option suggested by many. In this case, you will need to buy a Windows installation disk and follow the time-consuming procedure to reinstall the Windows ecosystem on your PC. While doing this, you should also take care of your existing data as well. PCUnlocker on the other hand, gets done the job without any charge or risking your existing computer data quickly and most simply. Putting things in place, PCUnlocker is the best solution we have. And, we have more reasons to opt for the PCUnlocker tool so far.   

PCUnlocker Key Features & Advantages:

# Needless to mention, this tool will help you reset forgotten Windows PC passwords. All you need is to download and create a bootable USB, CD, or DVD and run the tool on your PC.

# The PCUnlocker program also comes with wide compatibility. It supports all Windows versions Windows OS 2000, XP, Vista, 7, 8, and 10 including Windows Server OS 2003 R2, 2008 R2, 2012.

# It support NTFS, NTFS5, FAT16, and FAT32 file system. Also, it works with .iso, .vhdx, and .vhd virtual hard disks and supports SAS/SCSI/IDE/SATA/RAID hard drives.

# On Windows 10 and 8, it can reset the Microsoft account password as well as the local account password.

# If you don’t want to overwrite your existing password, you can simply bypass the password using this tool to access a Windows computer.

# You may promote any Windows user account to the administrator account with the help of PCUnlocker.

# This tool is used for enabling or unlocking a Windows account if that is disabled, expired, or locked.

# Using PCUnlocker, users may reset or change passwords for domain administrator, and Active Directory Accounts besides resetting forgotten Windows passwords for local or administrator users. 

As you can see PCUnlocker provides so many things as far as resetting your PC password is concerned. It comes with a very decent user interface. If you are looking for only the way to reset forgotten passwords in Windows, the free version of PCUnlocker will work just fine. Some of the features are available with premium registration that costs you more than $30.

If you are good with the feature we have listed here and wise to try out this tool on your Windows 7/8/10 (32/64-bit), we will show you how to get it done step-by-step.

Reset Forgotten Windows Password Step-by-Step in Windows 7/8/10

Starting Off:

First of all, you will have to use an alternative computer to buy/download the PCUnlocker tool that is available in .zip format. If you are on an alternative Windows computer, you may use the WinZip tool for PC or ZIP Extractor extension for Chrome.  These programs will help you unzip the .iso file of PCUnlocker and save it on your PC.

 Create a Bootable Hardware (USB/CD/DVD):

After you unzip and save the pcunlocker.iso file, you will have to make a bootable hardware. Use the ISO2Disc tool or MagicISO for making bootable USB, CD, or DVD. MagicISO works for making bootable USB drives too.

Using ISO2Disc: ISO2Disc is free to download and use on a PC.  When the tool is installed you will be prompted to choose either to burn the .iso file to CD/DVD or USB Flash Drive. Here you will also have to locate and select the .iso file through the Browser option.

When your .iso file is selected and ready to burn, make sure that your Flash drive is empty and properly inserted into the computer. Hit the “Start Burn” and then the “Yes” button to continue.  When done, click OK.

Using MagicISO: MagicISO is also a free tool, easy to use on PC. This tool can be used for backing up CDs or DVDs to hard disks, making bootable CDs and DVDs, etc. When your bootable drive is ready with PCUnlocker in it, you can now proceed to the next step.

Access BIOS or UEFI of the Locked Windows PC:

Plug the bootable USB or insert the CD/DVD into your locked Windows PC. Turn on your computer access to UEFI or BIOS. This can be done in several ways. On Windows 10, if the system is already powered on, press+Hold the SHIFT key click on the Power icon, and then click to Restart. 

Alternatively, while your machine turns on press the F2 DEL or F8 key according to your PC Company or device model. This is done to access the BIOS setup menu.

Setup Windows BIOS:

Once you are inside the BIOS Setup menu, use your Arrow keys (Left/Right) to go to the Boot section.

After that, use the Plus (+) or Minus (-) key to bring the “Removable Devices” option to the top.

If you are using Bootable CD/DVD, use the Plus and Minus keys to choose the Boot Device [CD/DVD] option under the BOOT menu.

Finally hit the “F10” key to save the settings and exit the BIOS menu. Select the “Yes” option and then Hit the Enter key.  

Reset Forgotten Windows Password:

 After exiting from the BIOS setup menu, your system will boot from the password reset tool instead of the default bootloader. On this point, you can either choose “Reset Local Admin/User Password” or “Reset Active Directory Password.” Select the first option and then opt for the SAM registry file navigating C:\Windows\system32\config\SAM.

All the available user accounts on your PC will be shown in the list. Here you need to select the right account to reset your forgotten Windows password.

Once your account is selected, click on the “Reset Password” button followed by the “Yes” option to confirm the action.

Reset Your Windows Computer:

Finally “Restart” your PC to confirm the reset password. Your existing forgotten password will be reset immediately and you will be now able to log in to your computer without any password.  You can set a new password onwards.

That’s it. It’s easy to reset your password and log back to your computer when you have forgotten the existing credentials. This time, make sure to remember the password. Nevertheless, if you forget the password again, PCUnlocker is going nowhere. Hope this guide has helped you regain access to your Windows computer running on Windows 7, 8, or 10. Feel free to utilize the comment box if anything further is required.   

read more
Technology

How to Download and Install Xender for PC?

Xender for PC; when this term is searched online or asked someone, most of the suggestions are stuck with Bluestsacks. I say, using any emulator software is not even an option. There were times when an Android emulator used to be the only option as long as using a mobile app or playing an Android game on a PC was concerned. Time has changed now, and so did technology. Matter of fact, if we talk about the Xender File Transferring App, we have a couple of ways to use Xender for Windows PC.

Now the question is, how you will use Xender on a PC without using any third-party emulator as such Bluestacks? We will get to that answer and everything else you need to know about Xender.

Xender for PC

Xender is known to be one of the best file-sharing apps for mobile phones, Smartphones to be precise. Xender app is officially available for all mobile platforms as such Android, iOS, and Windows Phone. Xender has been providing the best features to mobile users. Over time, Team Xender has realized the need of Xender for PC and came up with the ultimate solution. Today we have Xender Web and Xender Utility for Windows.

Xender Web is a web-based version of Xender that can be utilized from all types of computers whether it is Windows, Mac, or others. However, Xender Web works only online.

Xender PC installer, on the other hand, is designed to work offline when installed on the PC. Just like the installed mobile apps.

In a nutshell, we have now two options for using Xender on Windows computers. If staying online is not an issue, the Xender Web version is recommended as it does not require download or installation. Alternatively, the Xender tool will do the best offline if downloaded and installed. You can connect your PC to a Smartphone and exchange files of various formats.

We will see how to use Xender Web and Offline tools for Windows computers. Before we get into the utilization section, you may want to have a quick glance at the key features of the Xender App.

Xender App Key Features:

Xender is a very reliable and easy way to transfer various types of files from your Smartphone device to other devices and vice-versa. The key features of Xennder are as follows –

1: Xender can transfer files with lightning speed. The highest speed of file transfer is recorded as 40Mb per second.

2: Supports multiple file formats. Xender gives you the freedom of sharing any type of files as such music, videos, photos, apps, games, documents, etc.

3: Xender works wirelessly. No tangled cable, internet, or data is required to get things done.

4: No limitations on shared file size. No matter what type of file you are sharing on Xender, you can transfer files as much as you want, as big as you wish. It’s just that, the bigger the file size, the longer the time will it take.

5: As mentioned earlier, Xender supports cross-platform file transferring. It allows you to exchange files between devices like PCs, Mac, Phones, and Tablets irrespective of the OS versions and nature of OS ecosystems. Xender runs on Android, iOS, Windows, and Mac OS X.

6: If you use Xender on a Smartphone, there is a unique feature that allows you to move your old mobile data like SMS, Contacts, Images, Videos, Audio, Games, etc to a new device with just one single button.    

7: When Xender is used on Smartphones, it can also be utilized as a File Manager to manage, move, and remove received files. You may also keep backups when some phone space needs to be freed up.

8: The Xener for PC tool as well as a mobile app comes with a very decent user interface that lets you get things done easily.

9: Interestingly, the tool is available in all major languages available around the world.

10: Recently, the Xender app has integrated Hungama into it. This collaboration will allow you to play, download, or share music tracks with other Xender users.

Do you have enough info about the Xender feature? This is the time to get your hands dirty with Xender for PC.

How to Use Xender for Windows PC without Bluestacks

By now, you must be aware of all the Xender advantages. Maybe, it’s time to apply the theory in practice.

Transfer Files Using Xender Web on PC:

This is very much easy. No download is needed. All you need to do is have an active internet connection on your PC and an updated Xender app installed on your Smartphone.

Step 1: Visit Xender Web from your Windows computer. There you will see a unique QR Code. Or go to https://xender.pro/how-to-connect-to-xender-web/

Step 2: Now, open the Xender app on your phone. Tap on the orange-colored network icon. 

Step 3: Scan the QR Code of Xender Web using your Xender mobile app.

Step 4: On the PC taskbar, you will see the available Xender network. Click on the “Connect” button.

When the devices are connected, you will see the Xender Web interface with the mobile device name and files in it. You can now choose files from the phone to make copies to your PC. Either way, you can choose files from your PC via the taskbar located on the left side of the Xender Web Window.

Download Xender for PC:

If you want to download and use Xender for PC offline tool, here is what to do.

Step 1: First of all, Download the Xender tool here.

Step 2: Locate the downloaded file and install the tool.

Step 3: Launch the tool and you can then connect it to the phone. Follow the same procedure as you do while connecting between phones.

No more relying on Bluestacks to use Xender for PC. Now you can use the Xender app on PC offline or online independently. Irrespective of the Windows version you running on your computer, Xender tends to work just fine and helps you transfer files between various devices, without any charges, effort, internet, or data cable. It’s that cool. If you still choose to use emulator software for Xender on PC, the emulator program will slow down your system.       

read more
Technology

What Are The Different UPI Frauds You May Face During Transactions?

Digital Payments is one of the fastest payment systems. UPI (Unified Payments Interface) transactions enable instant fund transfer in the form of a digital payment system in India, between Bank accounts via Mobile phones. As the payment process is very fast we also need to take care of unwanted fraud transactions that may occur without our knowledge and cause huge losses to us. In this article, I am going to share with you the most effective safeguards to protect yourself from fraudulent transactions.

As in today’s world everybody is updated along with the technology and generation, but what if we cannot protect ourselves from such fraudant transaction? Which is important to know the safeguards along with knowing how to use it?

Before we know how to protect UPI Fraud Transactions, let us go through the process on how this Upi (Unified Payments Interface) transaction works.

Here’s How a Typical UPI transaction Works:

  1. Initiation: When you initiate payment through your UPI-enabled mobile app, your transaction begins. E.g., Google Pay, Phonepe, Paytm, BHIM, etc) to process the transaction you will need to enter the recipient UPI ID, Scanning QR code, or Mobile number linked with the UPI ID.
  2. Authentication: This authentication ensures to security of the payment, using UPI PIN which is only known to you and your account is secure enough for the transaction.
  3. Confirmation: After your authentication is done, all the details of the transaction are sent to your bank for the process and the recipient bank is also notified of the payment request.
  4. Fund Transfer:  The funds you request are ready for the instant transaction from your bank account to the recipients bank account linked to the specified UPI ID.
  5. Confirmation to Recipient: The sender and the recipient instantly receives message upon successful transaction of funds into their bank account linked to the mobile number respectively.
  6. Transaction History: Transaction details history can be seen by Both the sender and the recipient on their respective bank statements and UPI apps.

UPI transactions are always known for the speed and convenience transactions. Whereas using UPI is not the only thing you should be knowing, Precautions and all the safeguards to know for protecting your money is always the wise and best decision in today’s world.

Now, Let us go through the main topic, by which you can protect your fraud UPI transactions and be aware of such fraudent transactions:

Safeguards to Protect your UPI Fraud Transactions:

UPI Fraud transactions is referred to the transactions which is conducted by other unauthorized without your knowledge. Here, I will be sharing some common types of UPI fraud transaction along with how to protect from such types of transaction:

  1. Sim-swap Fraud: You may unfamiliar with the word sim-swap, but yes this kind of fraud exist. Fraudsters may trick your mobile service providers, which is SIM provider and issue a new SIM linked to your mobile number. Once they able to activate the SIM they will be receiving all the OTP (One Time Password) and conduct all the necessary transactions by accessing to your bank account.

    Safeguards: As soon as your SIM drops signal or network, immediately contact your Mobile SIM provider or incase if you receive a notification regarding new SIM swap request which you did not initiate and not aware of it. Make sure you enable SIM card Protection services in order to protect your SIM by your SIM card provider for more safety.

  2. QR Code scams: Frauders are very clever to manipulate normal human beings, and so you can be one of their target. They might manipulate QR Codes to redirect payments to their bank account, replacing the intended recipients account.

    Safeguards: To protect this kind of transaction you always need to verify the recipients details and amount before and after scanning QR codes. Always use QR codes directly  from merchant or trusted sources.

  3. App Cloning: Fake apps can be created by the fraudsters to manipulate and resemble as the same UPI app, which you are looking for, and by which you may be tricked to download their app. Those fake apps can capture all your bank details with banking credentials.

    Safeguards: Always download app from official app stores such as Apple App Store or Google Play store. Rather than that do not download from any other unofficial websites. Also verify the Developer’s details and read the app reviews in order to be safe from all sides.
  4. Phishing: Fake messages or emails can be send by the fraudsters, pretending to be from the bank or other UPI provider. Using your information they conduct unwanted transactions by asking your sensitive information, OTP (One Time Password) or by asking your UPI PIN.

    Safeguards: Never Share OTP passwords or UPI PIN to any one. Bank and other Network providers never ask such sensitive information from their customers. Always verify your messages and email before sharing any kind of information to other unknown.

  5. Social Engineering: By giving Fake offers, fake impersonating bank officials, fake calls or fake customer support calls, fraudsters may try to manipulate individuals in order to take their passwords easily with their quality and attractive offers and support.

    Safeguards: Beware and Be cautious from those unsolicited messages or calls, asking for your UPI or banking details. Do not share your PIN or passwords or OTP to any unknown or unauthorized in any communication before responding.


These are the following significant guidelines, which you can follow to reduce the risk of falling victim to UPI Fraud transactions. Incase if you become a victim, immediately contact your bank’s customer care and report the following details and incident. Banks and other officials never ask for the sensitive personal information and Banks will look and investigate to this matter once your report promptly.

read more
Technology

Joyoshare Media Cutter for Mac Review

Hoping to get Joyoshare Media Cutter for Mac? Well, you should if you have a Mac product and looking for a powerful, intuitive and seamless video cutter for Mac. You might have seen a bunch of Media Cutter Software for MacOS but most of them charge a good amount or not user-friendly. JoyoShare Media Cutter is an exception, it is easy to use and multifunctional media cutter.

This multifunctional media cutter is powerful enough that deliver 60x video conversion. This software is meant to help you cut, join, and merge video or audio. Joyoshare Media Cutter supports all popular multi-formats that include MKV, MPEGMP4, 3GP, AVI, MOV and also audio formats like WMA, WAV, MP3, and much more.

Joyoshare Media Cutter for Mac Review

Having a MacOS device, you can try out this useful Media Converter. It supports MacOS 10.8-10.13; so, without any worry, it can be downloaded on your Mac device. The good thing is that you can have a trial version before diving into this Video Cutter for Mac. Also, get to know its major features, which are extremely helpful and make it an amazing feature-rich media converter for Mac.

Important Features of JoyoShare Media Cutter

This video and audio cutter for Mac has many features that make it must must-have video cutter program for MacOS users. Here we will review all major features to conclude about this software.

  • While cutting a video or audio file, you get the pin-point precision. It does offer two methods using the control key and just setting the temporal interval to get your right video frame or audio segments.
  • By using the advanced acceleration processing algorithm, it works at 60x faster than most of the existing media cutter-free for Mac. So, to get your desired video portion from a video clip on the go without taking much time for processing.
  • Joyoshare trims your video and audio without quality compromising. Well, most of the media converter for Mac delivers poor output but now using the innovative lossless video/audio trimmer it preserves 100% original quality.
  • Capturing the video or audio segment, you can even edit the chosen clip to improve it. The editing tool is endowed with a stylized preset to make your new video in the way you like.
  • Many audio and video formats like WMA, WAV, AVI, MP4, MP3, MPEG, etc. There are also many presets for multiple popular devices to create the best output with it.
  • It has an easy-understanding interface and navigation method even for a new user.
  • After cutting, splitting, joining and converting a video/audio, there is a direct YouTube sharing option.

How to download Joyoshare Media Cutter for Mac Free?

Joyoshare Media Cutter for Mac can be download for free but it would 30 days trial only. To give it is a shot, you are recommended to download the Trial version of Jotoshare for Mac first.

Click here to download Jotoshare Media Cutter Trial

Joyoshare Media Cutter full version cost you $39.95 but now with the special price you can save $10. So, you can buy Joyoshare at just $29.95 to get this premium version video/audio cutter for Mac.

Click here to download Joyoshare Media Cutter Premium Version

So, if you are making your mind to download and install an intuitive, fast and smart media cutter on Mac then Joyoshare Media Cutter is next to none. As you can see this media cutter for Mac product is feature-rich. This is not just a video/audio cutter but it can join, trim, merge, edit etc, to stylize as per your desired media file. Get this professional media cutter tool at a special price now for your Mac device. Also, there is a trial version, which you can get free of cost for a limited period.

read more
1 23 24 25 26 27 70
Page 25 of 70